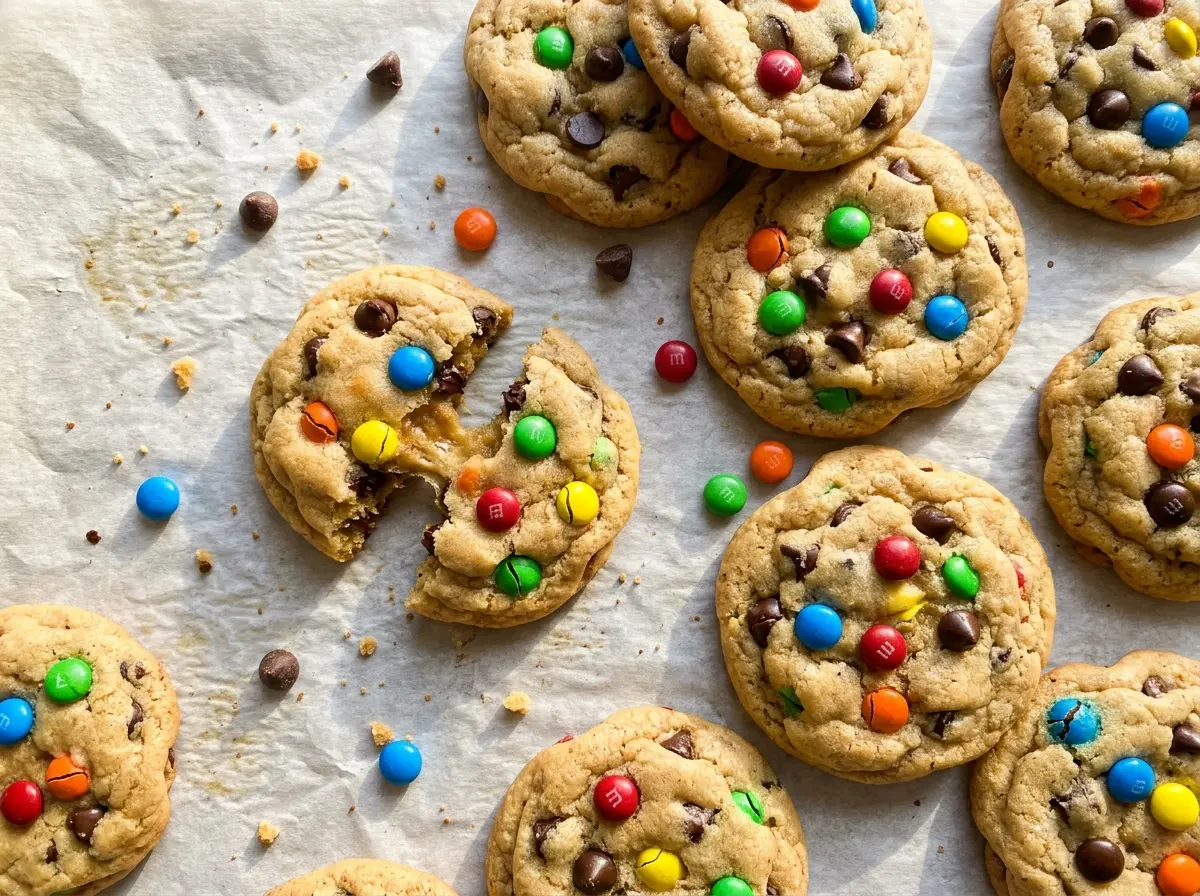
The first tray can look a little soft in the middle when it comes out of the oven, even though the edges are set. That’s exactly where I want these cookies: the centers finish setting on the baking sheet, keeping each one tender instead of crisp all the way through. The mini candies and chocolate chips make every bite a little different, and the 2-tablespoon scoops bake up into a generous, soft batch.
I chill the dough for a full hour before baking. That gives the butter time to firm up again after mixing, so the cookies hold their shape instead of spreading too quickly. I also keep the dough that’s waiting for its turn in the refrigerator; cool dough is easier to portion and gives the later trays the same start as the first. The result is a soft cookie with set edges, a tender center, and little bursts of chocolate and candy.
Kitchen Note
Stop mixing as soon as the flour disappears. I fold in the mini chips and M&M’s by hand so the dough doesn’t get worked more than it needs to.
Save these soft batch mini M&M chocolate chip cookies for a bake with tender centers, set edges, and colorful candy in every scoop.
Why These Cookies Need a Full Hour in the Fridge
Chilling isn’t just a pause between mixing and baking. The butter softens as you beat it with the sugars, and the dough is warm from handling by the time the mix-ins are folded through. Give it an hour in the refrigerator and the dough firms up, which helps the portions keep their shape in the oven. Skip that rest and the cookies are more likely to spread before their edges set.
That rest also helps the batch bake more evenly from tray to tray. The first two sheets go into the oven while the remaining dough stays chilled, so the last cookies aren’t sitting on the counter getting warmer as they wait. Keep the dough covered during the chill, then scoop it straight from the refrigerator. You’ll get more consistent portions and a better chance of keeping the centers soft while the edges bake through.
The mini size of the mix-ins matters here, too. Mini chips and mini M&M’s distribute through a 2-tablespoon portion without making the dough difficult to scoop or the cookie lopsided. Each bite gets both chocolate and candy, while the dough still has room to bake into a soft, cohesive cookie.
What the Butter, Extra Yolk, and Mini Mix-Ins Do

- Unsalted butter — Softened butter creams smoothly with the sugars and gives the cookies their rich base. It should yield slightly when pressed but shouldn’t look melted or greasy; melted butter changes how the dough behaves.
- Light brown and granulated sugars — Brown sugar brings moisture and a gentle molasses note, while granulated sugar balances it and helps the edges set. Light brown sugar keeps that flavor mild; dark brown sugar would bring a stronger molasses taste.
- The egg and extra yolk — The whole egg brings structure, and the additional yolk adds richness that helps keep the centers tender. Use a large egg as listed; a smaller egg changes the dough’s balance.
- All-purpose flour — Spoon it into the measuring cup and level the top rather than dipping the cup into the bag. Packing in extra flour is an easy way to end up with dry, stiff cookies.
- Cornstarch and baking soda — Cornstarch helps give the crumb a soft texture, while baking soda supports browning and spread. These ingredients do different jobs, so don’t swap one for the other.
- Mini chocolate chips and mini M&M’s — Their small size makes them easy to fold evenly through the dough. Fresh chips and candies from a recently opened package have the best texture; there’s no need to buy a premium brand for this recipe.
- Vanilla and fine salt — Vanilla rounds out the brown sugar and chocolate, and fine salt keeps its seasoning even throughout the dough. Unsalted butter gives you control over the salt level.
Mixing and Baking the Dough Without Losing Its Soft Centers
Cream the Butter and Sugars Until Smooth
Beat the softened butter with both sugars in a large bowl using an electric mixer on medium speed for 2 minutes. The mixture should look creamy, with no large visible pieces of butter. If the butter is too cold, it won’t blend evenly; if it’s melted, the dough won’t start with the right texture. Scrape down the bowl if the mixture is collecting around the sides.
Add the Eggs, Then Bring in the Dry Ingredients
Beat in the egg, egg yolk, and vanilla until combined. In a separate bowl, whisk together the flour, cornstarch, baking soda, and fine salt so the leavening is spread evenly through the flour. Add that mixture to the butter mixture on low speed and stop as soon as it comes together. Fold in the mini chips and M&M’s by hand, distributing them without crushing the candies.
Chill the Dough and Set Up the Oven
Cover the dough and refrigerate it for 1 hour. Toward the end of the chill, heat the oven to 350°F and line two baking sheets with parchment paper. Position the oven racks in the upper and lower thirds so both sheets can bake together. Keep the dough covered until you’re ready to scoop.
Scoop Even Portions and Bake on Two Racks
Scoop the dough into 2-tablespoon portions, arranging 12 portions on each baking sheet with about 2 inches between them. Put the remaining dough back in the refrigerator while these trays bake. Bake both sheets for 10–12 minutes, switching their rack positions and rotating them halfway through. The edges should be set, while the centers still look slightly underdone; don’t wait for the centers to look firm in the oven.
Let the Baking Sheets Finish the Job
Leave the cookies on the baking sheets for 5 minutes after they come out. They’ll continue setting from the heat of the pans, so moving them immediately can leave the centers too fragile. After that short rest, transfer them to a wire rack to cool. Repeat with the remaining chilled dough.
Two Useful Ingredient Swaps for Different Diets
A Gluten-Free Batch with a Cup-for-Cup Flour Blend
Replace the all-purpose flour with a gluten-free blend labeled for one-to-one baking substitution. The cookies may bake up a little more tender or crumbly, so keep the dough chilled and handle the baked cookies gently while they’re warm.
A Dairy-Free Version with Plant-Based Baking Sticks
Use stick-style plant-based butter in place of the dairy butter; avoid soft tub spreads, which contain more water and can make the dough spread unpredictably. The cookies will have a slightly different buttery flavor, but the stick format is designed to cream more like traditional butter.
Storage and Reheating
- Room temperature: Keep completely cooled cookies in an airtight container for up to 4 days. They’ll stay soft, though the candy shells may lose a little of their fresh-from-the-oven crispness.
- Freezer: Freeze the cooled cookies in an airtight container for up to 2 months. Separate layers with parchment so the cookies don’t stick together, then thaw at room temperature.
- Reheating: These cookies are good at room temperature and don’t need reheating. For a warm cookie, microwave it briefly and check it often; overheating can make the chocolate and candy centers uncomfortably hot.
Questions That Come Up While Making These Mini M&M Cookies
Soft Batch Mini M&M Chocolate Chip Cookies
Ingredients
Equipment
Method
- Beat the butter, brown sugar, and granulated sugar in a large bowl with an electric mixer on medium speed for 2 minutes, until creamy.
- Beat in the egg, egg yolk, and vanilla until combined.
- Whisk the flour, cornstarch, baking soda, and salt in a separate bowl.
- Add the flour mixture to the butter mixture and mix on low just until combined.
- Fold in the mini chocolate chips and mini M&M's.
- Cover the dough and refrigerate for 1 hour.
- Heat the oven to 350°F.
- Line two baking sheets with parchment paper and position racks in the upper and lower thirds of the oven.
- Scoop the dough into 2-tablespoon portions and arrange 12 portions on each baking sheet, spacing them about 2 inches apart.
- Keep the remaining dough chilled.
- Bake both sheets for 10–12 minutes, switching their rack positions and rotating them halfway through, until the edges are set and the centers still look slightly underdone.
- Repeat with the remaining dough.
- Let the cookies cool on the baking sheets for 5 minutes.
- Transfer the cookies to a wire rack to cool.