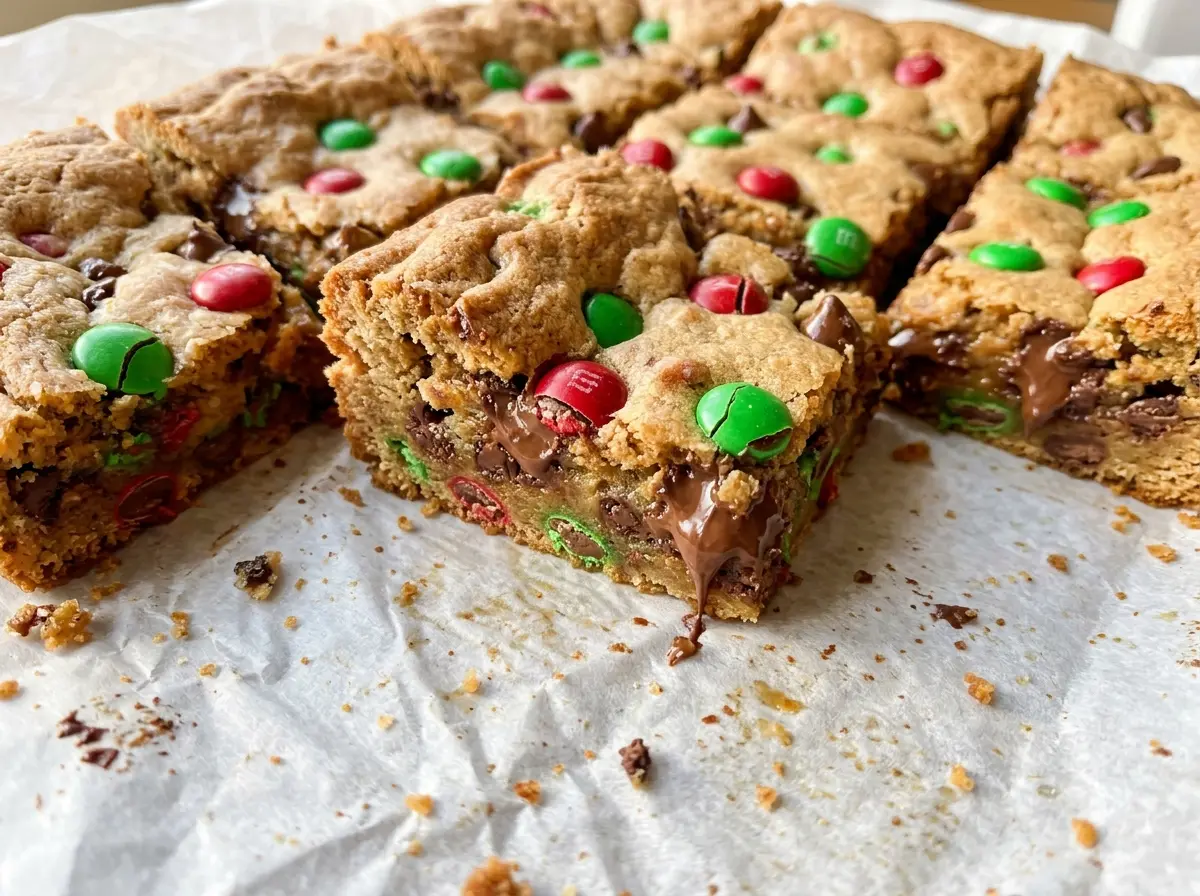
When the pan comes out of the oven, the edges are golden while the middle still looks soft. That’s exactly what I want for these Gooey Christmas Cookie Bars; they finish setting as they cool, so you get a tender center instead of a dry, crumbly slab. The parchment overhang also means I can lift the whole batch out without wrestling bars loose from the corners.
The dough comes together like a classic chocolate chip cookie dough, but it’s pressed into one pan instead of portioned into individual cookies. I fold both kinds of chocolate through the dough, then spread it into an even layer so the edges and center bake at a similar pace. Once cooled, each bar has semisweet chocolate in the middle and a festive candy crunch on top.
Kitchen Note
Room-temperature eggs blend into softened butter more smoothly than cold ones. Set them out before you start mixing so the dough stays cohesive instead of looking uneven or curdled.
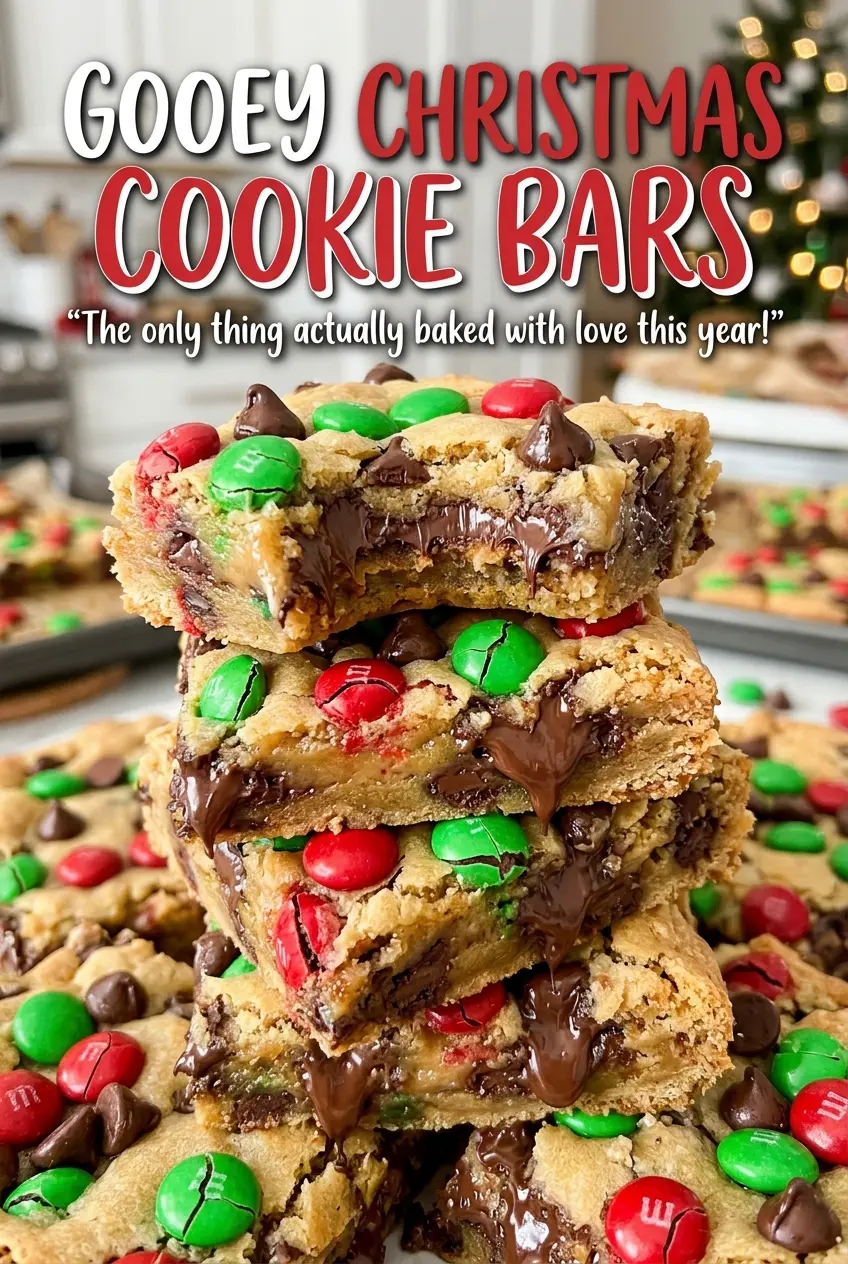
Save these Gooey Christmas Cookie Bars for a festive bake with soft centers, semisweet chocolate, and red-and-green candy crunch.
Why This Cookie-Bar Dough Goes Straight From Bowl to Pan
Cookie bars don’t need the same shaping as individual cookies. The dough is spread into a single layer in a 9×13-inch pan, so there’s no need to scoop equal portions or leave space between rounds. That makes the method especially handy when you want a full batch with less hands-on shaping.
The dough also goes into the oven after mixing, with no chilling stage. The pan supports the soft dough as it bakes, and pressing it into an even layer gives the edges and center a fair chance to finish together. Take a moment to smooth out any thick ridges or thin corners; uneven patches can leave you with crisp edges in one area and a softer middle elsewhere. The bars are meant to stay tender, so judge the center by how it looks rather than waiting for the entire surface to feel firm.
There’s a practical payoff after baking, too: one cooled slab is easier to portion neatly than a tray of fragile, warm cookies. Letting it cool in the pan gives the middle time to settle before you lift and slice it.
What Gives These Christmas Bars Their Chewy Middle and Bright Crunch
- Unsalted butter — Softened butter creams evenly with the sugars and gives the bars their rich cookie-dough base. A standard grocery-store butter works well here; unsalted butter lets the fine salt stay in balance. Keep it softened, not melted, so the dough holds its structure.
- Light brown and granulated sugars — Packed light brown sugar brings moisture and a deeper caramel note, while granulated sugar balances it and helps the edges bake up. Pack the brown sugar firmly when measuring. Dark brown sugar will add more molasses character if you use it, with a slightly deeper taste.
- Room-temperature eggs — Eggs bind the dough and help it bake into a cohesive bar. Use large eggs, and bring them to room temperature before mixing so they incorporate without chilling the softened butter.
- Vanilla extract — Vanilla rounds out the brown sugar and chocolate. A familiar store-brand extract is perfectly suitable; there’s no need for an expensive bottle for this dough.
- All-purpose flour — This gives the bars enough structure to hold their shape when cut. Measure it without packing it down, and don’t replace it with self-rising flour, which includes leavening and changes the balance.
- Baking soda and fine salt — Baking soda provides the lift and browning that suit a cookie-style bar, while fine salt disperses evenly through the dough. Baking powder isn’t a direct swap for baking soda here.
- Semisweet chocolate chips — Semisweet chocolate keeps the bars from becoming overly sweet alongside the candy pieces. A basic grocery-store bag works just fine; the chips hold their shape while baking.
- Red and green candy-coated chocolate pieces — These add the festive color and a crisp candy shell against the soft bar. M&M’s are one option, and another candy-coated chocolate brand works too. Fold them in gently so the shells stay intact.
The Mixing-to-Baking Sequence That Keeps the Center Soft
Cream the Butter and Sugars
Heat the oven to 350°F and grease a 9×13-inch baking pan. Line it with parchment, leaving an overhang on the long sides. Beat the softened butter with both sugars in a large bowl for about 2 minutes, until creamy. If the butter is still cold, it won’t blend evenly; if it’s melted, the dough won’t have the same creamy starting texture.
Blend in the Eggs and Vanilla
Beat in the eggs and vanilla until combined, scraping down the bowl as needed. Pause to scrape the sides and bottom if you see streaks of butter or sugar that the beaters haven’t reached. The mixture should look even before the dry ingredients go in. Room-temperature eggs help the mixture come together without firming the butter.
Mix the Dry Ingredients Just Until Combined
In a separate bowl, whisk together the flour, baking soda, and fine salt. Add that mixture to the butter bowl and mix just until no dry streaks remain. Stop once the flour disappears; prolonged mixing can make cookie bars tougher. Check along the bottom of the bowl, where pockets of flour can hide.
Fold in the Chocolate and Press the Dough
Fold in the semisweet chocolate chips and red-and-green candy-coated chocolate pieces. Use a spatula so the inclusions are distributed without crushing the candy shells. Transfer the dough to the prepared pan and press it into an even layer, paying attention to the corners. A level surface helps the bars bake consistently from edge to center.
Bake Until the Center Is Just Set
Bake for 24 to 28 minutes, until the edges are golden and the center looks just set but remains soft. Don’t wait for the middle to look dry and firm; that usually means the bars have gone too far. Cool completely in the pan for at least 1 hour. Then use the parchment overhang to lift the slab out and cut it into bars.
Two Ingredient Swaps That Keep the Bars on Track
Gluten-Free Cookie Bars
Replace the all-purpose flour with a cup-for-cup gluten-free baking flour blend designed to replace wheat flour in baking. Use the same quantity and mix only until combined. The bars may be a little more delicate, so let them cool fully before lifting and cutting.
Dairy-Free Bars
Use stick-style dairy-free butter in place of the unsalted butter, plus dairy-free semisweet chocolate chips and dairy-free candy-coated chocolate pieces. Choose products labeled dairy-free for all three swaps. The texture may be a touch less rich, but the cookie-bar format still works well.
Storage and Reheating
- Refrigerator: Store the bars in an airtight container for up to 5 days. Chilling firms the center, so let a bar sit at room temperature before serving if you prefer it softer.
- Freezer: Freeze cooled bars in a sealed container for up to 2 months, separating layers with parchment. Thaw at room temperature before serving.
- Reheating: Warm one bar in the microwave for about 5 to 8 seconds if you want the chocolate softer. Avoid longer bursts; the candy coating can get hot before the bar itself feels warm.
Questions That Come Up With Gooey Cookie Bars
Gooey Christmas Cookie Bars
Ingredients
Equipment
Method
- Heat the oven to 350°F.
- Grease a 9x13-inch baking pan and line it with parchment paper, leaving an overhang on the long sides.
- In a large bowl, beat the softened butter, packed light brown sugar, and granulated sugar until creamy, about 2 minutes.
- Beat in the eggs and vanilla until combined, scraping down the bowl as needed.
- In a separate bowl, whisk together the flour, baking soda, and salt.
- Add the flour mixture to the butter mixture and mix just until no dry streaks remain.
- Fold in the chocolate chips and candy-coated chocolate pieces.
- Press the dough evenly into the prepared pan.
- Bake for 24 to 28 minutes, until the edges are golden and the center looks just set but remains soft.
- Cool completely in the pan, at least 1 hour.
- Lift the cookie slab out using the parchment and cut into bars.