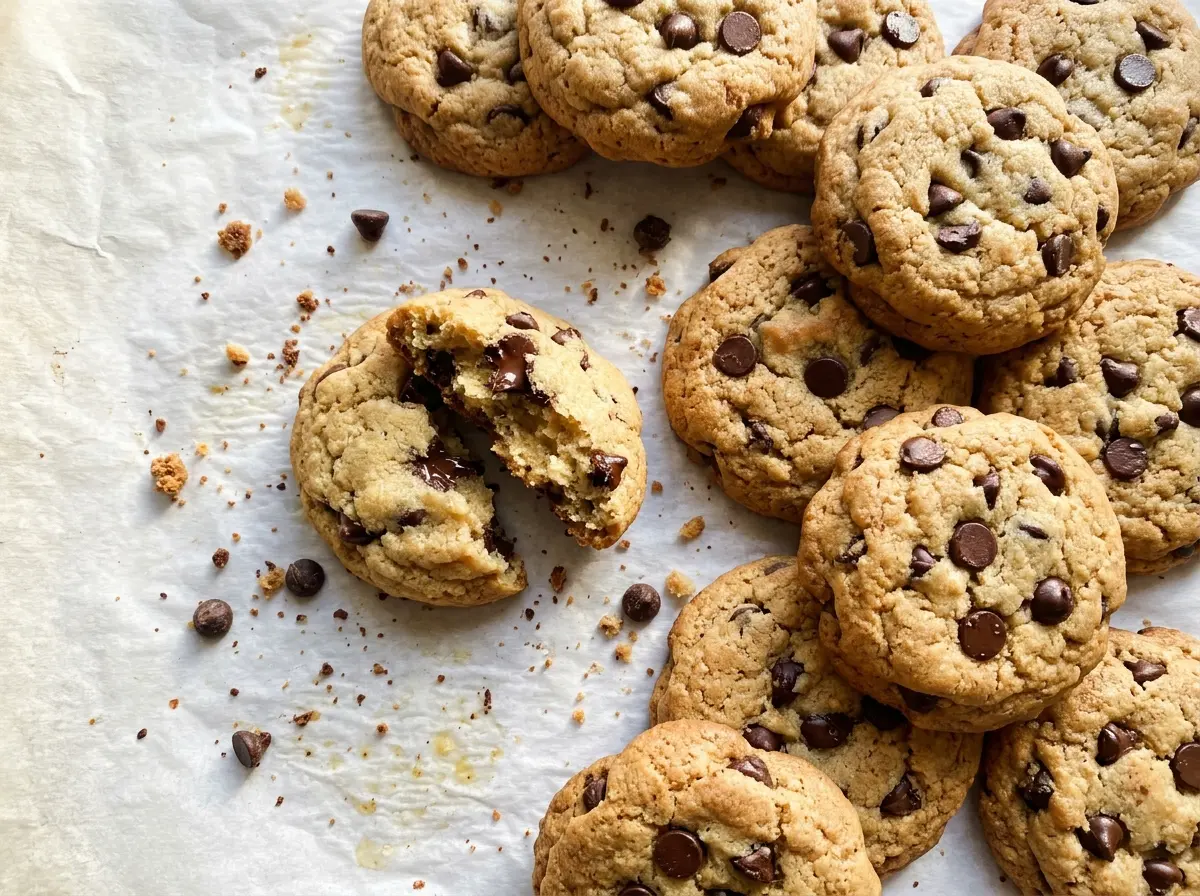
When the chocolate chips are folded in, this dough should look thick and scoopable, not loose like cake batter. I learned to give the gluten-free flour time to settle into the dough before baking; that short rest makes portioning much less messy and helps the cookies keep their shape. These gluten free chocolate chip cookies bake up with lightly golden edges and centers that stay tender.
The balance of granulated and brown sugar matters here. Brown sugar brings moisture and chew, while granulated sugar helps the edges bake up with a little crispness. With a measure-for-measure gluten-free flour blend that already contains xanthan gum, the cookies hold together without turning dense or crumbly. Each batch makes 36 cookies, so there’s plenty to share—or to tuck away for later.
Kitchen Note
I don’t shorten the 30-minute chill; it firms the dough enough to scoop cleanly. If the portions feel soft and sticky, let the dough chill rather than adding extra flour, which can leave the cookies dry.
Save these gluten free chocolate chip cookies for a bake day when you want chewy centers, golden edges, and a dough that’s easy to portion.
Why the Two Sugars Matter More in Gluten-Free Cookies
Gluten-free cookies can turn dry and crumbly when the dough doesn’t have enough moisture and structure to hold together. The brown sugar in this dough helps with both: its molasses content adds moisture, and it contributes to a softer, chewier middle. Granulated sugar balances that softness and helps the edges bake up lightly crisp.
Keeping the sugars in equal amounts gives you both textures without leaning too far toward a crisp, thin cookie or a soft, cakey one. It’s a small detail, but it changes what you get from the same flour blend and butter. I wouldn’t casually reduce one sugar or swap the whole amount for the other; the cookies would bake and taste differently, and the dough’s balance would shift.
That balance also makes the bake cue easier to read: the edges can turn lightly golden while the centers still look just set. They don’t need to look deeply browned all over to be ready to come out of the oven.
What the Flour Blend and Butter Have to Get Right

- Gluten-free measure-for-measure flour blend — Choose a blend labeled for measure-for-measure baking that includes xanthan gum. That gum helps bind the dough and gives the cookies enough structure to lift from the pan without falling apart. A single-ingredient flour, such as rice flour, isn’t a direct replacement for this blend.
- Unsalted butter — Softened butter creams smoothly with the sugars and gives the dough its rich, tender texture. It should yield when pressed but not look greasy or melted. Unsalted butter keeps the salt level predictable; if you use salted butter, adjust the added salt in the dough.
- Light brown sugar and granulated sugar — Both have a job here: brown sugar supports a chewy center, while granulated sugar helps the edges set with a light crispness. Pack the brown sugar into the measuring cup so you get the intended amount. The source of the granulated sugar matters less than measuring it accurately.
- Large eggs — Eggs bind the gluten-free flour and bring moisture to the dough, helping the cookies hold together after baking. Use large eggs for the intended balance; a smaller egg won’t contribute the same amount of liquid or structure.
- Vanilla extract — It rounds out the buttery, brown-sugar flavor. Pure vanilla extract has a fuller aroma, but imitation vanilla works if that’s what you keep on hand; the cookies will still bake properly.
- Gluten-free semisweet chocolate chips — Semisweet chips give each bite chocolate without making the cookies overwhelmingly sweet. Use chips labeled gluten-free to keep the batch gluten-free, and choose a brand you enjoy eating on its own; the chocolate is a prominent part of every cookie.
From Creamed Butter to Set Centers: The Cookie Dough Stages
Whisk the Dry Ingredients Evenly
Whisk the gluten-free flour, baking soda, and salt together in a medium bowl before they meet the butter mixture. This distributes the baking soda through the flour so there aren’t concentrated pockets in the finished cookies. Break up any visible lumps as you whisk. Set the bowl aside while you cream the butter and sugars.
Cream the Butter, Then Add the Eggs
Beat the softened butter with both sugars in a large bowl until creamy, about 2 minutes. The mixture should look blended and smooth rather than like separate streaks of butter and sugar. Beat in the eggs one at a time, letting each incorporate before adding the next. Mix in the vanilla once both eggs are blended in.
Fold in the Chips and Chill the Dough
Add the flour mixture and mix just until it’s combined; stop when you no longer see dry flour. Stir in the chocolate chips so they’re distributed throughout without continuing to work the dough. Cover the bowl and chill the dough for 30 minutes. While it chills, heat the oven to 350°F and line two 12×17-inch baking sheets with parchment paper.
Bake Until the Edges Turn Lightly Golden
Scoop the dough into 1 1/2-tablespoon portions and space them about 2 inches apart on the prepared sheets. Bake for 10 to 12 minutes, swapping the sheets between racks halfway through so they bake evenly. Look for lightly golden edges and centers that appear just set; deeply browned centers can mean the cookies have gone too far. Let them rest on the sheets for 5 minutes, then transfer them to a wire rack to cool.
How to Change the Chocolate or Make a Dairy-Free Batch
Use Bittersweet Chips for a Less-Sweet Cookie
Replace the semisweet chips with the same amount of gluten-free bittersweet chips. The dough’s sweetness stays the same, but the chocolate tastes darker and more intense. Stir them in at the same point as the original chips.
Make Them Dairy-Free with Baking Sticks
Replace the butter with the same amount of softened stick-style dairy-free baking butter, and use dairy-free semisweet chocolate chips. Choose a baking product rather than a soft tub spread, which can make the dough greasy. The cookies may have a slightly different buttery flavor, but the dough still creams and portions well.
Storage and Reheating
- Refrigerator: Store cooled cookies in an airtight container for up to 1 week. They’ll firm up in the refrigerator, so let them come to room temperature for a softer bite.
- Freezer: Freeze cooled cookies in an airtight freezer container, with parchment between layers, for up to 2 months. Thaw at room temperature.
- Reheating: Warm a cookie in the microwave for 5 to 8 seconds if you’d like the chocolate soft. Longer heating can make the cookie tough and the chips very hot.
The Gluten-Free Cookie Questions That Come Up at the Counter
Gluten Free Chocolate Chip Cookies
Ingredients
Equipment
Method
- Whisk the flour, baking soda, and salt together in a medium bowl.
- Beat the butter, granulated sugar, and brown sugar until creamy, about 2 minutes.
- Beat in the eggs one at a time.
- Mix in the vanilla.
- Add the flour mixture and mix just until combined.
- Stir in the chocolate chips.
- Cover and chill the dough for 30 minutes.
- Heat the oven to 350°F.
- Line two 12x17-inch baking sheets with parchment paper.
- Scoop the dough into 1 1/2-tablespoon portions, placing them about 2 inches apart on the prepared sheets.
- Bake for 10 to 12 minutes, swapping the sheets between racks halfway through, until the edges are lightly golden and the centers look just set.
- Let the cookies rest on the baking sheets for 5 minutes.
- Transfer them to a wire rack to cool.