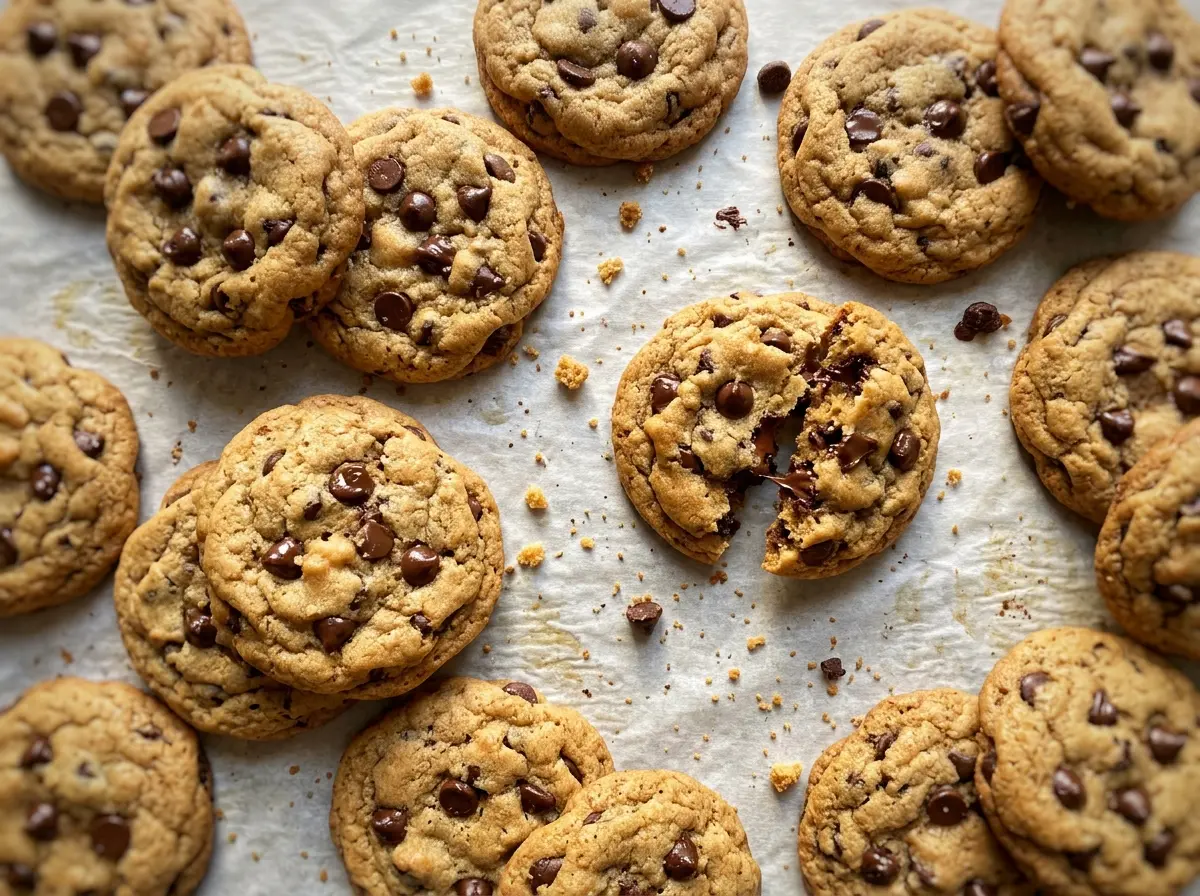
The first tray tells you a lot: the edges turn golden before the centers look completely firm, and that’s exactly when these classic chocolate chip cookies are ready to come out. I used to leave them in until the middles looked fully baked, then wonder why they cooled crisp instead of soft. Now I watch the edges and trust the five-minute rest on the baking sheet to finish setting the centers.
Softened butter makes this dough easy to cream with both sugars, and adding the eggs one at a time keeps the mixture smooth before the flour goes in. Once the dry ingredients are added, stop mixing as soon as the flour disappears; a few streaks are easier to fix than a tough, overworked dough. The semisweet chips settle into the dough without taking over, so each cookie gets chocolate in every bite and a tender center under those golden edges.
Kitchen Note
Let the cookies sit on the baking sheet for the full five minutes before moving them. They’re fragile when they first leave the oven, and that short rest lets the bottoms firm up without drying out the centers.
Save these classic chocolate chip cookies for a batch with golden edges, soft centers, and plenty of semisweet chips.
Why Creaming the Butter and Sugar for Two Minutes Matters
Butter and sugar do more here than make a sweet base. Beating them until creamy works air into the mixture, which helps the cookies bake up with a tender bite instead of a dense, heavy one. The two sugars bring different things to the dough: granulated sugar helps the edges turn crisp and golden, while brown sugar keeps the middle softer and adds a gentle caramel note.
There’s a useful middle ground in the mixing. Stop when the butter and sugars look creamy and evenly blended; you don’t need to keep beating in pursuit of a fluffy, pale mixture. Then add the eggs one at a time so each one blends in before the next goes in. When the flour mixture arrives, switch to a light hand and mix only until it’s incorporated. That way the dough keeps the delicate texture you worked into it, rather than turning firm from extra mixing.
This balance is what gives the cookies their familiar contrast: a lightly crisp edge with a softer center. It also explains why melted butter isn’t a shortcut here. The recipe depends on softened butter that can be creamed, not liquid butter that changes how the sugars and flour come together.
What the Butter, Sugars, and Chocolate Bring to These Cookies

- All-purpose flour — It gives the dough enough structure to hold the chips while keeping the cookies tender. Spoon it gently into your measuring cup rather than packing it down; too much flour can leave the baked cookies dry. For a gluten-free version, use a cup-for-cup gluten-free baking flour in its place.
- Softened unsalted butter — This is what creams smoothly with the sugars and carries the buttery flavor through the dough. A familiar grocery-store butter works well; it should yield when pressed but shouldn’t look shiny or melted. Unsalted butter also lets you control the salt in the dough.
- Granulated and brown sugars — Using both gives the cookies a better balance than relying on either one alone. Pack the brown sugar into its measuring cup so the amount is consistent; light or dark brown sugar both work, with dark brown bringing a deeper molasses note.
- Large eggs — They bind the dough and contribute moisture. Use large eggs for the proportions to stay balanced, and add them individually so the butter mixture stays cohesive.
- Vanilla extract — It rounds out the buttery, caramel-like notes without competing with the chocolate. Pure vanilla is lovely, but standard vanilla extract works just fine in a baked cookie.
- Semisweet chocolate chips — Their sweetness is balanced against the brown sugar, and chips hold their shape as the cookies bake. Choose a brand you enjoy eating; the chocolate is a major part of each bite, so quality shows.
- Baking soda — It helps the cookies spread and brown in the hot oven. Measure it carefully; too much can leave an unpleasantly alkaline taste.
From Smooth Dough to Golden-Edged Cookies
Get the pans and dry ingredients ready
Heat the oven to 375°F and line two baking sheets with parchment paper. Whisk the flour, baking soda, and salt together in a medium bowl so the leavener is evenly distributed before it meets the wet ingredients. If baking soda is clumped, break up those little pockets with the whisk. Set the bowl aside while you cream the butter and sugars.
Cream the butter, sugars, and eggs
Beat the softened butter with both sugars in a large bowl until creamy, about 2 minutes. Scrape the bowl if the mixture is gathering along the sides, then beat in the eggs one at a time. Mix in the vanilla after the eggs are incorporated. The mixture should look smooth and unified rather than separated or streaky.
Fold in the flour and chips
Add the flour mixture and mix just until combined; stop when you no longer see dry flour. Stir in the semisweet chocolate chips so they’re spread throughout the dough. Scoop rounded tablespoons onto a prepared baking sheet, leaving about 2 inches between portions, with about 12 portions on each sheet. Crowding the pan gives the cookies less room to spread.
Bake one sheet at a time
Bake one sheet at a time for 9 to 11 minutes. Look for golden edges and centers that appear just set; the middle shouldn’t look deeply browned. If you wait for the centers to look firm and dry in the oven, the cookies can overbake as they cool. Rest them on the baking sheet for 5 minutes, then transfer them to a wire rack.
Three Practical Ways to Adapt the Batch
Make a gluten-free batch
Replace the all-purpose flour with a cup-for-cup gluten-free baking flour blend, following its 1:1 substitution ratio. The cookies may have a slightly more tender or crumbly bite, depending on the blend, but the butter-and-sugar method stays the same.
Freeze dough portions for later
Scoop the dough into rounded tablespoons, freeze the portions on a lined tray until firm, then transfer them to a freezer-safe container. Thaw the portions in the refrigerator before baking them on parchment-lined sheets. This gives you fresh-baked cookies without mixing a new batch.
Scale down to 18 cookies
Halve every ingredient to make a smaller batch, then keep the same mixing and baking method. The smaller quantity is handy when you want a few fresh cookies without storing a full batch. Bake one sheet at a time and use the same visual cues for doneness.
Storage and Reheating
- Refrigerator: Store the cooled cookies in an airtight container for up to 1 week; refrigeration can make them a little firmer.
- Freezer: Freeze cooled cookies in an airtight freezer-safe container for up to 2 months. Separate layers with parchment so they don’t stick together.
- Reheating: Warm a cookie briefly in the microwave if you want the chocolate soft again. Stop as soon as it feels warm; overheating can make the cookie tough.
Questions That Come Up While Baking These Cookies
Classic Chocolate Chip Cookies
Ingredients
Equipment
Method
- Heat the oven to 375°F.
- Line two baking sheets with parchment paper.
- In a medium bowl, whisk together the flour, baking soda, and salt.
- In a large bowl, beat the butter, granulated sugar, and brown sugar until creamy, about 2 minutes.
- Beat in the eggs one at a time.
- Mix in the vanilla extract.
- Add the flour mixture and mix just until combined.
- Stir in the chocolate chips.
- Drop rounded tablespoons of dough about 2 inches apart onto a prepared baking sheet, using about 12 portions per sheet.
- Bake one sheet at a time for 9 to 11 minutes, until the edges are golden and the centers look just set.
- Let the cookies rest on the baking sheet for 5 minutes.
- Transfer them to a wire rack to cool.