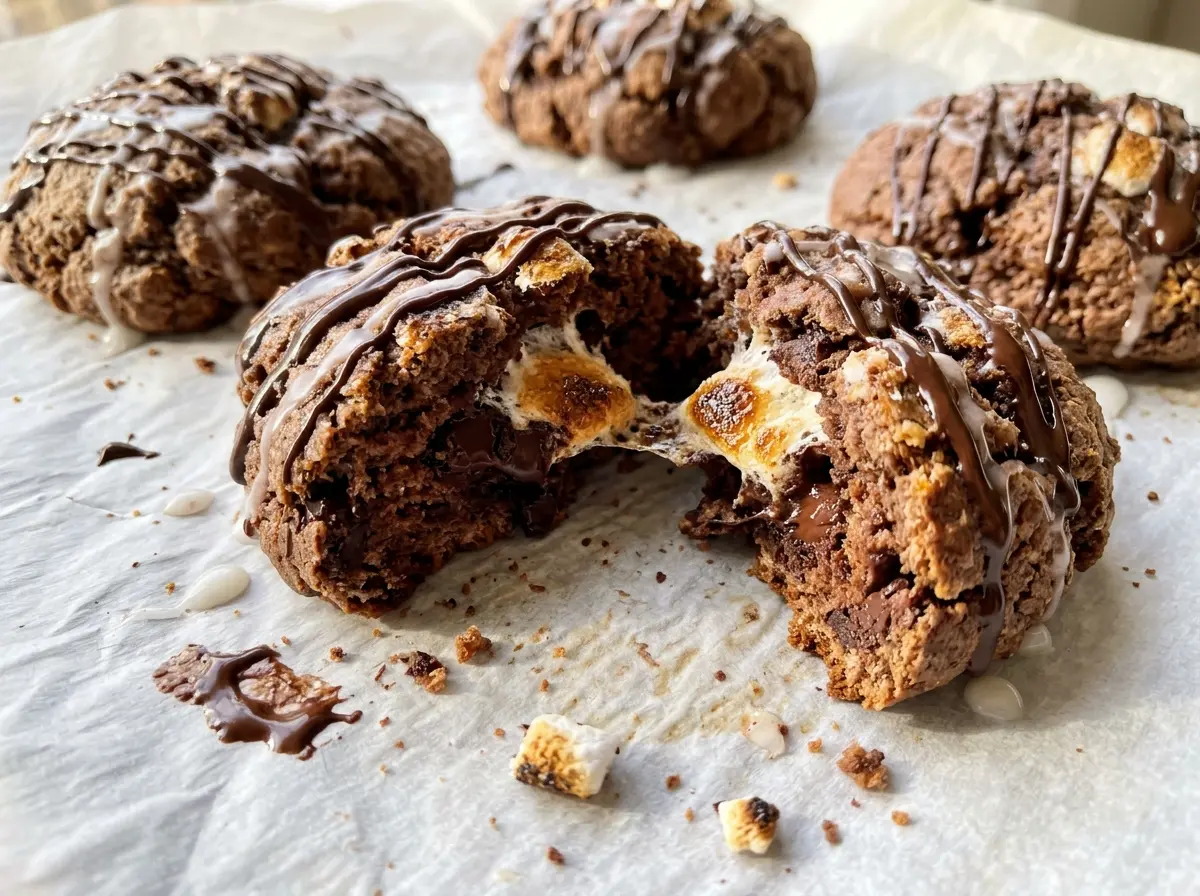
When you stir the cream and egg into the cocoa-flour mixture, the dough won’t look smooth or polished. That shaggy, slightly rough texture is exactly what I want for hot chocolate scones: it comes together with a gentle pat, then bakes into tender wedges with a chocolatey middle and little pockets of melted chips.
I keep the butter cold and stop mixing as soon as the dry ingredients are moistened. Working the dough until it looks silky makes scones tough, and there’s no need to knead it into submission. The marshmallow glaze brings the hot-chocolate feel without hiding the cocoa or chocolate chips. Once it sets, each wedge has a soft crumb under a sweet, lightly stretchy-looking drizzle.
Kitchen Note
Marshmallow creme can make the glaze feel stiff straight from the bowl. Give it 10 seconds in the microwave if it needs loosening, then drizzle while it’s fluid and let it set on the cooled scones.
Save these hot chocolate scones for a cocoa-rich bake with chocolate chips and a marshmallow glaze that sets right on top.
Why a Rough, Shaggy Dough Makes a Better Chocolate Scone
Chocolate scone dough is easy to overwork because cocoa darkens it before you can judge how much mixing it needs. Once the cream, egg, and vanilla go in, stir only until the flour looks moistened and the dough gathers in rough clumps. It won’t resemble a smooth cookie dough, and it shouldn’t. A few uneven bits are better than a ball that’s been worked until elastic.
That restraint matters even more after the chocolate chips go in. Fold them through, then bring the dough together gently on the floured surface. Pressing and patting are enough to form the round; kneading adds effort without improving the crumb. If a little flour remains visible, use your hands to gather the dough rather than continuing to stir in the bowl. The baked scones should hold their wedge shape while staying tender inside, with a crumb that breaks cleanly instead of pulling into a dense, chewy bite.
What Cocoa, Cream, and Cold Butter Each Bring to These Scones

- All-purpose flour — It gives the wedges enough structure to hold their shape without turning cakey. A standard store-brand flour works well; measure it without packing it into the cup, since extra flour can make the dough dry and the baked crumb heavy.
- Unsweetened cocoa powder — Cocoa supplies the deep chocolate base without adding extra sweetness. Dutch-process cocoa works in the same amount and gives the scones a darker color with a rounder, less sharp cocoa taste; whichever kind you use, break up any lumps as you whisk the dry ingredients.
- Cold unsalted butter — Butter cut into pea-sized pieces creates a tender, slightly layered texture as it bakes. The brand doesn’t need to be expensive, but it should be cold when you cut it in. Soft butter smears into the flour instead of leaving the small pieces this dough needs.
- Heavy cream and egg — Cream brings richness and moisture, while the egg helps bind the dough and gives the scones their structure. Use heavy cream rather than low-fat milk; milk has less fat and won’t give the same tender result. A large egg is the right size here, so there’s no guesswork about how much liquid is going into the bowl.
- Semisweet chocolate chips — They add sweet, melted pockets that balance the unsweetened cocoa. Regular supermarket chips are fine; use chips you like eating, since their chocolate flavor comes through in every bite. Bittersweet chips are a good swap if you prefer a less-sweet finish.
- Marshmallow creme — This is what gives the glaze its familiar marshmallow character and smooth, glossy look. Powdered sugar alone makes a simple sugar icing, not a marshmallow glaze, so keep the creme if that finish is what you’re after.
From Pea-Sized Butter to a Set Marshmallow Drizzle
Whisk the Cocoa Dry Mix and Cut in the Butter
Heat the oven to 400°F and line a large baking sheet with parchment paper. Whisk the flour, cocoa powder, sugar, baking powder, and salt in a large bowl until the cocoa is evenly dispersed. Cut in the cold butter with a pastry cutter or your fingertips, stopping when the pieces are about pea-sized. If the butter starts to soften under your hands, work quickly so it doesn’t smear into the flour.
Stir in the Cream Mixture and Fold Through the Chips
Whisk the heavy cream, egg, and vanilla together in a small bowl, then pour them into the dry mixture. Stir just until a shaggy dough forms; a smooth, fully worked dough is a sign you’ve gone too far. Fold in the chocolate chips gently so they’re spread through the dough without extra mixing. You should be able to gather the dough, even if the surface still looks rough.
Pat the Round and Cut Eight Wedges
Turn the dough onto a lightly floured surface and gently bring it together. Pat it into an 8-inch round about 3/4 inch thick, keeping the pressure light and even so the center and edges bake at the same pace. Cut the round into 8 wedges, then arrange them about 1 inch apart on the prepared sheet. If the cut edges look a little uneven, leave them alone rather than reshaping each wedge.
Bake Until Set, Then Cool Before Glazing
Bake for 18 to 22 minutes, until the scones are set and a toothpick inserted in the center comes out with a few moist crumbs. A clean toothpick can mean the centers have gone too far, so don’t wait for the crumb to look dry. Cool the scones on the baking sheet for 5 minutes, then transfer them to a wire rack for 15 minutes. They need that cooling time before the glaze goes on.
Whisk the Marshmallow Glaze Smooth
Whisk the powdered sugar, marshmallow creme, and milk in a small microwave-safe bowl until smooth. If the mixture is too thick to drizzle, warm it for 10 seconds and whisk again. Drizzle it over the cooled scones, then leave them undisturbed for about 10 minutes so the glaze can set. Putting it on while the scones are hot makes the finish runnier.
Easy Changes for a Different Chocolate Finish
Use Bittersweet Chips for a Deeper Chocolate Bite
Replace the semisweet chips with the same amount of bittersweet chips. The cocoa stays prominent and the wedges taste less sweet, which pairs especially well with the marshmallow glaze.
Make a Dairy-Free Batch
Use cold plant-based baking sticks in place of the butter and unsweetened full-fat oat creamer instead of heavy cream. For the glaze, use dairy-free marshmallow creme and oat milk. The scones will be a little less buttery, but they’ll still bake into tender chocolate wedges.
Storage and Reheating
- Room temperature: Keep glazed scones in an airtight container for up to 2 days. The glaze may soften a little as it sits.
- Refrigerator: Refrigeration isn’t needed and can dry out the crumb.
- Freezer: Freeze unglazed scones in an airtight container for up to 2 months. Thaw before glazing, or warm them first and let them cool before adding the drizzle.
- Reheating: Warm unglazed scones in a 300°F oven for 5 to 8 minutes, then cool before glazing. Avoid reheating glazed scones, since the drizzle will melt.
Questions That Come Up When Baking Hot Chocolate Scones
Hot Chocolate Scones
Ingredients
Equipment
Method
- Heat the oven to 400°F and line a large baking sheet with parchment paper.
- Whisk the flour, cocoa powder, sugar, baking powder, and salt in a large bowl.
- Cut the cold butter into the flour mixture with a pastry cutter or your fingertips until the pieces are about pea-sized.
- Whisk the heavy cream, egg, and vanilla in a small bowl.
- Pour the cream mixture into the flour mixture and stir just until a shaggy dough forms.
- Fold in the chocolate chips.
- Turn the dough onto a lightly floured surface, gently bring it together, and pat it into an 8-inch round about 3/4 inch thick.
- Cut the dough into 8 wedges and arrange them on the prepared baking sheet about 1 inch apart.
- Bake for 18 to 22 minutes, until the scones are set and a toothpick inserted in the center comes out with a few moist crumbs.
- Cool the scones on the baking sheet for 5 minutes.
- Transfer the scones to a wire rack and cool for 15 minutes.
- Whisk the powdered sugar, marshmallow creme, and milk in a small microwave-safe bowl until smooth, warming it for 10 seconds if needed to loosen it.
- Drizzle the glaze over the cooled scones.
- Let the glaze set for about 10 minutes before serving.