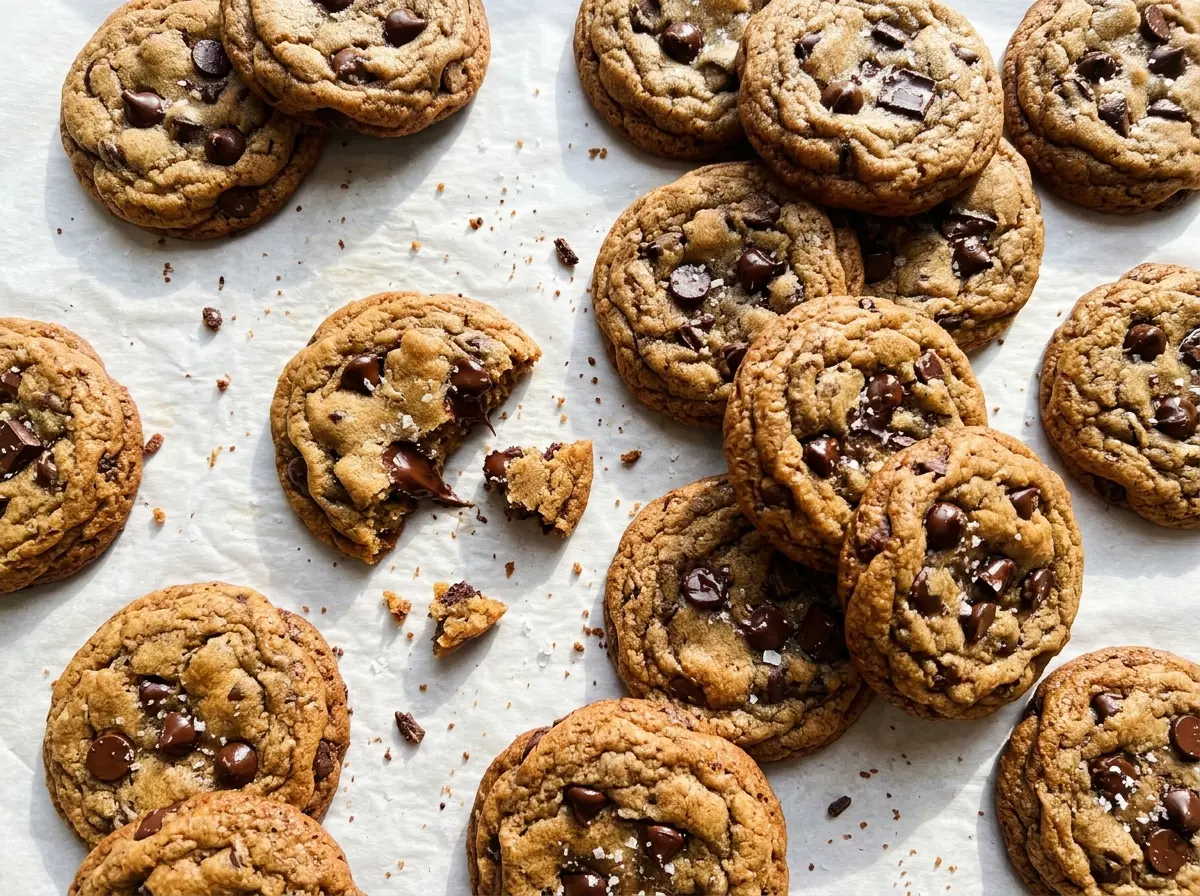
Warm cookie dough can look loose and shiny after the butter goes in, which makes it tempting to add more flour. Hold off. Once the dough has time to chill, it firms up enough to scoop and bakes into cookies with golden edges and soft centers. That’s the balance I want from brown butter chocolate chip cookies: a little crispness around the edge, plenty of chocolate, and a middle that stays tender.
The extra egg yolk helps give these cookies a rich, chewy texture without making them heavy. I whisk it in with the whole egg after the butter has cooled, then fold the flour in gently so the dough doesn’t get overworked. The result is a cookie that tastes warmly nutty from the browned butter, with semisweet chocolate in every bite.
Kitchen Note
Watch the milk solids, not just the butter’s color. They’ll turn golden and smell nutty; take the skillet off the heat then, before those little bits go dark and bitter.
Save these brown butter chocolate chip cookies for a bake day when you want soft centers, crisp edges, and a dough that’s easy to portion after chilling.
Why Brown Butter Dough Needs a Full Chill
Brown butter starts out as melted butter, so the dough is softer than one made by creaming softened butter with sugar. Chilling gives that melted fat time to firm up. It also makes the dough easier to portion neatly, which helps the cookies bake at a similar pace instead of spreading into thin, uneven puddles.
Give the covered dough the full hour in the refrigerator before scooping. If it goes into the oven while it’s still warm, the cookies are more likely to spread too quickly before their edges set. That can leave you with a flatter cookie and less contrast between the edge and the center. The wait is hands-off, and the payoff is dough that holds its shape long enough to bake into a soft-centered cookie.
There’s no need to chill the dough until it’s rock hard. After an hour, it should be firm but still scoopable with a spoon or cookie scoop. If your refrigerator runs especially cold and the dough feels stiff, give it a few minutes on the counter so you can portion it without pressing or tearing it.
What Each Ingredient Does in These Brown Butter Cookies

- Unsalted butter — It browns cleanly and lets you control the salt in the dough. Since the browned milk solids are part of the flavor, use butter you enjoy baking with; there’s no need for a specialty brand.
- Light brown sugar and granulated sugar — Brown sugar brings moisture and a caramel note, while granulated sugar helps the edges bake up crisp. Pack the brown sugar into the measuring cup so the dough gets the intended amount.
- Egg and egg yolk — The whole egg binds the dough, and the extra yolk adds richness and chew. Bring both to room temperature so they whisk smoothly into the cooled butter rather than making the mixture feel lumpy.
- All-purpose flour — It gives the cookies enough structure to hold the chocolate and browned butter. Measure it without packing it down; too much flour makes the cookies drier and more bread-like.
- Baking soda — This is the leavener that helps the cookies spread and brown. Check that the box is fresh, since old baking soda can leave the cookies dense.
- Semisweet chocolate chips — Their sweetness balances the brown sugar, and chips keep their shape as the cookies bake. A standard grocery-store bag works well here; choose a brand you like eating on its own.
- Vanilla extract — It rounds out the browned butter and chocolate. Pure vanilla is lovely, but a good-quality standard extract works just fine in baked cookies.
From Golden Butter to Cookies With Soft Centers
Brown the Butter Until the Solids Turn Golden
Put the tablespoon-size butter pieces in a 10-inch skillet over medium heat and stir often as they melt. The butter will foam, and the milk solids will begin to color; the whole process takes 5–8 minutes. Look for golden-brown flecks and a nutty aroma, not dark brown or black specks. Pour the butter and all those browned bits into a large heatproof bowl so the skillet’s residual heat doesn’t keep cooking them.
Cool the Butter Before Adding the Eggs
Let the butter stand for 20–30 minutes, until it feels warm but not hot. Whisk in both sugars until combined, then add the egg, yolk, and vanilla and whisk until the mixture looks smooth and glossy. If the butter is still hot, it can scramble the eggs, so give it the full cooling time rather than rushing this part. In a separate medium bowl, whisk the flour, baking soda, and salt together.
Fold Gently, Then Let the Dough Firm Up
Add the flour mixture to the butter mixture and fold just until no dry streaks remain. Stop there; mixing past that point can make the cookies tougher. Fold in the chocolate chips, cover the bowl, and chill the dough for 1 hour. It should feel firm enough to scoop, but not so hard that you have to force the scoop through it.
Space the Dough and Watch the Edges
Heat the oven to 350°F and line an 18×13-inch rimmed baking sheet with parchment paper. Scoop the dough into 2-tablespoon portions and arrange 12 on the sheet, about 3 inches apart. Bake for 10–12 minutes, until the edges are golden and set while the centers still look soft. Let the cookies cool on the sheet for 5 minutes before moving them to a rack, and let the sheet cool completely before baking the remaining dough.
Easy Ways to Change the Chocolate or Flour
Use Chopped Semisweet Chocolate
Replace the chips with the same volume of chopped semisweet chocolate. The uneven pieces melt into little pockets and streaks, so the cookies look less uniform but have more varied chocolate in each bite.
Make Them With a 1:1 Gluten-Free Flour Blend
Use a cup-for-cup gluten-free baking blend designed to replace all-purpose flour, ideally one that includes xanthan gum. Keep the volume the same and fold carefully; the finished cookies may be a little more delicate, so let them set on the baking sheet before transferring them.
Add a Little Crunch With Pecans
Fold in ½ cup chopped pecans along with the chocolate chips. They bring a toasty crunch that works naturally with the browned butter; the cookies will be a bit more crowded with mix-ins, so fold them through evenly.
Storage and Reheating
- Room temperature: Store cooled cookies in an airtight container for up to 4 days. The edges soften a little over time, but the centers stay tender.
- Freezer: Freeze baked cookies in an airtight container for up to 2 months, with parchment between layers. Thaw at room temperature before serving.
- Reheating: Warm a cookie in a 300°F oven for 3–4 minutes. Avoid leaving it in too long, or the center will dry out and the chocolate will become very hot.
Questions That Come Up While Baking These Cookies
Brown Butter Chocolate Chip Cookies
Ingredients
Equipment
Method
- Melt the butter in a 10-inch skillet over medium heat, stirring often, for 5–8 minutes, until it foams and the milk solids turn golden brown with a nutty aroma.
- Pour the butter and browned bits into a large heatproof bowl.
- Cool for 20–30 minutes, until warm but not hot.
- Whisk the brown sugar and granulated sugar into the butter until combined.
- Whisk in the egg, egg yolk, and vanilla until the mixture is smooth and glossy.
- In a medium bowl, whisk together the flour, baking soda, and salt.
- Fold the flour mixture into the butter mixture just until no dry streaks remain.
- Fold in the chocolate chips.
- Cover the dough and chill for 1 hour.
- Heat the oven to 350°F.
- Line an 18x13-inch rimmed baking sheet with parchment paper.
- Scoop the dough into 2-tablespoon portions and arrange 12 portions about 3 inches apart on the prepared sheet.
- Bake for 10–12 minutes, until the edges are golden and set while the centers remain soft.
- Cool the cookies on the sheet for 5 minutes.
- Transfer the cookies to a rack.
- Let the sheet cool completely before baking the remaining dough.