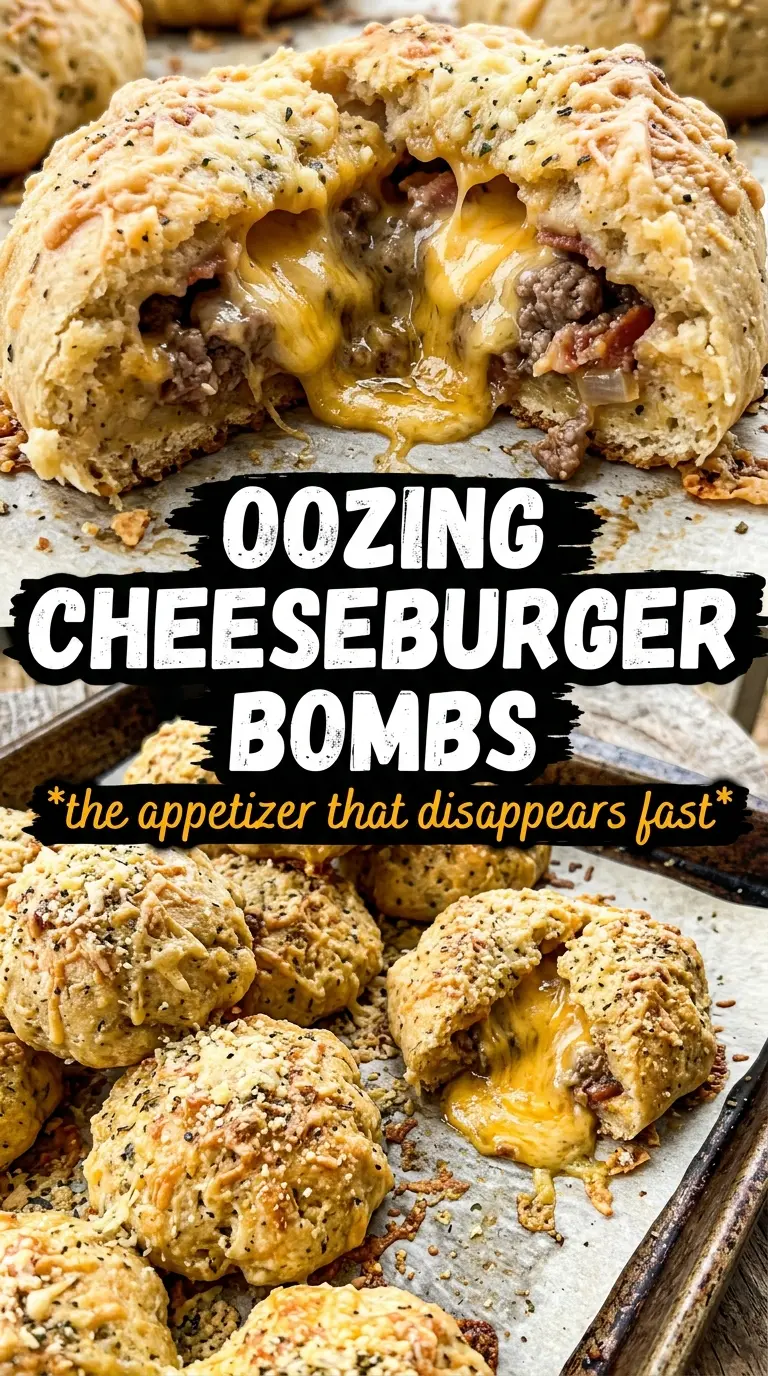
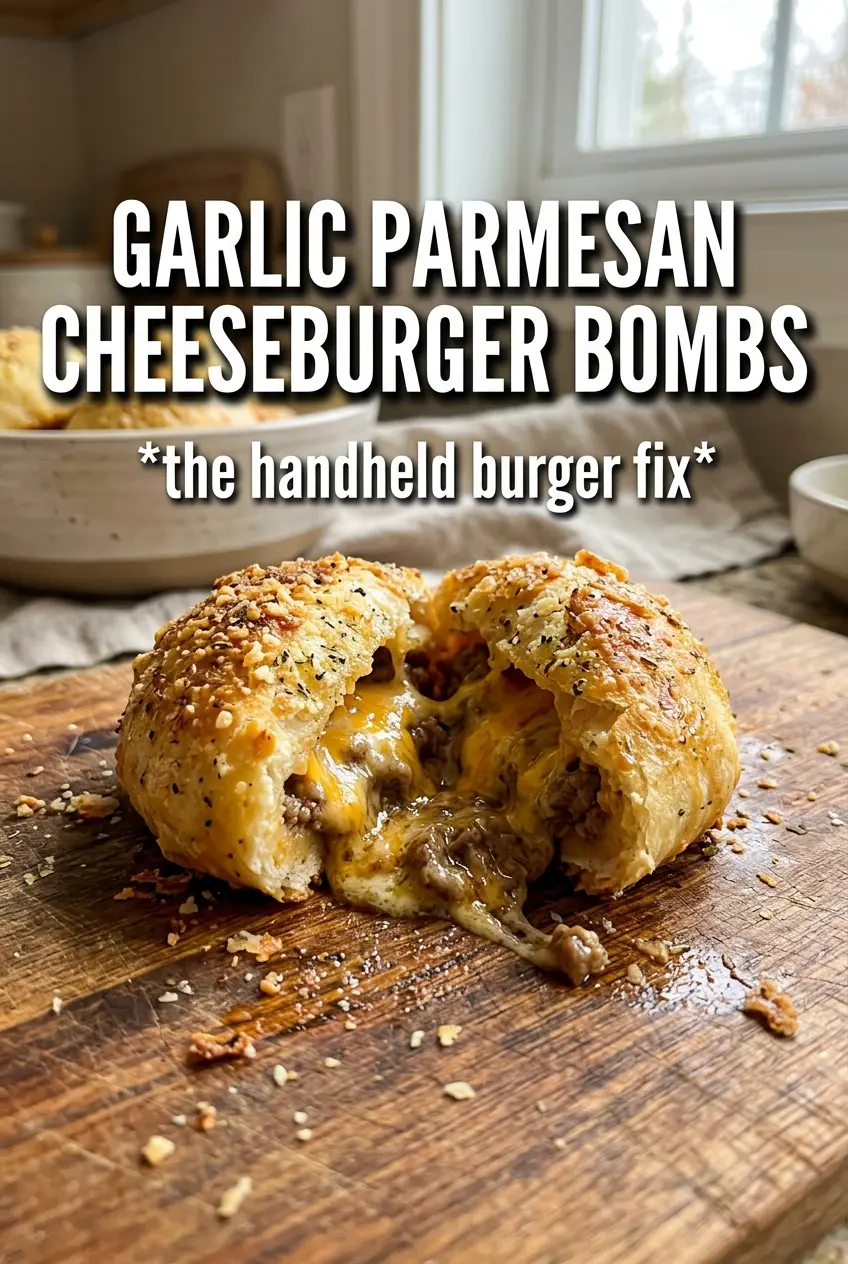
Golden garlic parmesan cheeseburger bombs land on the plate with the kind of pull-apart payoff that makes people reach in before they’ve even sat down. The biscuit dough bakes up soft and pillowy, the cheddar melts into the seasoned beef, and the garlic butter on top turns the whole thing into something that feels straight out of a game-day spread or a party tray that somehow disappeared first.
What keeps these from leaking all over the pan is the balance of filling and seal. The beef needs to cool just enough so it doesn’t steam the biscuit dough from the inside, and the biscuit edges need to be pinched firmly so the cheese stays where it belongs until the bombs hit the oven. The garlic parmesan butter does more than add flavor; it also gives the tops that deep glossy finish and helps the crust bake into a rich golden shell.
Below, I’m walking through the spots that matter most: how to keep the filling neat, how to get that cheese pull without a blowout, and which swaps still give you a good result if you need to work with what’s in the fridge.
The biscuit bottoms stayed tender, the cheese melted right into the beef, and the garlic butter on top browned into the best part. I let the filling cool for a few minutes like suggested and they sealed perfectly.
Save these garlic parmesan cheeseburger bombs for the nights when you want a cheesy, pull-apart appetizer with almost no leftovers.
The Seal Matters More Than the Filling
The biggest mistake with stuffed biscuit bombs is overfilling them and trusting the dough to do the rest. It won’t. Once the beef starts heating, any loose seam becomes a leak, and melted cheddar finds the fastest way out. A tighter seal and a little empty border around the filling matter more than packing in an extra spoonful.
Cooling the beef mixture for a few minutes before stuffing also helps a lot. Hot filling softens the biscuit dough before it reaches the oven, which makes sealing harder and increases the chance of a split top. You want the filling warm, not steaming.
- Biscuit dough — Refrigerated biscuits give you the quickest path to a soft, fluffy shell. Puff pastry won’t behave the same way here, and crescent dough is thinner and more likely to tear.
- Cheddar — A cube melts into the center without disappearing completely, which gives you that classic burger-bite pull. Pre-shredded cheese works in a pinch, but cubes create a better molten pocket.
- Garlic parmesan butter — This is what turns the tops from plain biscuit dough into something worth serving hot. Fresh garlic and real parmesan matter here; the jarred substitutes don’t brown or taste the same.
- Ground beef — Use beef with some fat for flavor, then drain it well. Too much grease will loosen the filling and make the biscuit bottoms soggy.
What Each Ingredient Is Actually Doing in This Recipe
- Primary ingredient (the star) — Quality matters most. Choose the best you can find.
- Cooking medium (oil, butter, or broth) — This carries flavors and prevents dryness.
- Seasonings (salt, pepper, spices, herbs) — Layer flavors so nothing overpowers. Build depth gradually.
- Aromatics (garlic, onion, herbs) — Cook with fat to bloom flavors. Become the foundation.
- Supporting ingredients — Complement the main ingredient without overpowering it.
- Sauce or liquid (if applicable) — Brings flavors together. Balance richness with acid.
- Acid (lemon, vinegar, wine, or other) — Brightens and prevents flat-tasting results.
- Final finish (garnish, glaze, or sauce) — Prevents one-dimensional taste and adds visual appeal.
Building the Bombs Without a Blowout
Cooking the Filling Until It Stops Sweating
Brown the beef with the onion until the meat has no pink left and the onion looks soft and translucent. Stir in the garlic and Worcestershire at the end so the garlic doesn’t scorch, then cook just long enough for everything to smell deep and savory. Drain the fat well; if the filling looks glossy and greasy, the biscuits will slip around instead of sealing.
Flattening the Dough Into a Thin Enough Round
Press each biscuit into about a 4-inch circle, with the center slightly thicker than the edges. That gives you enough surface area to wrap the filling without stretching the dough so much that it snaps back and opens. If the dough keeps shrinking, let it rest for a minute on the counter and it will relax enough to shape cleanly.
Sealing, Flipping, and Baking
Place a spoonful of beef and one cheddar cube in the center, then pull the dough up around it and pinch the seam hard. Place each bomb seam-side down on the baking sheet so gravity helps finish the seal. Brush with the garlic parmesan butter before baking, then again after the bombs come out of the oven for a glossy top and a stronger garlic finish.
Swap in ground turkey for a lighter version
Ground turkey works well here if you season it a little more boldly and don’t let it dry out. Add the onion and garlic as written, then keep the filling juicy enough to hold together but not wet. The result is a little leaner and milder, so the parmesan butter on top becomes even more important.
Make them gluten-free with GF biscuit dough
Use a gluten-free refrigerated biscuit dough if you can find one, but handle it gently because it can crack faster than standard dough. If it splits while shaping, pinch it back together and keep the filling amount modest. The texture will be a little more tender and less stretchy, but the flavor still lands.
Use pepper jack instead of cheddar for more heat
Pepper jack melts just as well as cheddar and adds a gentle kick that works nicely with the garlic butter. It makes the centers a little softer and more fluid, so let the bombs cool for a couple of minutes before serving if you want cleaner bites. This is the easiest way to shift the recipe without changing the method.
Storage and Reheating
- Refrigerator: Store leftovers in an airtight container for up to 3 days. The biscuit exterior softens a bit in the fridge, but the flavor stays good.
- Freezer: These freeze well after baking. Cool completely, wrap tightly, and freeze for up to 2 months.
- Reheating: Warm in a 350°F oven or air fryer until heated through and the outside re-crisps. The usual mistake is microwaving them too long, which makes the biscuit rubbery and can cause the cheese to burst out.
Answers to the Questions Worth Asking
Garlic Parmesan Cheeseburger Bombs
Ingredients
Equipment
Method
- Preheat the oven to 375°F and line a baking sheet with parchment for easy release and cleanup.
- Brown the ground beef with the diced onion in a skillet until the meat is cooked through, then drain off excess fat.
- Add the minced garlic, Worcestershire sauce, salt, and black pepper, and cook for 1 minute so the flavors bloom.
- Transfer the beef mixture to a bowl and let it cool slightly so it doesn’t melt the cheese too fast when stuffed.
- Flatten each biscuit into a 4-inch round to make space for filling.
- Place a spoonful of the beef mixture and a cube of cheddar in the center of each biscuit.
- Pull the edges up and pinch tightly to seal into a ball, then place seam-side down on the baking sheet so the filling stays inside.
- Mix the garlic parmesan butter by melting the butter, then stirring in minced garlic, grated parmesan, and chopped parsley.
- Brush each bomb generously with garlic parmesan butter, then bake at 375°F for 15–18 minutes until deep golden brown.
- Remove from the oven, brush with any remaining butter, and serve immediately while the cheddar is melted and stretchy.