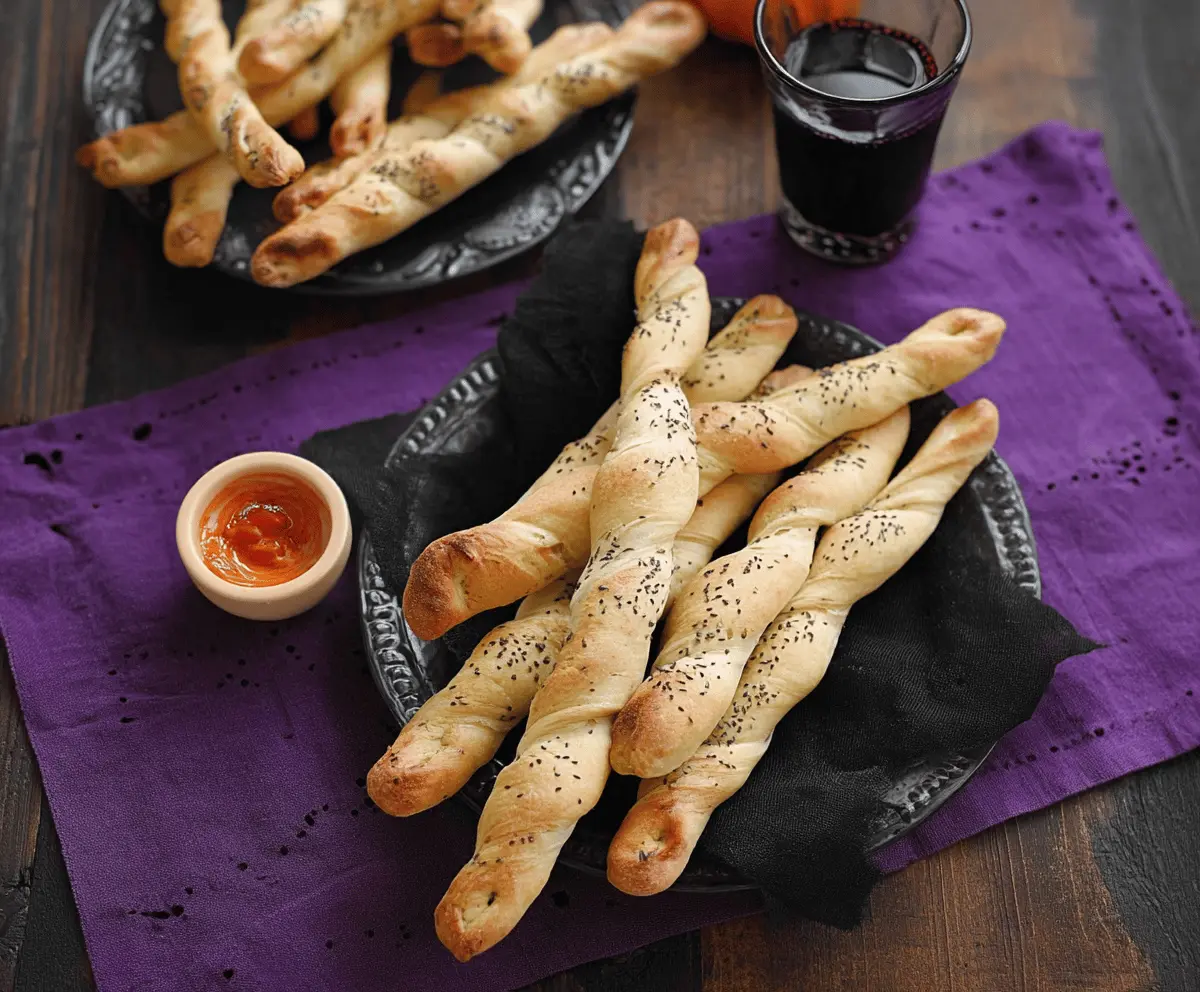
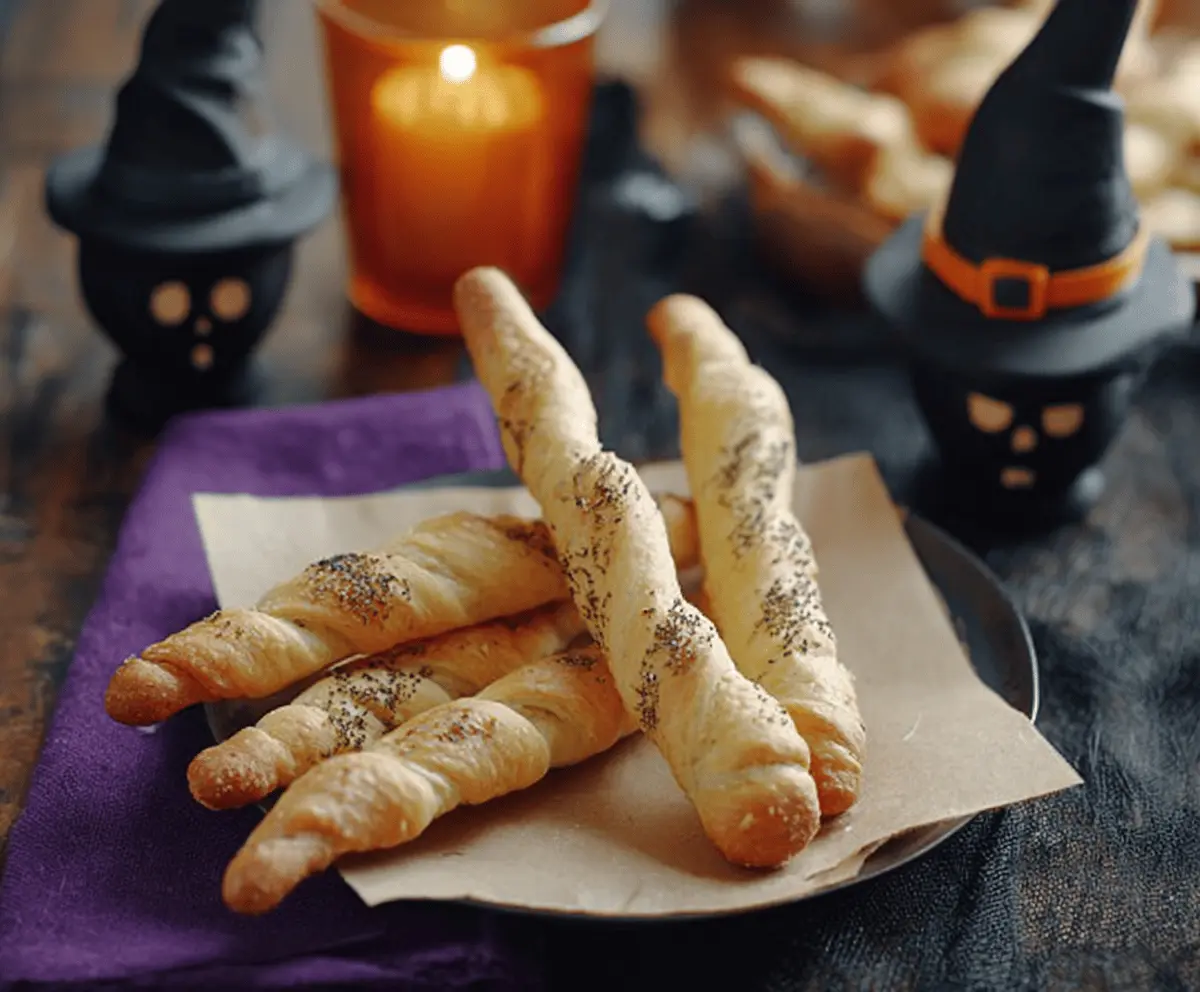
These spooky Witch Finger Breadsticks are perfect for Halloween! Shaped like creepy fingers, they’re fun to make and even more fun to eat. Just picture your friends’ faces when they see them!
They’re made with simple dough and topped with almonds for the nails, giving them that extra creepy touch. I love serving these with a side of marinara sauce for dipping—it’s a delight! 🎃👻
Key Ingredients & Substitutions
Active Dry Yeast: This is essential for making the breadsticks rise. If you don’t have active dry yeast, you can use instant yeast instead; just mix it directly with the flour without activating it first.
All-Purpose Flour: It gives the breadsticks their structure. If you’re looking for a gluten-free option, try using a gluten-free flour blend that contains xanthan gum for the best results.
Almonds: These serve as the “nails” for the fingers. If you have nut allergies, you could use sunflower seeds or even pieces of a pretzel stick for a different look.
Poppy Seeds/Black Sesame Seeds: These add a nice touch and flavor. If you don’t have them, feel free to skip this or even use dried herbs like oregano for a twist.
How Do You Get the Perfect Twisted Shape for the Fingers?
Creating that twisted finger shape is really what makes these breadsticks fun! After you roll out your dough into sticks, here’s how to twist them:
- Hold one end of the stick with one hand.
- With your other hand, twist the stick while gently pulling it to stretch the dough a bit.
- Make sure to twist evenly to avoid any tight spots; it should look like a slight spiral.
Take your time with this step—perfecting the shape adds to the spooky effect when they’re baked! Just a gentle twist will do, and your fingers will turn out looking great!
Witch Finger Breadsticks
Ingredients You’ll Need:
- 1 package (about 2 1/4 tsp) active dry yeast
- 1 cup warm water (110°F/43°C)
- 2 1/2 cups all-purpose flour, plus extra for dusting
- 1 tsp salt
- 1 tbsp sugar
- 2 tbsp olive oil, plus more for greasing and brushing
- Poppy seeds or black sesame seeds for sprinkling
- Optional: garlic powder or Italian seasoning for added flavor
- Optional dipping sauce: marinara, spicy ketchup, or cheese dip
How Much Time Will You Need?
This fun and spooky recipe takes about 1 hour and 30 minutes in total, including preparation and the time for the dough to rise. You’ll spend around 30 minutes actively working on it, with the dough rising taking up the rest of the time. Just remember to let it chill and rise, and soon you’ll have creepy and delicious breadsticks!
Step-by-Step Instructions:
1. Activate Yeast:
In a small bowl, dissolve the yeast and sugar in warm water. Let it sit for about 5-10 minutes until it becomes frothy. This means your yeast is active and ready to use!
2. Make Dough:
In a large mixing bowl, combine the all-purpose flour and salt. Pour in the yeast mixture along with 2 tablespoons of olive oil. Stir until a dough is formed. It might be a little sticky—don’t worry if it is; we’ll fix that later!
3. Knead Dough:
Transfer the dough onto a floured surface. Knead the dough for about 8-10 minutes until it becomes smooth and elastic. If it’s too sticky, add a little more flour, but try not to add too much or the breadsticks will turn out dense.
4. First Rise:
Lightly oil a bowl and place your kneaded dough inside. Cover it with a clean towel or plastic wrap, and let it rise in a warm place for about 1 hour or until it doubles in size. This is where the magic happens!
5. Form “Fingers”:
Once it’s risen, punch down the dough gently to release the air. Divide the dough into about 10 equal pieces. Roll each piece into a long, thin stick about 8 inches long—like creepy fingers!
6. Add Twists:
Gently twist each breadstick to create a slight spiral shape. This gives it that spooky finger appearance!
7. Create Knuckles:
Use a knife or your fingers to make gentle indentations on one end of each stick to give them knuckles. Be careful not to press too hard; we want to keep that nice finger shape.
8. Add “Nails”:
At the tip of each breadstick, press an almond slice to mimic the fingernail. This makes your breadsticks look even more spooktacular!
9. Second Rise:
Place the breadsticks on parchment-lined baking sheets, leaving space between them. Cover and let them rise for an additional 20-30 minutes.
10. Preheat Oven:
While your breadsticks are rising, preheat the oven to 375°F (190°C). We want it nice and hot for baking!
11. Brush and Sprinkle:
Once your breadsticks have risen, lightly brush them with olive oil and sprinkle poppy seeds or black sesame seeds over the top for extra flavor and crunch.
12. Bake:
Bake the breadsticks in the preheated oven for about 15-20 minutes or until they turn golden brown and are cooked through. The smell will be amazing!
13. Cool and Serve:
Let them cool slightly before serving them up. They’re perfect with a side of marinara sauce, spicy ketchup, or cheese dip for dipping. Enjoy your spooky and tasty Witch Finger Breadsticks!
Can I Use Frozen Dough for This Recipe?
Yes! If you have frozen bread dough, you can use it as a short-cut. Just allow it to thaw in the refrigerator overnight and come to room temperature before shaping it into finger sticks.
How Do I Store Leftover Breadsticks?
Store any leftover Witch Finger Breadsticks in an airtight container at room temperature for up to 2 days. They can also be kept in the fridge for up to a week, but be aware they may lose some crispiness. To reheat, warm them in the oven for a few minutes to regain that crunchy texture!
Can I Make These Breadsticks Spicier?
Absolutely! You can add garlic powder or Italian seasoning to the dough for extra flavor. For a kick, try mixing in some crushed red pepper flakes or a dash of cayenne pepper!
What’s the Best Way to Serve Them?
These spooky breadsticks are best served warm. Pair them with marinara sauce for dipping to enhance their Halloween theme, or try spicy ketchup for a fun twist! Either way, they’re sure to delight guests at any Halloween gathering.