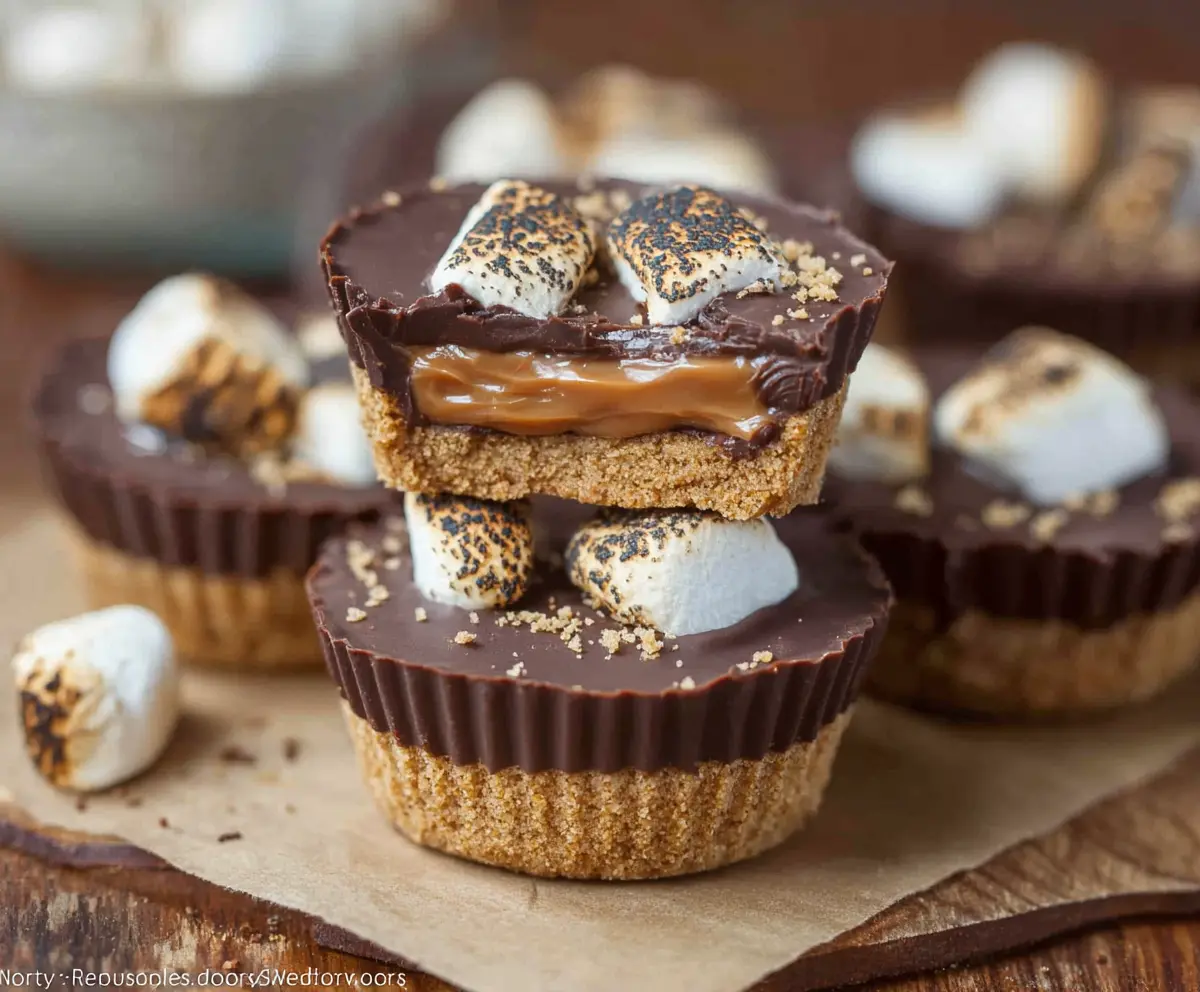
These S’mores Peanut Butter Cups are a heavenly mix of chocolate, peanut butter, and crunchy graham crackers. They’re like your favorite campfire treat wrapped in a sweet cup!
Honestly, who can resist the classic flavor of s’mores? I can eat these cups anytime! Just try not to eat them all at once—good luck with that! 😂
I love making these because they’re super easy and fun. Just layer the ingredients in muffin tins, chill, and enjoy! Perfect for snacking or a sweet surprise for friends!
Key Ingredients & Substitutions
Graham Cracker Crumbs: This gives the classic s’mores taste. If you don’t have them, crushed digestive biscuits work well. You could also try using crushed vanilla wafer cookies for a different twist!
Unsalted Butter: Melting butter adds moisture to the crust. If you’re looking for a dairy-free option, coconut oil is a great substitute. It will add a slight coconut flavor, which is delicious!
Semi-Sweet Chocolate: This is the main flavor here. If you prefer darker chocolate, go for bittersweet or dark chocolate chips. Milk chocolate can also work if you like it sweeter.
Peanut Butter: Creamy peanut butter is best here, providing a smooth texture. If you want to switch it up, almond or cashew butter will also taste amazing. For a crunch, you could use crunchy peanut butter.
Mini Marshmallows: These are essential for that s’mores effect. If you can’t find mini marshmallows, regular ones can be cut in half. You can also use a marshmallow fluff as a neat alternative!
How Do I Get S’mores Peanut Butter Cups to Set Perfectly?
Getting the layers to set just right can be key to enjoying these treats. Follow these steps for success:
- **Chill Between Layers**: After adding chocolate to the crust, chill for about 10 minutes. This helps each layer to become firm before adding the next.
- **Control the Heat**: When toasting marshmallows, use medium heat to avoid burning. A kitchen torch works well, but broiling should be done carefully—keep your eyes on them!
- **Cool Time**: After assembling, chill the entire tray in the fridge for at least one hour. This firming up ensures that when you bite into them, they don’t fall apart!
Patience is your friend here. Waiting for each layer to set properly pays off when you finally take a bite!
How to Make S’mores Peanut Butter Cups
Ingredients You’ll Need:
For The Crust:
- 1 1/2 cups graham cracker crumbs
- 6 tablespoons unsalted butter, melted
- 1/4 cup granulated sugar (optional, for the crust)
For The Filling:
- 1 cup semi-sweet chocolate chips or chopped chocolate
- 1 tablespoon coconut oil or vegetable oil (optional, for smoother chocolate)
- 1/2 cup creamy peanut butter
For The Topping:
- Mini marshmallows (about 24, enough for topping 12 cups)
How Much Time Will You Need?
This recipe takes about 20 minutes to prepare, plus at least 1 hour to chill. You’ll spend a bit of time mixing, melting, and assembling, but the waiting part is all about letting those delicious layers set properly in the fridge!
Step-by-Step Instructions:
1. Preparing the Crust:
In a medium bowl, mix together the graham cracker crumbs and melted butter (and sugar if you’re using it). Stir until combined. Press about 1 tablespoon of this mixture into the bottom of each cup in a muffin tin lined with paper liners or silicone molds. Make sure the crust is packed down well for stability!
2. Melting the Chocolate:
In a microwave-safe bowl, add the chocolate chips and coconut oil. Heat in the microwave in 30-second intervals, stirring thoroughly each time, until smooth and melted. This will help create a creamy chocolate layer!
3. Assembling the Cups – First Layer:
Carefully pour or spoon a layer of melted chocolate over each graham cracker crust until it’s just covered. Then, place the muffin tin in the fridge for about 10 minutes to let the chocolate set slightly.
4. Adding the Peanut Butter:
After the chocolate has set, drop about 1 teaspoon of creamy peanut butter onto the chocolate layer in each cup. Gently press the peanut butter down into the layer but avoid mixing it together too much.
5. Topping with Chocolate and Marshmallows:
Pour another layer of melted chocolate over the peanut butter, completely covering it. Then, top each peanut butter cup with two or three mini marshmallows. They’ll be the perfect melty treat when toasted!
6. Toasting the Marshmallows:
If you have a kitchen torch, use it to toast the marshmallows until they’re golden and slightly charred, just like a real s’more! If you prefer, you can also place the cups under a preheated broiler for 1-2 minutes—just keep a close eye to prevent burning!
7. Chilling to Set:
Put the assembled S’mores Peanut Butter Cups back in the refrigerator for at least 1 hour. This allows all the layers to set firmly so that each cup holds together nicely when you serve them.
8. Serving:
Once chilled and set, gently remove the S’mores Peanut Butter Cups from the muffin tin. Enjoy this gooey, crunchy, and chocolatey treat with family or friends—or keep them all for yourself!
This recipe brilliantly combines the classic elements of s’mores: a crunchy graham cracker crust, rich melted chocolate, creamy peanut butter, and toasted marshmallows for a delightful twist on a beloved favorite!
Can I Use Different Types of Chocolate?
Absolutely! While semi-sweet chocolate is great, you can use dark chocolate for a richer taste or milk chocolate for a sweeter treat. Just ensure it melts well!
How Do I Store Leftover S’mores Peanut Butter Cups?
Store any leftovers in an airtight container in the fridge for up to 5 days. They can also be frozen for longer storage—just thaw in the refrigerator before enjoying!
Can I Make These Vegan?
Yes! Substitute the butter with coconut oil, opt for dairy-free chocolate, and use a plant-based peanut butter. Additionally, replace marshmallows with vegan marshmallow alternatives if needed.
Can I Prepare These in Advance?
Definitely! You can make the cups a day ahead. Just be sure to keep them refrigerated until you’re ready to serve to maintain their shape and texture!