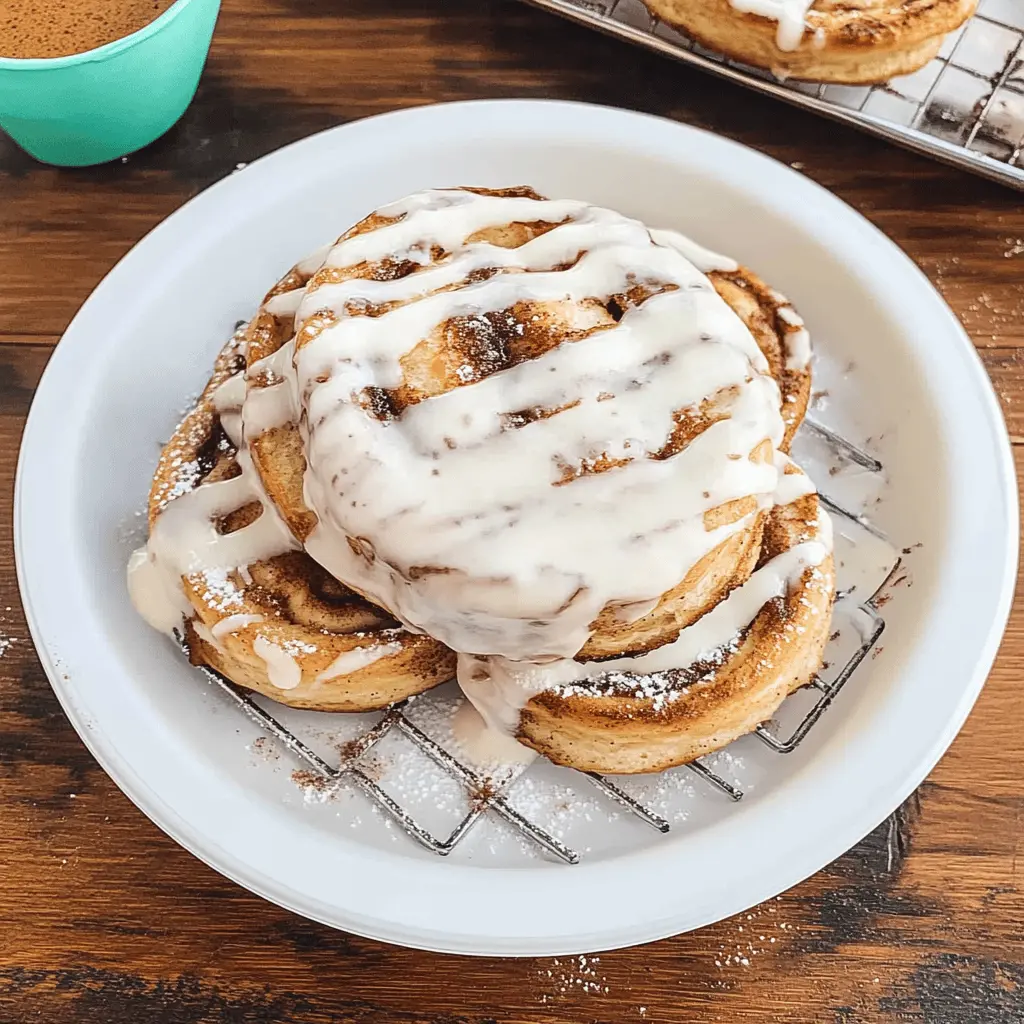
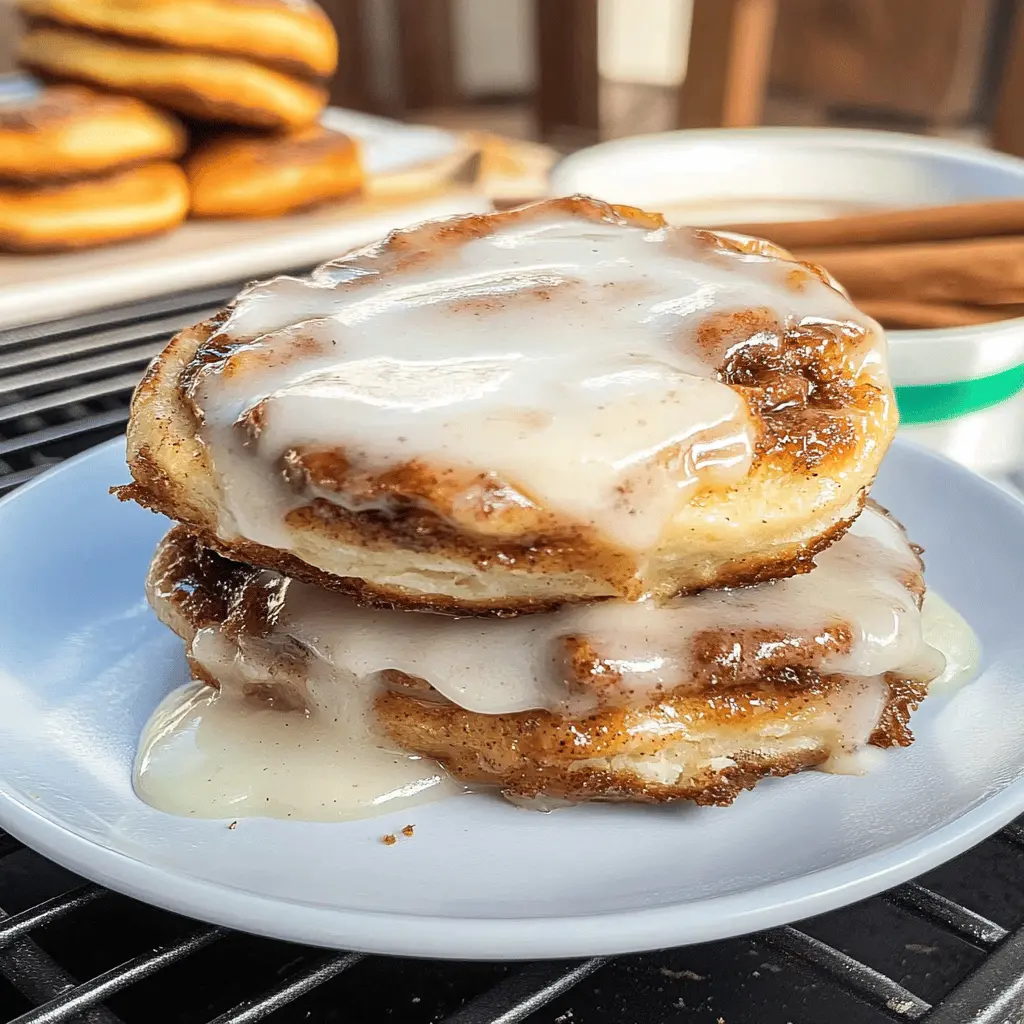
These Smashed Blackstone Cinnamon Rolls are a fun twist on a classic treat! Soft, sweet dough filled with cinnamon and sugar, then flattened for that perfect bite.
They’re great for breakfast or a sweet snack, and they smell amazing while baking! Honestly, I can’t resist sneaking a taste before they’re even on the table! 😋
Key Ingredients & Substitutions
Biscuit Dough: Using refrigerated biscuit dough makes this recipe super quick and easy. If you want to bake from scratch, consider making your own dough with flour, baking powder, and buttermilk.
Brown Sugar: For a deeper flavor, light brown sugar is traditional, but dark brown sugar works too, as it has more molasses. If you need to avoid sugar, try coconut sugar or a sugar substitute suitable for baking.
Cinnamon: Ground cinnamon is key for that warm, sweet flavor. If you want to switch things up, try a mix of cinnamon and a pinch of nutmeg, or use cinnamon sticks for a stronger flavor but be sure to strain them out!
Unsalted Butter: I prefer unsalted butter to control the salt level. You can use margarine or coconut oil for a dairy-free option.
Milk: Whole milk gives the best consistency for the glaze, but any milk (almond, soy, oat) will work. Adjust the amount until you get the right thickness.
How Do I Get the Perfect “Smashed” Look for My Rolls?
The “smashed” technique is what makes these cinnamon rolls unique! Here’s how to get it right:
- After rolling the biscuit into a circle, brush both sides with melted butter to add flavor and moisture.
- When you fold the biscuit in half, press down gently with a spatula to flatten. Don’t squish them too hard; aim for a nice half-moon shape.
- Cook on a medium heat griddle. This ensures they cook evenly and get that lovely golden brown crust.
Keep an eye on them while cooking! A couple of minutes per side should do, but they can burn easily if the heat is too high. Enjoy your delicious smashed cinnamon rolls!
How to Make Smashed Blackstone Cinnamon Rolls
Ingredients You’ll Need:
For the Cinnamon Rolls:
- 2 cans refrigerated biscuit dough (about 16 oz each)
- ½ cup brown sugar, packed
- 2 tablespoons ground cinnamon
- ¼ cup unsalted butter, melted
For the Glaze:
- 1 cup powdered sugar
- 2 tablespoons milk (or more for desired consistency)
- 1 teaspoon vanilla extract
- Pinch of salt
How Much Time Will You Need?
This recipe will take about 10 minutes to prepare, plus around 10-15 minutes for cooking on the Blackstone griddle. In total, you’ll need about 20-25 minutes to enjoy these delicious cinnamon rolls from start to finish!
Step-by-Step Instructions:
1. Prepping the Griddle:
Start by preheating your Blackstone griddle to medium heat. This will get it nice and hot for cooking those delicious cinnamon rolls!
2. Preparing the Biscuit Dough:
Open the cans of biscuit dough and carefully separate each biscuit. This will give you a nice base for your cinnamon rolls.
3. Making the Cinnamon Sugar Mixture:
In a small bowl, mix together the packed brown sugar and ground cinnamon. This sweet mixture will be sprinkled on your rolls for a delicious flavor.
4. Rolling Out the Biscuits:
Take each biscuit and roll it into a flat circle, about ¼ inch thick. Once flattened, brush both sides with the melted butter to help the cinnamon sugar stick.
5. Adding the Cinnamon Sugar:
Sprinkle the cinnamon sugar mixture evenly over the rolled-out biscuits. Then, fold each biscuit in half to create a half-moon shape, pressing gently to seal in the flavor.
6. Smashed Biscuit Time:
Using a spatula, carefully press down on each half-moon to flatten them slightly, giving them that unique “smashed” look. This will help them cook evenly on the griddle.
7. Cooking the Cinnamon Rolls:
Place the smashed biscuits on your preheated Blackstone griddle. Cook for about 2-3 minutes on each side, or until they are golden brown and cooked through. Keep an eye on them so they don’t burn!
8. Making the Glaze:
While your cinnamon rolls are cooking, prepare the glaze. In a bowl, whisk together the powdered sugar, milk, vanilla extract, and a pinch of salt until it’s smooth and creamy. Adjust the milk as needed to get your desired consistency.
9. Drizzling the Glaze:
Once the cinnamon rolls are done cooking, remove them from the griddle and drizzle the glaze over the top while they’re still warm. This will make them extra delicious!
10. Serve and Enjoy:
Serve your smashed cinnamon rolls warm, and enjoy this delightful twist on the classic treat! They’re perfect for breakfast or just a sweet snack any time of day.
Can I Use Homemade Biscuits Instead of Refrigerated Dough?
Absolutely! If you prefer homemade biscuits, feel free to use your favorite biscuit recipe. Just roll them out to about 1/4 inch thick like you would with the refrigerated dough, and follow the same steps for flattening and cooking on the Blackstone griddle.
What Can I Substitute for Unsalted Butter?
If you don’t have unsalted butter, you can use salted butter instead. Just reduce the amount of added salt in the glaze to balance the flavors. Alternatively, coconut oil or a different type of vegetable oil can work if you need a dairy-free option.
How Do I Store Leftover Cinnamon Rolls?
Store any leftover smashed cinnamon rolls in an airtight container at room temperature for up to 2 days. To keep them fresh, you can also refrigerate them for longer storage, up to about a week. Reheat in the microwave for a few seconds to enjoy them warm again!
Can I Make the Glaze Thicker or Thinner?
Yes! Adjust the glaze consistency by adding more powdered sugar for a thicker glaze or more milk for a thinner one. Start with 1 tablespoon at a time until you reach your desired thickness. It’s best to do this after mixing the initial ingredients to avoid over-thinning!