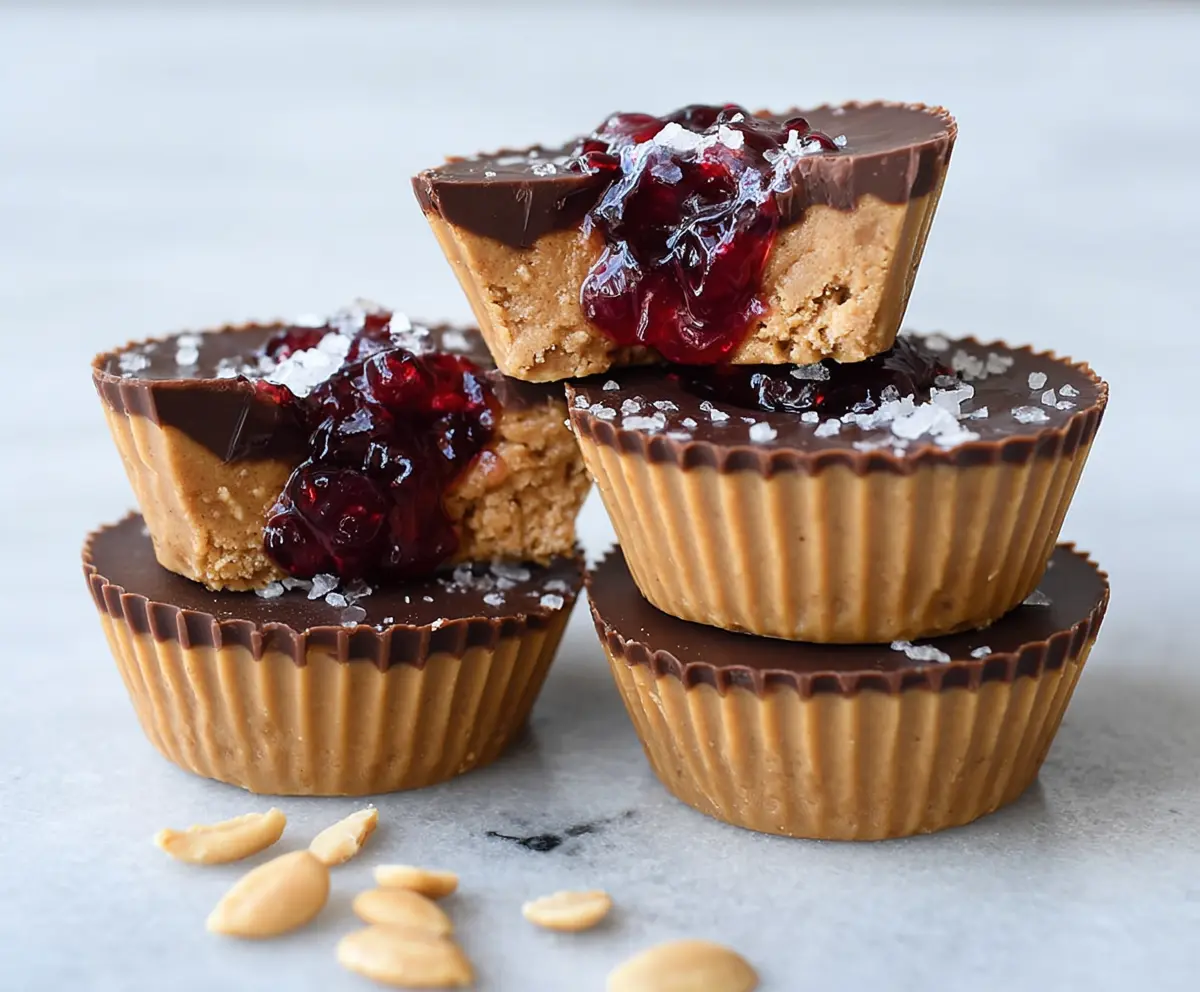
These Healthy Peanut Butter and Jelly Cups are a fun twist on a classic! They’re made with simple ingredients like oats, peanut butter, and your favorite fruit jam.
I love how easy these cups are to whip up, plus they’re a great snack for kids and adults. Who can resist a little peanut butter joy? Perfect for munching anytime! 😋
Key Ingredients & Substitutions
Peanut Butter: Using natural creamy peanut butter is key for flavor and texture. If you’re allergic or want a different flavor, try almond or cashew butter instead.
Maple Syrup or Honey: Both work as sweeteners in this recipe. If you’re vegan, stick with pure maple syrup. Agave syrup is another option!
Oat Flour: This adds a nice base to the cups. If you don’t have oat flour, just blend rolled oats until fine. You can also use almond flour for a low-carb option.
Dark Chocolate: I love using dark chocolate for the rich taste. If you prefer a sweeter option, go for semi-sweet chocolate. Dairy-free chocolate chips are perfect for those avoiding dairy.
Jam or Jelly: Choose your favorite flavor! For a healthier choice, pick a brand with no added sugar. You can easily use fresh fruit puréed instead of jam for a fresh twist.
How Do I Melt Chocolate Smoothly?
Melted chocolate is a crucial step for super tasty cups. Here’s how to do it without a mess:
- Use a microwave or a double boiler. If using a microwave, microwave chocolate in 20-second intervals, stirring each time until smooth. Avoid overheating!
- When using a double boiler, simmer water in a pot and place a heatproof bowl on top with chocolate. Stir until it melts evenly.
- Add coconut oil for shine and smoothness. This helps the chocolate drip over the cups beautifully.
Remember, patience is key! Rushing can lead to burnt chocolate, ruining that rich flavor.
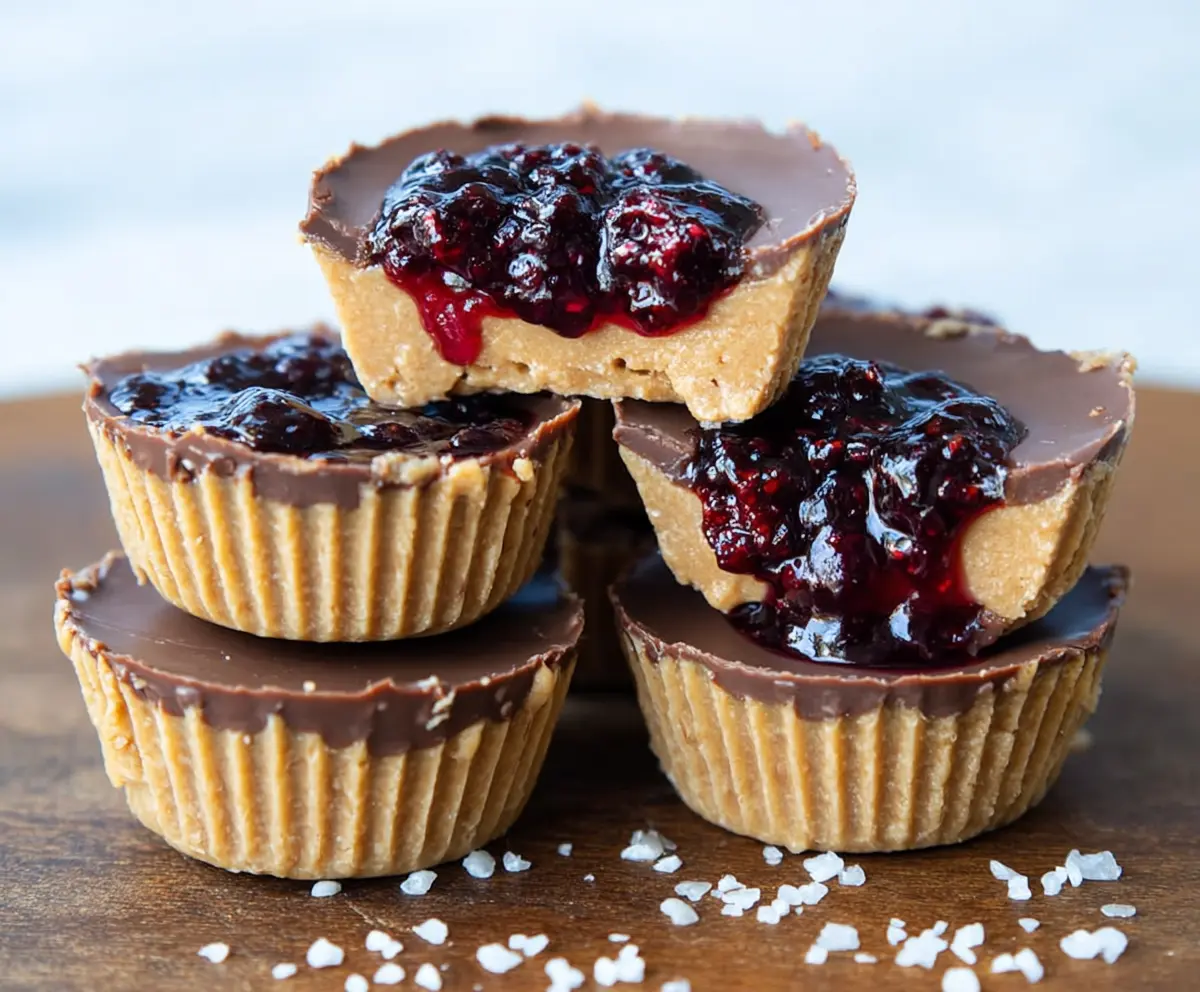
Healthy Peanut Butter and Jelly Cups
Ingredients You’ll Need:
- 1 cup natural creamy peanut butter (preferably unsweetened and unsalted)
- 1/4 cup pure maple syrup or honey
- 1/2 cup oat flour (or finely ground oats)
- 1/4 teaspoon sea salt (plus extra for sprinkling)
- 1/2 cup dark chocolate chips or finely chopped dark chocolate (70% cocoa or higher)
- 1 teaspoon coconut oil
- 1/2 cup jam or jelly of choice (preferably no added sugar or low sugar)
How Much Time Will You Need?
This recipe takes about 15 minutes to prepare and requires at least 1 hour to chill in the refrigerator. So, about 1 hour and 15 minutes in total! It’s a quick and easy treat to whip up ahead of time.
Step-by-Step Instructions:
1. Prepare the Peanut Butter Mixture:
In a mixing bowl, combine the peanut butter, maple syrup (or honey), oat flour, and 1/4 teaspoon of sea salt. Stir well until the mixture is smooth and forms a dough-like consistency. This is going to be the base of your cups, so make sure it’s nice and mixed!
2. Set Up Your Muffin Cups:
Take a mini muffin tin or silicone cupcake liners and lightly grease them. If you’re using a regular tray, you might want to place your silicone cups on the tray for easy handling. Greasing will help make it easier to remove the cups later.
3. Form the Base Layer:
Spoon the peanut butter mixture evenly into 8 muffin cups. Press down firmly with the back of the spoon to create a solid base layer. This layer will hold everything together, so make it nice and compact!
4. Add the Jam:
Now, add about 1 teaspoon of jam or jelly to the center of each peanut butter layer. Lightly press it down so it sits nicely in the middle but be careful not to mix it too much. You want some jelly to be visible!
5. Melt the Chocolate:
In a small microwave-safe bowl, melt the dark chocolate with the coconut oil. Do this in 20-second increments, stirring after each round until it’s smooth and fully melted. This gives your cups that delicious, rich chocolate topping!
6. Top with Melted Chocolate:
Using a spoon, carefully pour the melted chocolate over each peanut butter and jelly cup, covering the top completely. Don’t worry if it gets a little messy; it will look beautifully homemade!
7. Sprinkle with Sea Salt:
For that extra flavor, sprinkle a tiny pinch of sea salt on top of each cup. It adds a nice contrast to the sweetness!
8. Chill to Set:
Place the tray in the refrigerator for at least 1 hour, or until the chocolate is set and firm. This helps the layers to hold together perfectly.
9. Remove from Molds:
Once they are firm, gently remove the peanut butter and jelly cups from the molds. If they’re sticking, a little twist should help them come out easily.
10. Store and Enjoy:
Store these tasty treats in an airtight container in the refrigerator for up to 1 week. Enjoy them as a healthy snack or a sweet treat anytime!
These cups combine creamy peanut butter, sweet yet tart jelly, and rich dark chocolate with a touch of salt for a deliciously balanced healthy snack. Enjoy the goodness!
Can I Use a Different Nut Butter?
Absolutely! Almond butter or cashew butter can be great substitutes for peanut butter. Just keep in mind this may slightly alter the flavor of your cups, but they’ll still be delicious!
Can I Make These Vegan?
Yes, to make these cups vegan, simply use maple syrup instead of honey and ensure that your chocolate is dairy-free. Many brands offer great vegan chocolate options!
How Should I Store Leftovers?
Store any leftovers in an airtight container in the refrigerator for up to 1 week. They taste great chilled and are perfect for a quick snack anytime!
Can I Use Different Types of Jam?
Definitely! Feel free to use any flavor of jam or jelly you like—just go for lower sugar options if you want a healthier choice. Raspberry, strawberry, or even a mixed berry jam would be lovely!