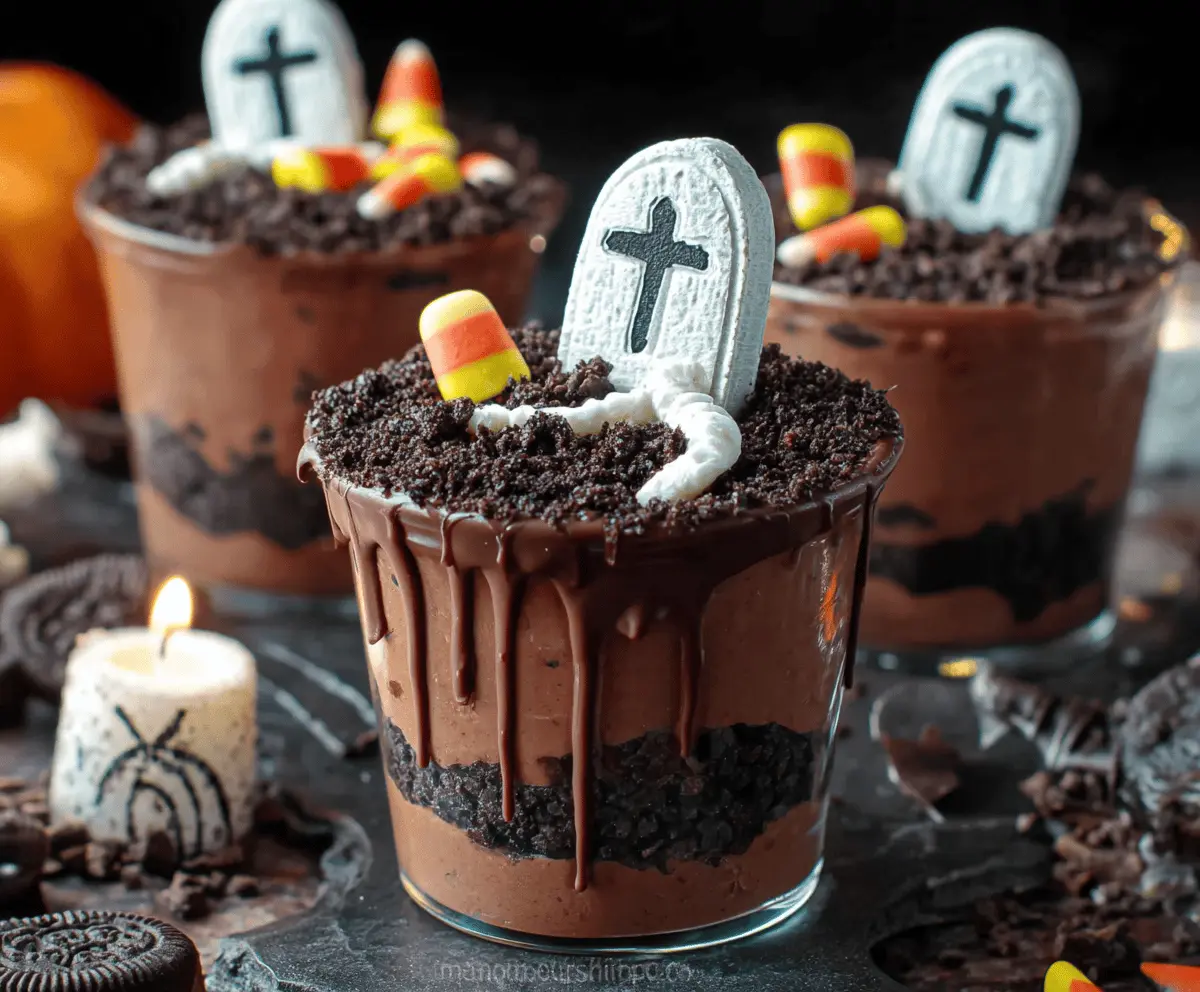
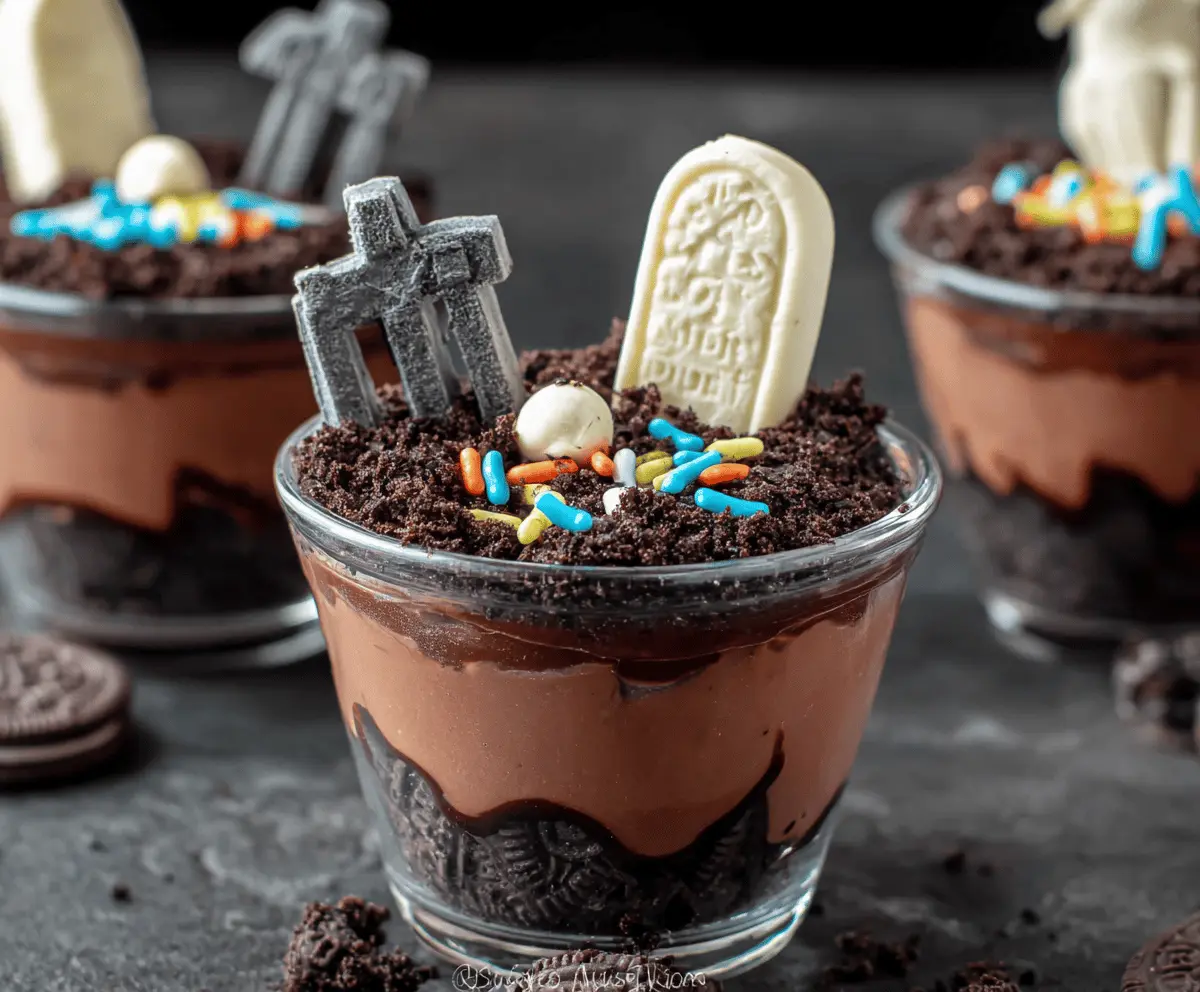
These spooky Graveyard Chocolate Pudding Cups are perfect for Halloween! They feature delicious chocolate pudding layered with crushed cookies and topped with candy tombstones.
You can let your kids help with the decorating—it’s messy, but the giggles make it worth it! I enjoy making these with a big spoonful of whipped cream on top. Yum!
Key Ingredients & Substitutions
Whole Milk: This ingredient gives the pudding creaminess. If you’re looking for a lighter option, you can use skim milk or even almond milk for a dairy-free version. Just keep in mind, the flavor might be slightly different.
Instant Chocolate Pudding Mix: This is the star of the show! If you can’t find instant mix, you can make homemade pudding, but it will take longer. Alternatively, chocolate mousse or a similar dessert could be used, but the texture will differ.
Heavy Cream: Whipped cream adds a nice touch. You can substitute it with Cool Whip for convenience or use coconut whipped cream for a dairy-free option. I often add a bit of vanilla extract to the whipped cream for extra flavor!
Oreo Cookies: These cookies create the “dirt.” If you’re looking for alternatives, any chocolate cookie will work—like chocolate graham crackers or even gluten-free cookies to fit dietary needs.
Candy Tombstones: You can buy these or make your own by decorating sugar cookies with icing. Any spooky candy like gummy worms can also add fun variation!
How Do I Make the Perfect Layering for My Pudding Cups?
Layering is key to achieving a fun look. Here’s how to do it right:
- Start with a smooth layer of pudding at the bottom. Ensure it’s evenly spread to avoid any mixing with the “dirt.”
- Next, add the crushed Oreos. The crumbs should cover the pudding completely.
- For the second layer of pudding, spoon it gently over the Oreos, trying not to disturb them.
- Finally, add another layer of Oreos for that dirt effect. Make it look nice and even.
Trust me, taking a little care with layers makes these cups look great and fun to eat. Enjoy serving this spooky treat at your Halloween gathering!
Graveyard Chocolate Pudding Cups
Ingredients You’ll Need:
- 2 cups cold whole milk
- 1 package (3.9 oz) instant chocolate pudding mix
- 1 cup heavy cream, whipped (for decoration)
- 15 Oreo cookies, finely crushed (for “dirt”)
- 1/2 cup semisweet chocolate chips
- 1 teaspoon coconut oil or vegetable oil
- Candy tombstones (or homemade tombstones made from cookies or fondant)
- Candy corn or other Halloween candy for decoration
How Much Time Will You Need?
This recipe takes about 15 minutes of prep time to combine and layer the ingredients, plus an additional 30 minutes for chilling. All in all, you’re looking at about 45 minutes from start to enjoying this spooky treat!
Step-by-Step Instructions:
1. Prepare the Pudding:
In a mixing bowl, whisk together the cold milk and instant chocolate pudding mix until the mixture thickens, which should take about 2 minutes. Once it’s nice and smooth, cover the bowl and place it in the refrigerator for at least 5 minutes to fully set.
2. Crush the Oreos:
Take your Oreo cookies and place them into a resealable plastic bag. Use a rolling pin to crush them into fine crumbs, or you can use a food processor if you have one. Set aside the crumbs for later use.
3. Melt Chocolate for Drips:
In a microwave-safe bowl, combine the semisweet chocolate chips and coconut oil. Microwave the mixture in 20-second intervals, stirring after each time until it becomes smooth and glossy. This melted chocolate will give an exciting look to your cups!
4. Prepare Serving Cups:
If you want to add a fun touch, drizzle the melted chocolate around the rims of each serving cup to create a dripping effect. Let them sit for a few minutes to firm up slightly before adding any pudding.
5. Assemble the Pudding Cups:
Take the chocolate pudding out of the fridge. Start by spooning half of the pudding into each prepared serving cup. Then, add a layer of your crushed Oreos on top to create the “dirt” layer. Finally, spoon the remaining pudding to fill the cups almost to the top.
6. Top the Cups:
Sprinkle a generous layer of crushed Oreos on top of each cup for that graveyard dirt look. Insert a candy tombstone cookie vertically into the top of each cup. For added decoration, scatter some candy corn or other Halloween candies around the tombstone. Don’t forget to pipe or dollop on some whipped cream to create “grave mounds” or “bones”!
7. Chill:
Refrigerate the completed pudding cups for at least 30 minutes. This will help the flavors meld together and let the decorations firm up nicely.
8. Serve:
Once chilled, your spooky Graveyard Chocolate Pudding Cups are ready to be enjoyed! Serve them chilled and watch your guests delight in this fun Halloween treat!
These luscious cups combine creamy chocolate pudding, crunchy Oreo crumbs, and festive candy decorations to create a deliciously eerie dessert for any Halloween celebration. Enjoy the festive fun!
Can I Use Non-Dairy Milk for the Pudding?
Yes, you can substitute whole milk with non-dairy alternatives like almond milk or coconut milk. Just ensure they are unsweetened for the best flavor balance!
How Can I Make This Recipe Gluten-Free?
To make these pudding cups gluten-free, simply use gluten-free chocolate cookies instead of Oreos. Many brands offer tasty options that work perfectly!
Can I Prepare These Cups the Night Before?
Absolutely! You can assemble the pudding cups the night before and store them in the fridge. Just wait to add the whipped cream and decorations until right before serving for the freshest look!
What Should I Do with Leftover Pudding?
If you have leftover pudding, store it in an airtight container in the fridge for up to 2 days. You can enjoy it as a simple dessert on its own or layer it into other treats!