These adorable Gingerbread Thumbprint Cookies are perfect for the holiday season! They have a sweet, spicy ginger flavor and a cute jam filling right in the center.
Making these cookies is a fun way to get in the festive spirit! I love to use raspberry jam for that nice burst of flavor. They disappear quickly, so make sure to save a few for yourself! 🍪
Key Ingredients & Substitutions
All-Purpose Flour: This is the base for the cookies. If you’re looking for a gluten-free option, use a gluten-free flour blend. Just make sure it’s a 1:1 ratio blend for the best results.
Spices: Ground ginger, cinnamon, cloves, and nutmeg are essential for that gingerbread flavor. If you’re out of one, don’t worry! You can substitute with gingerbread spice mix if you have it.
Unsalted Butter: I suggest using unsalted butter, so you can control the saltiness. If you prefer a dairy-free version, use coconut oil or a plant-based butter substitute.
Granulated Sugar: Besides rolling the cookies, granulated sugar helps them to have a nice sweet crunch around the edges. You can use brown sugar for a richer flavor or coconut sugar for a healthier option.
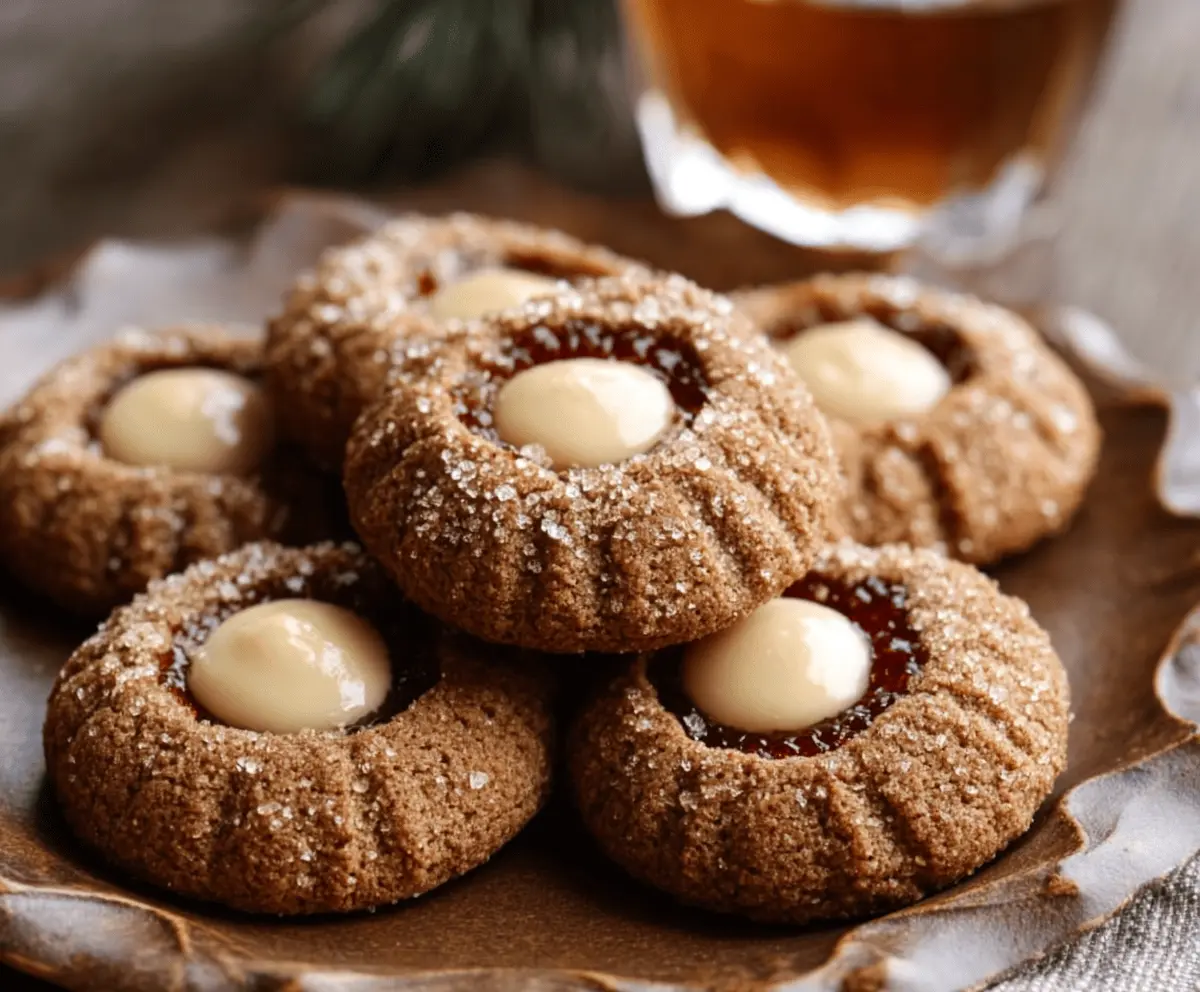
Jam: Raspberry jam is my go-to because of its tartness. However, you can substitute any of your favorite flavors, like apricot or strawberry, to fit your taste!
How Do I Get the Perfect Thumbprint?
The thumbprint technique is key to these cookies! After rolling your dough into balls, it’s important to create a nice indentation without flattening the cookie too much. Here’s how:
- Use your thumb or the back of a small spoon to press a well into the center of each ball. Make sure to go deep enough to hold the jam without breaking through the bottom.
- If the dough sticks to your thumb, lightly flour your thumb before pressing.
- After baking, if the indentations puff back up, press them again while they’re warm to ensure they hold the jam well.
This technique may take a little practice, but you’ll get the hang of it. Just be gentle and enjoy the process!

Gingerbread Thumbprint Cookies
Ingredients You’ll Need:
For the Cookies:
- 2 1/4 cups all-purpose flour
- 2 teaspoons ground ginger
- 1 teaspoon ground cinnamon
- 1/2 teaspoon ground cloves
- 1/4 teaspoon ground nutmeg
- 1/4 teaspoon salt
- 3/4 teaspoon baking soda
- 1/2 cup (1 stick) unsalted butter, softened
- 1/2 cup granulated sugar (plus extra for rolling)
- 1 large egg
- 1/3 cup molasses
- 1 teaspoon vanilla extract
For the Filling:
- Raspberry jam or your favorite jam (for thumbprint filling)
- White chocolate or white chocolate chips (for center dollop)
How Much Time Will You Need?
You’ll need about 15 minutes for prep and about 10 minutes for baking. After that, let the cookies cool for about 10 minutes on the baking sheet before transferring them to a wire rack. Total time including cooling: around 35-40 minutes.
Step-by-Step Instructions:
1. Preheat and Prepare:
Start by preheating your oven to 350°F (177°C). While that’s heating, line a baking sheet with parchment paper so your cookies won’t stick.
2. Mix the Dry Ingredients:
In a medium bowl, whisk together the flour, ground ginger, cinnamon, cloves, nutmeg, salt, and baking soda. Make sure everything is well combined; this helps evenly distribute the flavor!
3. Cream the Butter and Sugar:
In a large bowl, use an electric mixer to cream the softened butter and granulated sugar together until it’s light and fluffy. This should take about 2-3 minutes, making sure you scrape down the sides of the bowl as you go.
4. Add the Egg and More:
Now, beat in the egg, molasses, and vanilla extract. Make sure everything is well mixed in, creating a lovely, smooth mixture!
5. Combine the Mixtures:
Gradually add the dry ingredients to the wet mixture, mixing gently just until everything is combined. Be careful not to over-mix; we don’t want tough cookies!
6. Form the Cookies:
Using about 1 tablespoon of dough, scoop it out and roll it into a ball. Roll each ball in extra granulated sugar, then place them on your prepared baking sheet about 2 inches apart.
7. Create the Thumbprints:
Use your thumb or the back of a spoon to press into the center of each dough ball to create an indentation. Don’t worry if they crack a bit—this is normal!
8. Bake the Cookies:
Bake for about 8-10 minutes. You want them to be set but still soft to the touch—keep an eye on them!
9. Re-define the Indents:
Once they’re out of the oven, if the indents puffed up, gently press them with your thumb again while they are warm to form a deeper well for the jam.
10. Add the Jam:
Fill each indentation with about 1/2 teaspoon of raspberry jam. This delightful burst will be the finishing touch to your cookies!
11. Add White Chocolate:
Next, immediately place one white chocolate chip or a small dollop of melted white chocolate in the center of each jam filling. This adds a lovely creamy flavor.
12. Cool Down:
Let your cookies cool on the baking sheet for about 10 minutes. Then carefully transfer them to a wire rack to cool completely. This helps them firm up nicely.
13. Store and Enjoy:
Once cool, store your delicious cookies in an airtight container at room temperature. Enjoy them as a festive treat during your celebrations!
These chewy, warmly spiced cookies with a sweet jam and creamy white chocolate center are sure to bring warmth and joy to any gathering! Happy baking!
Can I Use Other Types of Jam?
Absolutely! While raspberry jam is a classic choice, feel free to use your favorite flavor. Apricot, strawberry, or even blueberry can work wonderfully as alternatives for that fruity filling.
How Should I Store Leftovers?
Store your cookies in an airtight container at room temperature for up to 5 days. If you want to keep them fresh for longer, you can also freeze them. Just wrap them tightly in plastic wrap and then place them in a freezer-safe bag for up to 3 months!
Can I Make These Cookies Gluten-Free?
Yes, you can! Simply substitute the all-purpose flour with a gluten-free flour blend that measures 1:1. Make sure to check that the blend contains xanthan gum for better texture.
What If My Dough Is Too Sticky?
If your dough feels too sticky to handle, chill it in the refrigerator for about 30 minutes. This makes it easier to scoop and roll into balls without sticking to your hands!