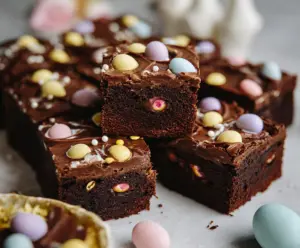
Easter Blossom Cookies are sweet treats that look like little flowers! They’re soft and buttery, topped with a chocolate kiss in the center. Perfect for adding some color to your celebration!
Baking these is a breeze, and the kids will love helping out! Just don’t blame me if they want to eat the kisses before the cookies are even done! 😂
I enjoy making these cookies because they’re quick to whip up and always put a smile on everyone’s face. Plus, the bright sprinkles make them look extra festive for Easter!
Key Ingredients & Substitutions
Unsalted Butter: This adds richness to your cookie dough. If you’re out of unsalted butter, you can use salted butter; just reduce the added salt in the recipe to balance the flavors.
Granulated Sugar: It’s essential for sweetness and texture. If you want a healthier option, you can substitute with coconut sugar or use a sugar substitute like stevia, adjusting quantities as needed.
All-Purpose Flour: A must for structure! For gluten-free cookies, you can use a gluten-free all-purpose flour blend. Just make sure it includes xanthan gum for the right texture.
Food Coloring: The vibrant colors make these cookies so festive! If you’re looking for a natural alternative, use juices from beets (red), spinach (green), or blueberries (blue) instead of synthetic dyes.
Chocolate Kisses: These add the perfect touch for your cookie centers. If you want a nut-free option, consider using a caramel or a fruit like a cherry for the center instead.
How Do I Create Beautiful Blossom Shapes for the Cookies?
The blossom shape is what makes these cookies special. To achieve this, follow these simple steps:
- Divide your dough into portions: keep one white or add color to your preference.
- Roll small pieces of colored dough into petal shapes – think of a teardrop or oval.
- Position the petals around the edge of your base cookie, gently pressing them to adhere but keeping petals distinct for that lovely flower look.
It’s fun to mix and match colors! When baking, make sure the edges are just golden yet the centers stay soft for a chewy texture.

How to Make Easter Blossom Cookies
Ingredients You’ll Need:
For the Cookie Dough:
- 1 cup unsalted butter, softened
- 3/4 cup granulated sugar
- 1 large egg
- 1 tsp vanilla extract
- 2 1/4 cups all-purpose flour
- 1/2 tsp baking powder
- 1/4 tsp salt
For Coloring:
- Food coloring (pink, yellow, green, purple, blue)
For Topping:
- Chocolate kisses (for topping)
- Powdered sugar for dusting (optional)
How Much Time Will You Need?
This delightful recipe takes about 20 minutes for prep and 10-12 minutes for baking, which makes a total of around 30-35 minutes. Add a little cooling time, and you’ll be ready to enjoy your cookies shortly after!
Step-by-Step Instructions:
1. Preheat Your Oven:
Start by preheating your oven to 350°F (175°C). While it’s heating, line your baking sheets with parchment paper to prevent the cookies from sticking.
2. Cream Butter and Sugar:
In a large bowl, take your softened butter and granulated sugar. Using a mixer or a whisk, cream them together until the mixture is light and fluffy. This usually takes about 2-3 minutes of mixing.
3. Add Egg and Vanilla:
Beat in 1 large egg and 1 teaspoon of vanilla extract until everything is well combined. This will add flavor and richness to your cookies!
4. Mix Dry Ingredients:
In a separate bowl, whisk together the all-purpose flour, baking powder, and salt. This is to ensure that everything is evenly distributed before combining with the wet mixture.
5. Combine Wet and Dry Mixtures:
Gradually add the dry mixture into the wet mixture, mixing until a soft dough forms. Don’t overmix—just combine until you can’t see any flour.
6. Color the Dough:
Divide the dough into several parts: keep one portion uncolored (this will be your base). Add food coloring to the other portions to create pretty colors for your petals. Knead the colors in until you achieve the desired hues!
7. Shape the Blossoms:
For each cookie, take a small amount of colored dough and shape it into petals. Place these petal shapes on top of your white or colored dough base. Gently press them down to make sure they stick, but keep the colors separate for a beautiful look!
8. Form the Cookies:
Shape each piece of cookie dough into a rounded flat shape. This helps them bake evenly and makes for a lovely flower shape.
9. Bake:
Place the shaped cookies on the lined baking sheets and bake them in the preheated oven for about 10-12 minutes. Keep an eye on them—you’re looking for golden edges and soft centers!
10. Add the Chocolate Kisses:
As soon as they come out of the oven, press a chocolate kiss right in the center of each cookie. This will be the flower’s center. Yum!
11. Cool Down:
Let the cookies cool on the baking sheet for a few minutes before transferring them to a wire rack. This way, they won’t break when you move them!
12. Dust with Sugar (Optional):
If you like, lightly dust the cooled cookies with powdered sugar for that festive touch. It adds sweetness and a lovely soft look.
13. Serve and Enjoy!
Your colorful Easter Blossom Cookies are now ready to be enjoyed! Serve them at your celebration and watch everyone smile at their delightful appearance!
Can I Use Margarine Instead of Butter?
Yes, you can use margarine in place of unsalted butter. Just remember that margarine can have a slightly different texture and flavor, so your cookies might turn out a bit differently.
What If I Don’t Have Food Coloring?
If you’re out of food coloring, you can try using natural alternatives! For example, beet juice works for pink, turmeric for yellow, and spinach puree for green. Simply mix these in during the dough preparation until you achieve your desired color.
Can I Freeze These Cookies?
Absolutely! You can freeze the shaped cookie dough before baking. Just wrap each cookie in plastic wrap and place them in an airtight container. When you’re ready to bake, simply bake from frozen, adding a couple of additional minutes to the baking time.
How Long Can I Store Leftover Cookies?
Leftover cookies can be stored at room temperature in an airtight container for up to one week. For longer storage, consider freezing them for up to three months!