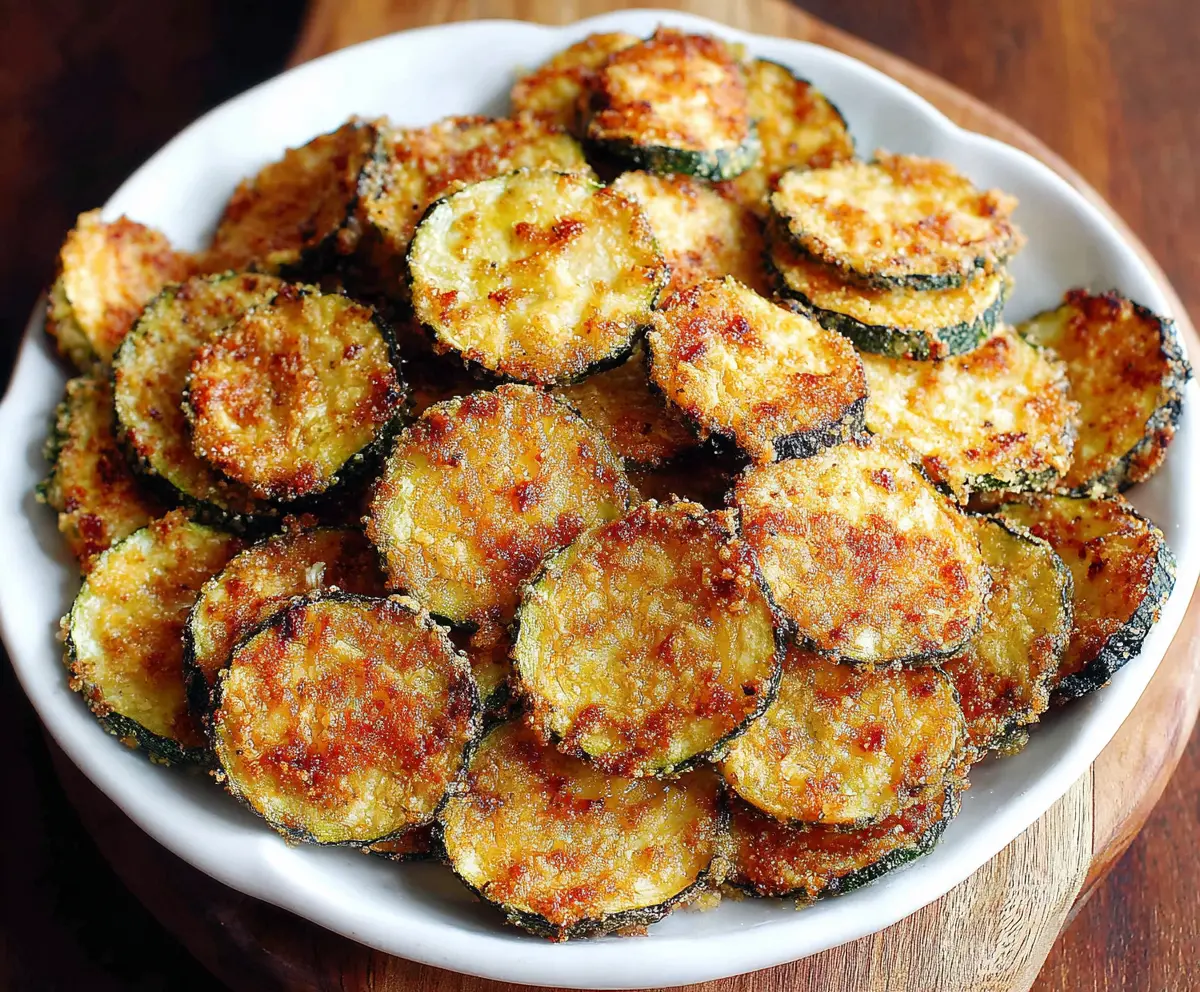
Crunchy zucchini chips are a light and tasty snack that anyone can enjoy! Made by slicing zucchini thin, then baking until they’re super crispy, it’s hard to stop at just one.
I love how easy these chips are to whip up, and they make a great alternative to regular chips. Perfect for movie night or when you just want something crunchy and fun. 🍽️
Key Ingredients & Substitutions
Zucchini: This is the star of the dish! Choose medium-sized zucchinis, which are easy to slice and yield nice chips. If zucchinis aren’t available, you can use yellow squash as a substitute.
Parmesan Cheese: I recommend using freshly grated Parmesan for the best flavor. You could swap it with Pecorino Romano for a stronger taste or keep it vegetarian by using nutritional yeast instead if avoiding dairy.
Panko Breadcrumbs: Panko gives a wonderfully crispy texture. If you don’t have panko, regular breadcrumbs work too, but the chips may not be as crunchy. Try making your own breadcrumbs from stale bread if you’re in a pinch!
Eggs: The eggs help the coating stick. If you’re looking for an egg-free version, you can use a flaxseed meal mixture (1 tablespoon flaxseed meal mixed with 2.5 tablespoons water, let it sit for a few minutes) as a binding agent.
How Do You Get Zucchini Chips Extra Crispy?
Getting your zucchini chips to be perfectly crispy can be tricky, but here’s how!
- Slice zucchini evenly into thin rounds. Aim for 1/8-inch thickness; this helps them cook uniformly.
- After slicing, sprinkle some salt on the zucchini rounds and let them sit for about 15-20 minutes. This draws out moisture, making your chips crunchier!
- Make sure to coat them well in the breadcrumb mixture but avoid overlapping on the baking sheet. Airflow is essential for crispiness.
- Using cooking spray or a drizzle of olive oil on the top layer before baking helps them brown beautifully.
- Flip the chips halfway through baking to promote even cooking and prevent sogginess.
Following these steps will ensure your zucchini chips are crunchy and delicious every time! Enjoy your snack time! 🥒✨
Crunchy Zucchini Chips
Ingredients You’ll Need:
For the Chips:
- 2 medium zucchinis
- 1/2 cup grated Parmesan cheese
- 1/2 cup panko breadcrumbs (or regular breadcrumbs)
- 1/2 teaspoon garlic powder
- 1/2 teaspoon onion powder
- 1/2 teaspoon salt
- 1/4 teaspoon black pepper
- 2 large eggs
- Cooking spray or olive oil for greasing
How Much Time Will You Need?
This recipe takes about 10 minutes to prepare and around 20-25 minutes to bake. In total, you’ll spend about 35 minutes from start to finish before enjoying these delightful crispy snacks!
Step-by-Step Instructions:
1. Preheat the Oven:
Start by preheating your oven to 425°F (220°C). This step is essential for achieving that perfect crunch on your zucchini chips. While the oven is warming up, prepare your baking sheet by lining it with parchment paper or lightly greasing it with cooking spray or olive oil.
2. Prepare the Zucchini:
Wash the zucchinis thoroughly and cut off the ends. Slice the zucchinis into thin rounds, about 1/8-inch thick. Try to keep them as even as possible so they cook uniformly and get that perfect texture.
3. Make the Egg Mixture:
In a shallow bowl, crack the eggs and whisk them until well combined. This will create a nice coating for the zucchini slices.
4. Combine the Dry Ingredients:
In another shallow bowl, mix together the grated Parmesan cheese, panko breadcrumbs, garlic powder, onion powder, salt, and black pepper. This will be the crunchy coating that makes these chips so tasty!
5. Coat the Zucchini Slices:
Take each zucchini slice, dip it into the egg mixture, allowing any excess to drip off. Then, press both sides of the slice into the breadcrumb mixture to ensure a good coating. Make sure they are evenly covered!
6. Arrange on the Baking Sheet:
Place the coated zucchini slices in a single layer on the prepared baking sheet. Make sure not to overlap them—great airflow is key to getting them crispy!
7. Spray for Extra Crispiness:
Once all the slices are on the baking sheet, lightly spray the tops with cooking spray or drizzle a small amount of olive oil over them. This helps them brown beautifully.
8. Bake the Chips:
Put the baking sheet in the oven and bake for 20-25 minutes. Be sure to flip the zucchini chips halfway through baking to ensure they cook evenly and turn golden brown.
9. Cool and Crisp:
Once they are done baking, remove the chips from the oven and let them cool on the baking sheet for a few minutes. This will help them crisp up even more!
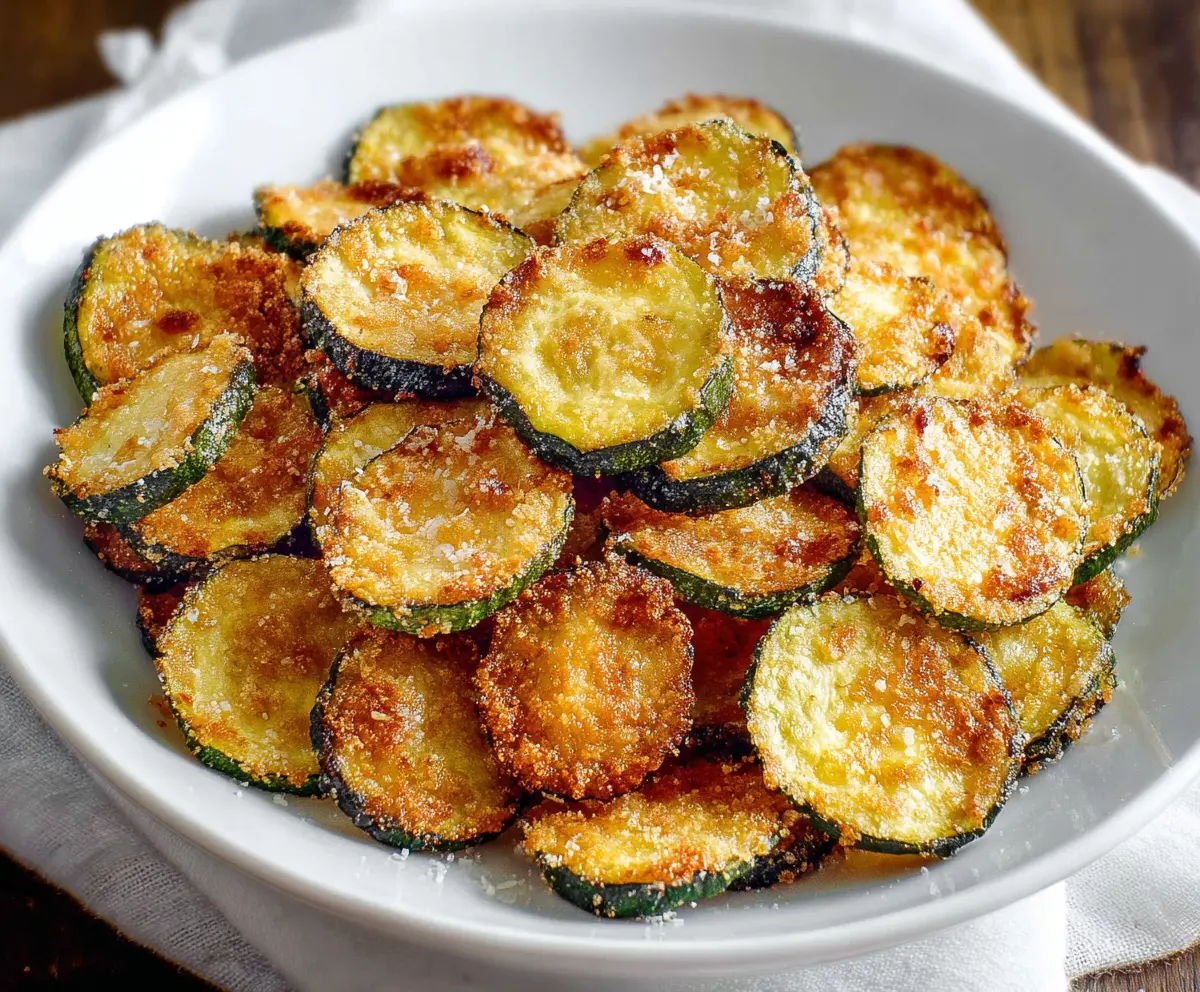
10. Serve and Enjoy:
Your crunchy zucchini chips are ready! Serve them immediately as a tasty snack or appetizer you can enjoy guilt-free. They’re perfect all on their own or paired with your favorite dip!
These crunchy zucchini chips are a great way to enjoy this nutritious vegetable in a deliciously crispy form. Enjoy your healthier snack option while crunching away!
Can I Use Other Types of Cheese?
Absolutely! While Parmesan adds a great flavor, you can also use mozzarella for a gooey texture or cheddar for a sharper taste. Just keep in mind that different cheeses may change the cooking time slightly, so monitor them closely!
How Can I Store Leftover Zucchini Chips?
Once cooled, store any leftover zucchini chips in an airtight container at room temperature for up to 2 days. Make sure they’re completely cool to maintain their crunch. If you want them truly crispy again, you can reheat them briefly in an oven or air fryer!
Can I Make These Chips in an Air Fryer?
Yes, you can absolutely use an air fryer! Arrange the coated zucchini slices in a single layer in the air fryer basket and cook at 400°F (200°C) for about 12-15 minutes, flipping halfway through. Keep an eye on them to prevent burning.
What Should I Serve with Zucchini Chips?
Zucchini chips make a fantastic snack on their own, but you can also serve them with dips like ranch, hummus, or marinara sauce for added flavor. They are also great alongside a fresh salad for a crunchy side!