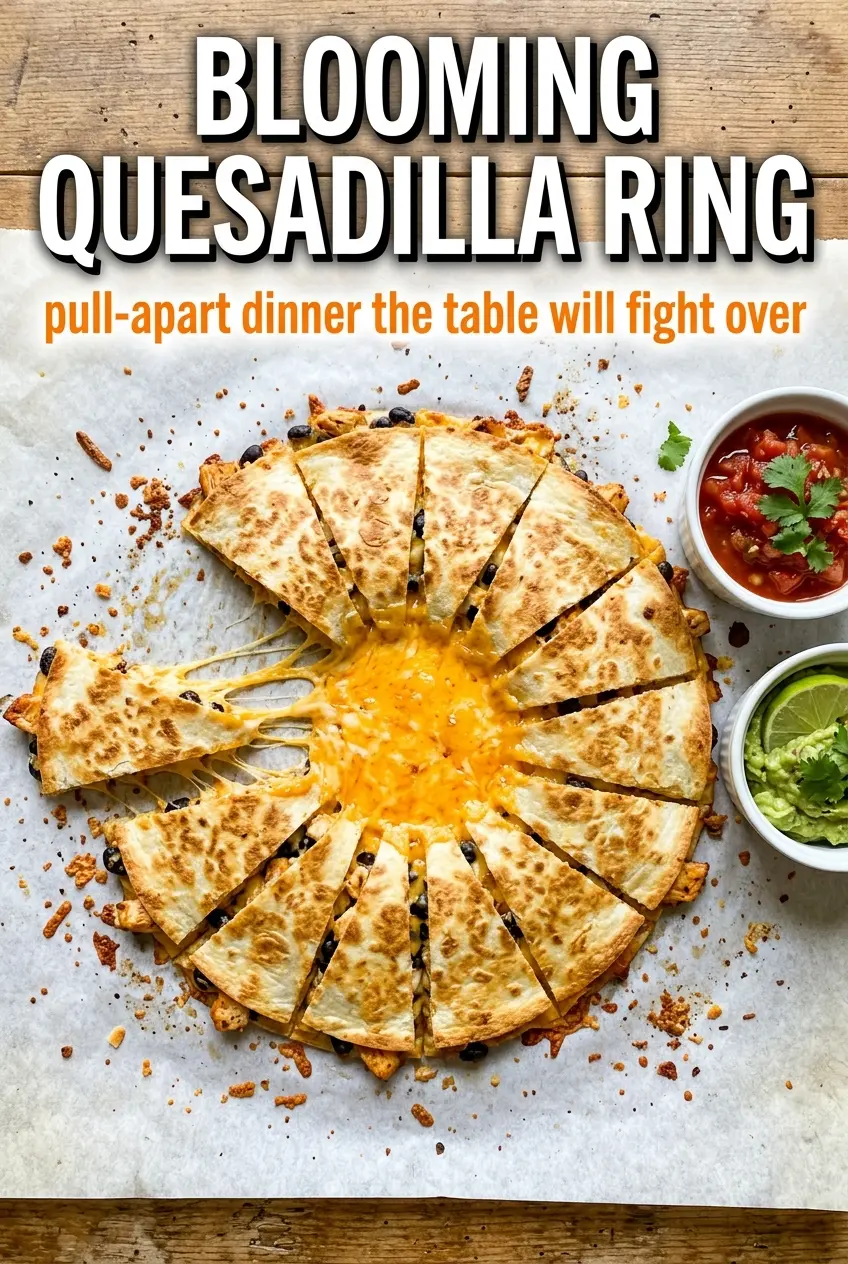
Golden, crisp quesadilla triangles fanned into a ring turn a basic skillet snack into the kind of appetizer people keep circling back to. The edges stay shattery and toasted, the cheese melts into the filling, and the whole thing lands on the table looking far more complicated than it is.
The trick is building enough structure inside each tortilla so the pieces hold their shape after cutting. Cheese goes against the tortilla first so it acts like glue, then the beef and vegetables stay tucked in instead of sliding out when the quesadillas hit the pan. Medium-high heat gives you that browned exterior before the filling has a chance to dry out.
Below you’ll find the small details that matter here: how to keep the triangles sealed, how to get a ring that stands up nicely on the platter, and what to change if you want a milder version or a meatless one.
I loved how the triangles held together after cutting, and the cheese got perfectly melty without the tortillas turning greasy. The ring looked gorgeous on the table, and the salsa-sour cream center was gone fast.
Save this blooming quesadilla ring for your next game day spread or easy party appetizer.
The Part That Keeps the Ring From Falling Apart
The biggest mistake with a quesadilla platter like this is overfilling the tortillas. It looks generous in the pan, but once you fold, cut, and stand the pieces up, too much filling pushes the tortilla open and the ring loses its shape. A thinner layer gives you cleaner triangles, better browning, and fewer filling spills on the board.
The other thing that matters is the cheese placement. Put cheese directly against the tortilla on both sides of the filling if you want the edges to seal and stay tight. That melted layer is what holds the triangle together after cutting, and it also protects the tortilla from turning soggy where the filling is moist.
- Shredded cheddar — Sharp cheddar melts well and gives the filling enough flavor to carry the whole appetizer. Pre-shredded is fine here, but freshly shredded cheese melts more smoothly because it doesn’t carry the anti-caking coating.
- Ground beef — Use fully cooked, well-drained beef. If it goes into the tortilla greasy, the filling slides and the quesadilla turns heavy instead of crisp.
- Flour tortillas — Large tortillas give you enough surface area to build and fold without tearing. Smaller tortillas can work, but the ring will look tighter and the pieces will be harder to stand up neatly.
- Queso dip — This is the warm, creamy finish that makes the platter feel complete. If you don’t have queso, a warm cheese sauce or even extra salsa-sour cream mix will still give people a good dip in the center.
Building Each Triangle So It Browns Before It Leaks
Layering the Filling
Lay the tortilla flat and keep the filling in a thin, even band rather than a mound. Cheese should touch the tortilla before and after the beef and vegetables, because it melts into the layers and helps everything stay put. If the vegetables are watery, pat them dry first so the tortilla doesn’t steam from the inside.
Folding and Cutting Cleanly
Fold the tortilla in half, press it gently, then cut it into triangles with a sharp knife or pizza cutter. A dull blade drags the filling out and squashes the edge, which makes sealing harder once the pieces hit the pan. Let the cut pieces sit flat for a minute before cooking so the folded edges settle.
Getting the Pan Hot Enough
Use medium-high heat and a thin coating of oil. The quesadillas should sizzle as soon as they hit the skillet, and the first side should develop deep golden spots before you flip. If the heat is too low, the tortillas absorb oil and turn soft before the cheese has a chance to melt.
Arranging the Blooming Ring
Stand the cooked triangles slightly overlapped around the edge of a round platter so they lean on each other. That overlap is what creates the bloom effect, so don’t spread them too far apart. Spoon the sour cream and salsa mixture into the center and add the warm queso on the side or in a small bowl in the middle if your platter has space.
Ways to Bend This Recipe Without Breaking It
Make it vegetarian with black beans
Swap the beef for drained black beans and add a little extra cheese to keep the filling cohesive. Beans bring a softer texture than beef, so keep the layer light and don’t overpack the tortilla or the triangles will split when you cut them.
Make it milder for mixed crowds
Use Monterey Jack or a mild cheddar instead of sharp cheddar, and choose a mild salsa for the center dip. You still get plenty of flavor from the beef, onion, and corn, but the heat stays low enough that kids and spice-shy guests will eat it without hesitation.
Make it gluten-free with corn tortillas
Use sturdy corn tortillas if you need a gluten-free version, but expect a different result: they crisp beautifully, yet they’re more fragile when folded. Keep the filling lighter and cook them just until heated through, because corn tortillas can crack if you try to force a large, overstuffed triangle.
Make it ahead for a party
Cook the beef and chop the vegetables earlier in the day, then assemble and pan-fry the quesadillas just before serving. The ring looks best when the triangles are still crisp, and holding them too long after cooking lets steam soften the edges.
Storage and Reheating
- Refrigerator: Store leftovers in an airtight container for up to 3 days. The tortillas soften as they sit, but they still reheat well.
- Freezer: Freeze the cooked triangles in a single layer, then move them to a freezer bag for up to 2 months. The texture is best if you freeze them before arranging the ring.
- Reheating: Warm in a skillet or air fryer until the tortilla crisps back up and the filling is hot. The microwave makes the tortillas limp, which is the fastest way to lose the texture that makes this appetizer work.
Questions I Get Asked About This Recipe
Blooming Quesadilla Ring
Ingredients
Equipment
Method
- Layer each flour tortilla with shredded cheddar cheese, cooked seasoned ground beef, diced red bell pepper, diced green bell pepper, diced onion, corn, and chopped cilantro. Fold the tortilla in half, then cut into triangles so the filling stays packed inside.
- Heat oil in a large skillet over medium-high heat until it shimmers. Working in batches, cook the quesadilla triangles for 2-3 minutes per side, flipping once, until golden and the cheese is visibly melted.
- Arrange the cooked quesadilla pieces in a circular ring on a platter, standing them up slightly overlapped so the melted cheese shows between layers. Mix sour cream with salsa and spoon the mixture into the center of the ring.
- Serve the ring immediately with warm queso dip on the side for dipping.