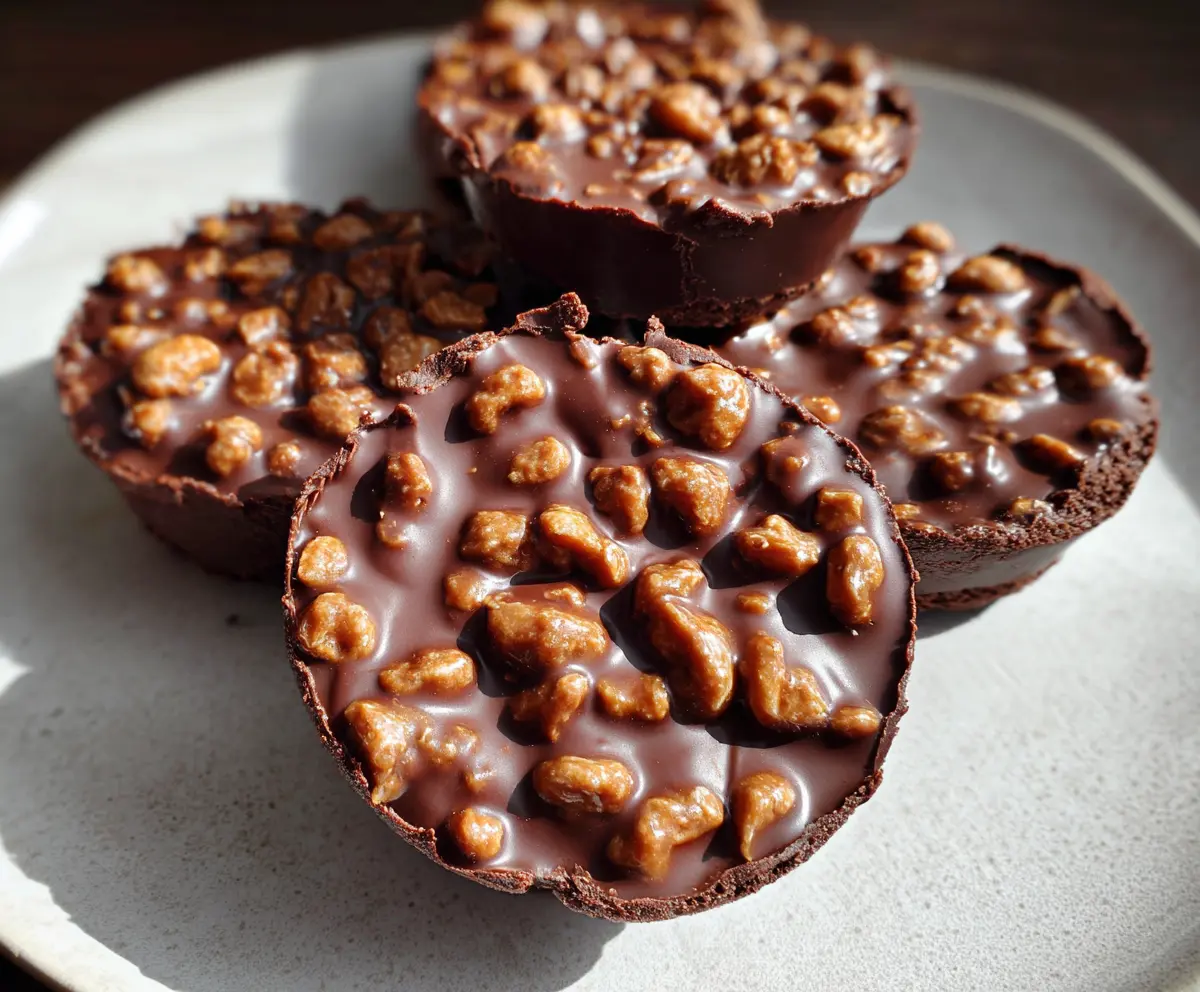
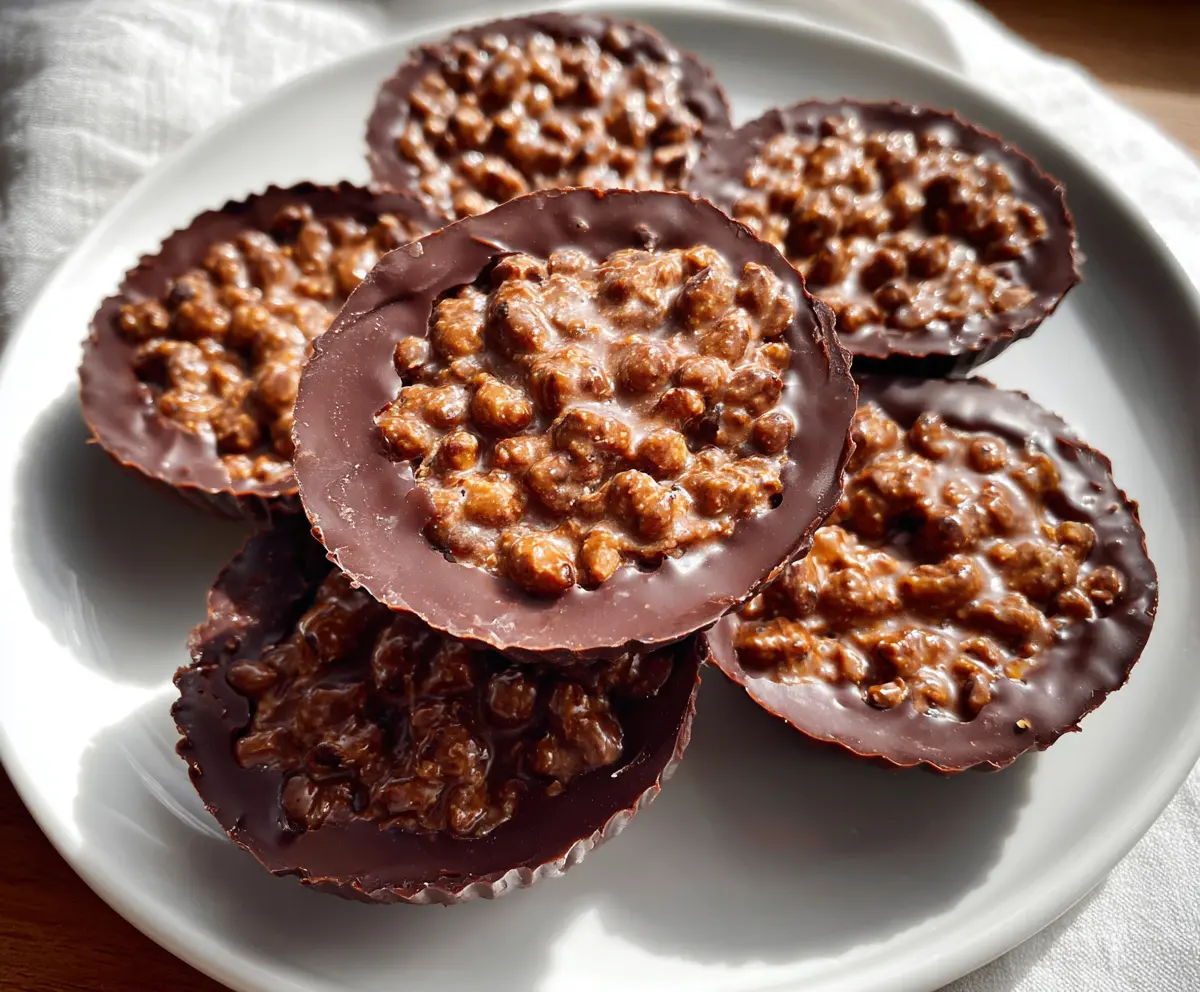
These Chocolate Peanut Butter Crunch Cups are a heavenly treat! Imagine creamy peanut butter mixed with crispy bits, all wrapped in rich chocolate. Yum!
Making these is super fun, and the best part is that they disappear so quickly. I like to keep some handy for movie nights, but they never last long in our house! 🍫🥜
Ingredients & Substitutions
Peanut Butter: I love using smooth peanut butter for a creamy texture. If you’re looking for a healthier alternative, natural peanut butter is great! If you have nut allergies, sunbutter (sunflower seed butter) works well too.
Honey or Maple Syrup: Both sweeteners work to add flavor. If you’re vegan, maple syrup is the better option. Alternatively, agave syrup or a sugar substitute can also be used.
Chocolate Chips: Semi-sweet chocolate is my favorite because it balances sweetness and richness nicely. Dark chocolate adds more depth, while milk chocolate gives a sweeter finish. Choose according to your taste!
Crispy Rice Cereal: This adds crunch to the cups! You can substitute it with other crispy cereals like cornflakes or even crushed pretzels for a different texture.
Coconut Oil: This is optional, but it helps make the chocolate smoother. You can skip it if you don’t have any or substitute with a little butter.
How Do You Melt Chocolate Smoothly Without Burning It?
Melted chocolate is key in this recipe. If you don’t melt it correctly, it can turn chunky and unappetizing. To melt chocolate smoothly, follow these simple tips:
- Microwave: Use a microwave-safe bowl. Heat in 30-second bursts, stirring in between until fully melted.
- Double Boiler: Place a heatproof bowl over a pot of simmering water. Stir constantly until melted to prevent burning.
- Do Not Overheat: If chocolate burns, it becomes grainy and unusable. Stop heating once it’s 75% melted—stirring will melt the rest.
With these tips, you’ll have perfectly smooth chocolate for your crunch cups! Enjoy the process; it’s fun to create delicious treats.
Chocolate Peanut Butter Crunch Cups
Ingredients You’ll Need:
For the Cups:
- 1 cup smooth peanut butter (natural or creamy)
- 2 tablespoons honey or maple syrup
- 1 teaspoon vanilla extract
- 1 1/2 cups semi-sweet or dark chocolate chips
- 1/2 cup crispy rice cereal (for the crunch)
- 1 tablespoon coconut oil (optional, for smoother chocolate)
How Much Time Will You Need?
This recipe will take about 15 minutes of prep time and around 1 hour for chilling the cups to set. An easy treat that doesn’t require baking and is sure to impress anyone with a sweet tooth!
Step-by-Step Instructions:
1. Mix the Peanut Butter Layer:
In a medium bowl, combine the smooth peanut butter, honey (or maple syrup), and vanilla extract. Stir everything together until it’s super smooth and well mixed. This is your delicious peanut butter layer!
2. Add the Crunch:
Next, gently fold in the crispy rice cereal into the peanut butter mixture. Be careful not to crush the cereal—this gives your cups that yummy crunch you’re looking for!
3. Prepare the Molds:
Line a muffin tin or silicone mold with paper liners to make it easy to remove the cups later. If you don’t have liners, you can lightly grease the molds to prevent sticking.
4. Melt the Chocolate:
Melt about 3/4 cup of chocolate chips along with the coconut oil (if using) in the microwave or over a double boiler. Stir frequently until the chocolate is completely smooth. Remember, patience is key here!
5. Create the Chocolate Base:
Once melted, spoon a small amount of the chocolate into the bottom of each mold, spreading it slightly to cover the base. This will be the delicious chocolate layer!
6. Chill the Base:
Place the muffin tin or molds in the refrigerator for about 5 minutes, until the chocolate is firm and set.
7. Add the Peanut Butter Filling:
Time to add the crunchy peanut butter layer! Take about a tablespoon of the peanut butter and cereal mixture and spoon it on top of the cooled chocolate layer. Press it down gently, but don’t flatten it completely.
8. Finalize with More Chocolate:
Now melt the remaining 3/4 cup of chocolate chips in the same way you did before. Pour this melted chocolate over the peanut butter layer, using a spoon to make sure it’s completely covered.
9. Add Extra Crunch:
For a pretty touch, sprinkle a few extra crispy rice cereal pieces on top of the chocolate layer before it sets. It looks nice and adds even more crunch!
10. Chill to Set:
Refrigerate the cups for at least 1 hour or until they are fully set and firm. This is the hardest part—waiting!
11. Serve and Enjoy:
Once set, carefully remove the cups from the molds. Store them in an airtight container in the fridge until you’re ready to enjoy your crunchy, rich Chocolate Peanut Butter Crunch Cups!
Dig in, and enjoy the delightful combination of chocolate and peanut butter! 🥜🍫
Can I Use Natural Peanut Butter in This Recipe?
Absolutely! Natural peanut butter adds a great flavor, but keep in mind it may be a bit less creamy than processed peanut butter. Just make sure to stir it well to combine the oil with the peanut butter before measuring!
How Can I Store the Chocolate Peanut Butter Crunch Cups?
Store any leftover cups in an airtight container in the refrigerator. They should last for up to a week. Just remember, they might not last long because they’re so delicious!
Can I Use Different Types of Chocolate?
Yes! You can use milk chocolate for a sweeter treat, or even try dark chocolate for a richer flavor. Just make sure to adjust the sweetness to your taste if you switch types!
What Can I Substitute for Coconut Oil?
If you don’t have coconut oil on hand, you can simply omit it. Alternatively, unsalted butter also works well as a substitute to help create a smoother melt for the chocolate.