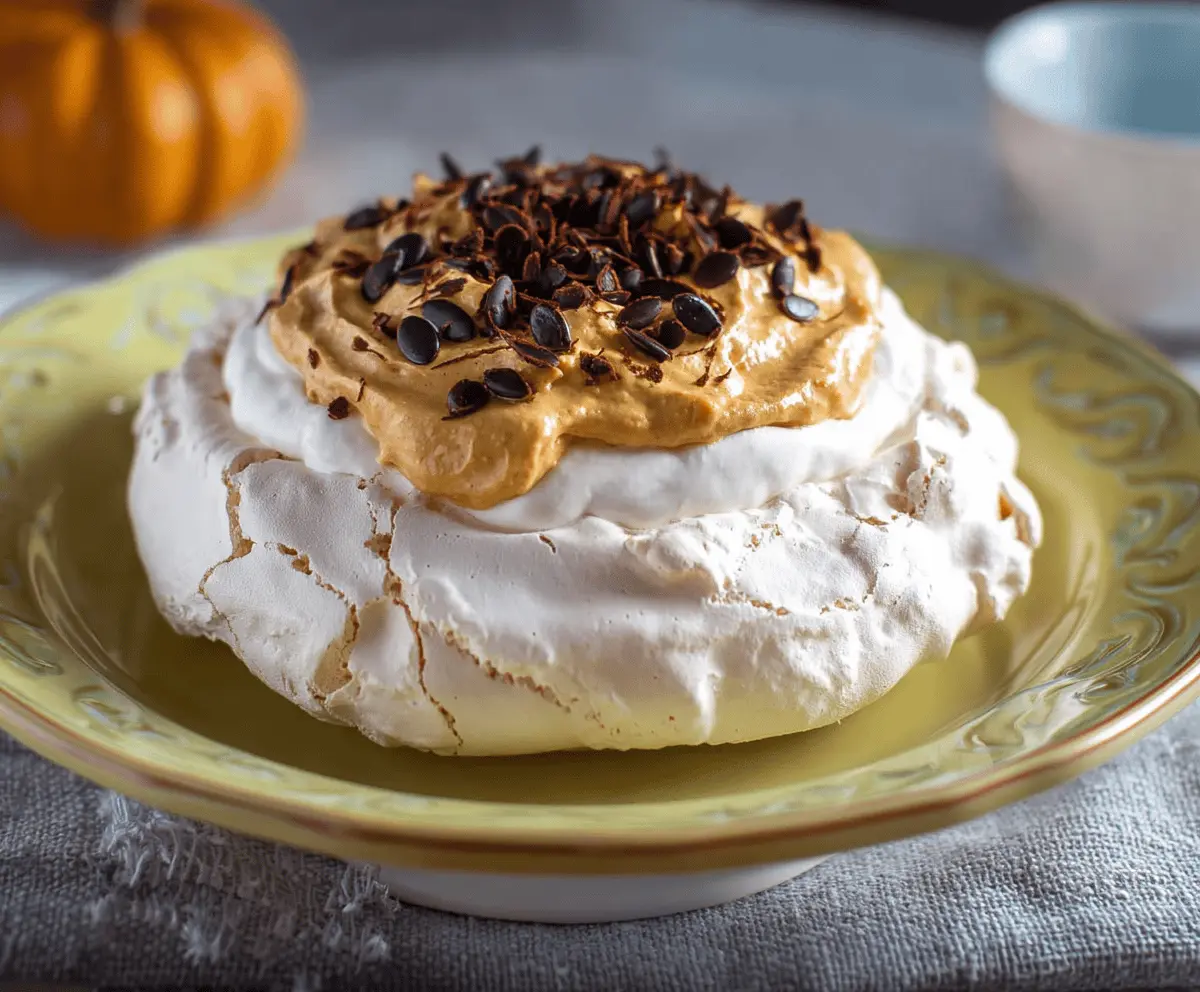
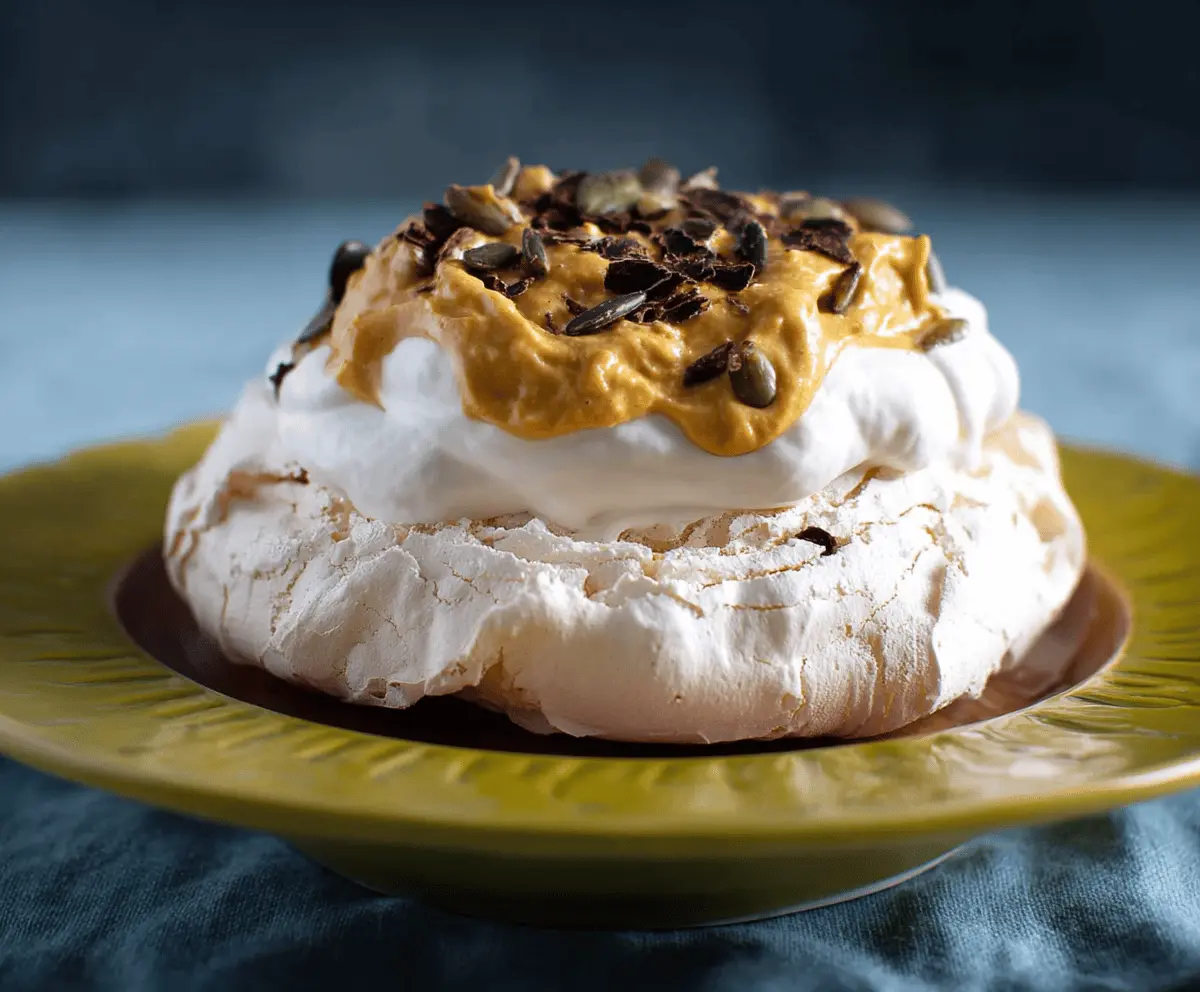
This Pumpkin Pavlova is a fun twist on a classic dessert! With a light, crispy meringue base, it’s topped with fluffy whipped cream and spiced pumpkin filling. Yum!
Each bite is a perfect mix of crunchy and creamy. I find it hard to stop at just one slice—it’s just too good! 🎃 Who can resist pumpkin in such a sweet way?
It’s super easy to whip up, and I love serving it at gatherings. It always gets smiles and happy tummies, making my little chef heart proud!
Key Ingredients & Substitutions
Egg Whites: Fresh, room temperature egg whites whip up better, giving your pavlova that perfect airy structure. If you’re vegan, aquafaba (the liquid from canned chickpeas) works as a fantastic substitute.
Caster Sugar: This fine sugar dissolves easily, making for a smooth meringue. If you don’t have it, you can pulse granulated sugar in a blender until fine, but be careful not to turn it into powder!
Canned Pumpkin Puree: You can use homemade pumpkin puree instead, just ensure it’s well strained to avoid excess moisture. For a twist, try using sweet potato puree!
Heavy Cream: If you want a lighter option, you can substitute with whipped coconut cream for a dairy-free version. Just chill the coconut milk overnight and scoop out the solid part.
How Do You Get the Perfect Meringue for Pavlova?
Getting your meringue right is crucial for a great pavlova. Start by ensuring your mixing bowl is completely clean and free of grease. Any fat can prevent the egg whites from whipping properly. Here’s how:
- Beat the egg whites on medium until soft peaks form. This ensures air is incorporated without over-whipping.
- Add sugar slowly, a tablespoon at a time, while increasing speed to high. This helps dissolve the sugar and create a glossy meringue.
- Fold in vinegar and cornstarch gently; this gives the pavlova that lovely chewy center.
- Bake at a low temperature and allow cooling in the oven to prevent cracking.
How to Make Pumpkin Pavlova
Ingredients You’ll Need:
For the Pavlova base:
- 4 large egg whites, at room temperature
- 1 cup (200g) caster sugar (superfine sugar)
- 1 tsp white vinegar
- 1 tsp cornstarch (cornflour)
- 1/2 tsp vanilla extract
For the pumpkin topping:
- 1/2 cup (120ml) heavy whipping cream
- 1/4 cup (60g) canned pumpkin puree
- 2 tbsp powdered sugar (icing sugar)
- 1/4 tsp ground cinnamon
- 1/8 tsp ground nutmeg
- 1/8 tsp ground ginger
- 1/4 tsp vanilla extract
Garnish:
- Roasted pumpkin seeds or pepitas, lightly toasted and roughly chopped
- Optional: grated dark chocolate or shaved chocolate for decoration
How Much Time Will You Need?
This delightful Pumpkin Pavlova takes about 15 minutes of prep time, plus 1 hour and 30 minutes to bake, and you’ll want to let it cool for a while too. So, give yourself around 2 to 3 hours in total to make this delicious dessert!
Step-by-Step Instructions:
1. Prepping the Oven and Baking Tray:
Start by preheating your oven to 300°F (150°C). Line a baking tray with parchment paper and draw a 7-inch (18cm) circle on it as a guide for your pavlova. This helps you shape it perfectly!
2. Beating the Egg Whites:
In a clean and dry mixing bowl, beat the egg whites using an electric mixer on medium speed. Keep going until soft peaks form. This means when you lift the mixer, the peaks will gently fold over. You’re on your way!
3. Adding Sugar:
Now, gradually add the caster sugar to the egg whites, one tablespoon at a time, while you continue beating on high speed. You want to see a glossy meringue with stiff peaks—it should stand tall when you lift your beater!
4. Folding in Additional Ingredients:
Gently fold in the white vinegar, cornstarch, and vanilla extract using a spatula. This is about being gentle; we don’t want to lose that fluffy goodness!
5. Shaping the Pavlova:
Spoon the meringue onto your prepared parchment paper within the circle. Shape it into a round form, and make a slight well in the center. This well is where all the delicious pumpkin topping will go later!
6. Baking the Pavlova:
Pop the pavlova into the oven and immediately lower the temperature to 250°F (120°C). Allow it to bake for about 1 hour and 15 minutes to 1 hour and 30 minutes. You’ll know it’s ready when the outside is dry and crisp. Turn off the oven and leave the pavlova inside with the door ajar to cool completely—this helps prevent cracking. Patience is key!
7. Making the Pumpkin Cream Topping:
While your pavlova cools, let’s whip up the pumpkin cream. In a bowl, whip the heavy cream and powdered sugar until you see soft peaks. This should be light and fluffy—just like a cloud!
8. Mixing in the Pumpkin:
Now, gently fold in the canned pumpkin puree, ground cinnamon, nutmeg, ginger, and vanilla extract until everything is well combined and smooth. This pumpkin cream will be so tasty!
9. Assembling the Pavlova:
Once your pavlova base is cool, spread the pumpkin cream topping evenly over the center. It’s time to make it look beautiful!
10. Adding the Finishing Touches:
Sprinkle the roasted pumpkin seeds or pepitas on top for a lovely crunch. If you want to fancy it up, feel free to add some chocolate shavings or grated dark chocolate as decoration!
11. Serving:
Serve your Pumpkin Pavlova immediately. When slicing, use a serrated knife to preserve those lovely layers. Each slice is a dreamy mix of crunchy, creamy, and spicy goodness!
Enjoy your delicious, crunchy-on-the-outside, soft-on-the-inside Pumpkin Pavlova with creamy spiced pumpkin topping and a nutty crunch from the pumpkin seeds!
Can I Use Egg Whites from a Carton Instead of Fresh Ones?
Yes! Just make sure to use the equivalent of 4 large egg whites, which is typically about 1/2 cup from a carton. The key is to ensure they are at room temperature to whip properly.
How Do I Prevent My Pavlova from Cracking?
Letting the pavlova cool in the oven with the door slightly ajar helps reduce temperature shock which can lead to cracking. Also, avoid opening the oven door while it’s baking!
How Can I Store Leftover Pavlova?
If you have any leftovers, store the pavlova base in an airtight container at room temperature, but keep the pumpkin topping separate in the fridge. Assemble it just before serving for the best texture!
Can I Make This Recipe Gluten-Free?
Absolutely! This recipe is naturally gluten-free, as it doesn’t contain any flour. Just be sure to use certified gluten-free cornstarch, and you’re good to go!