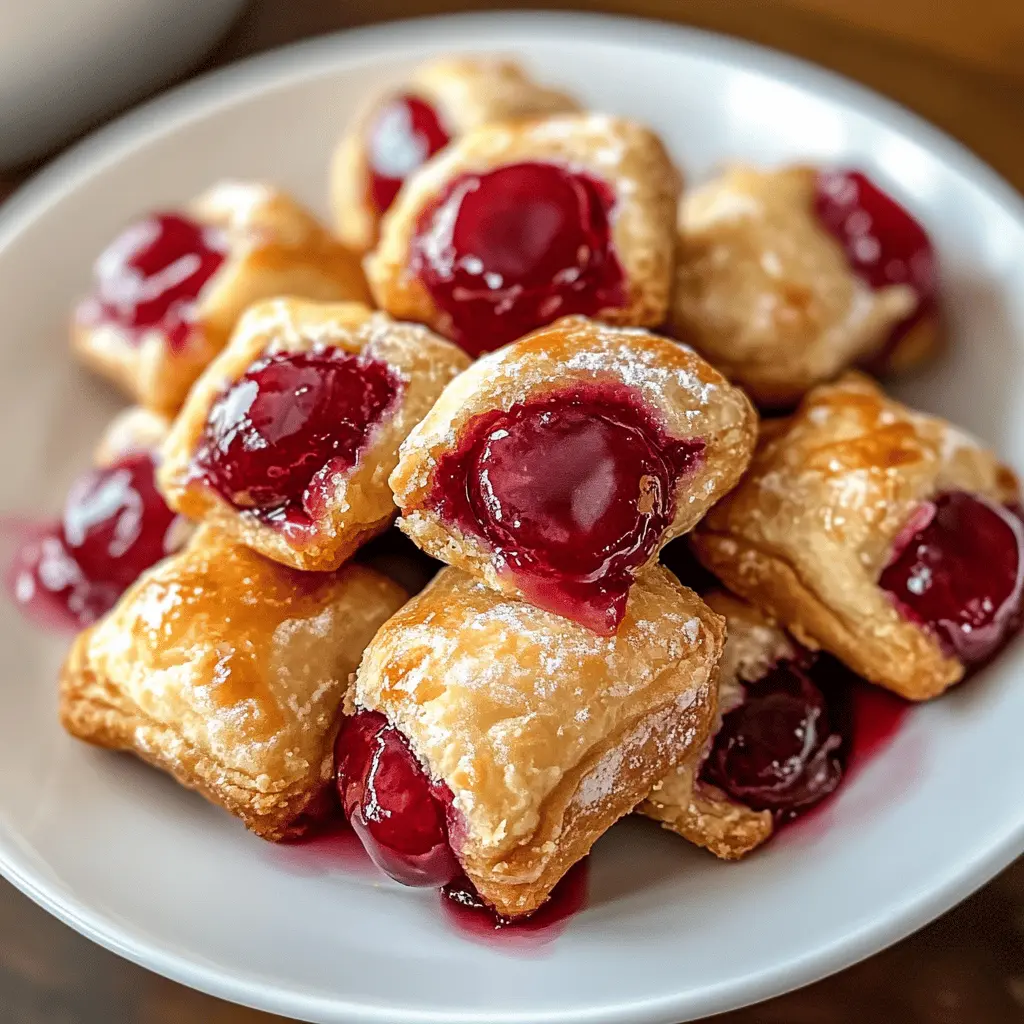
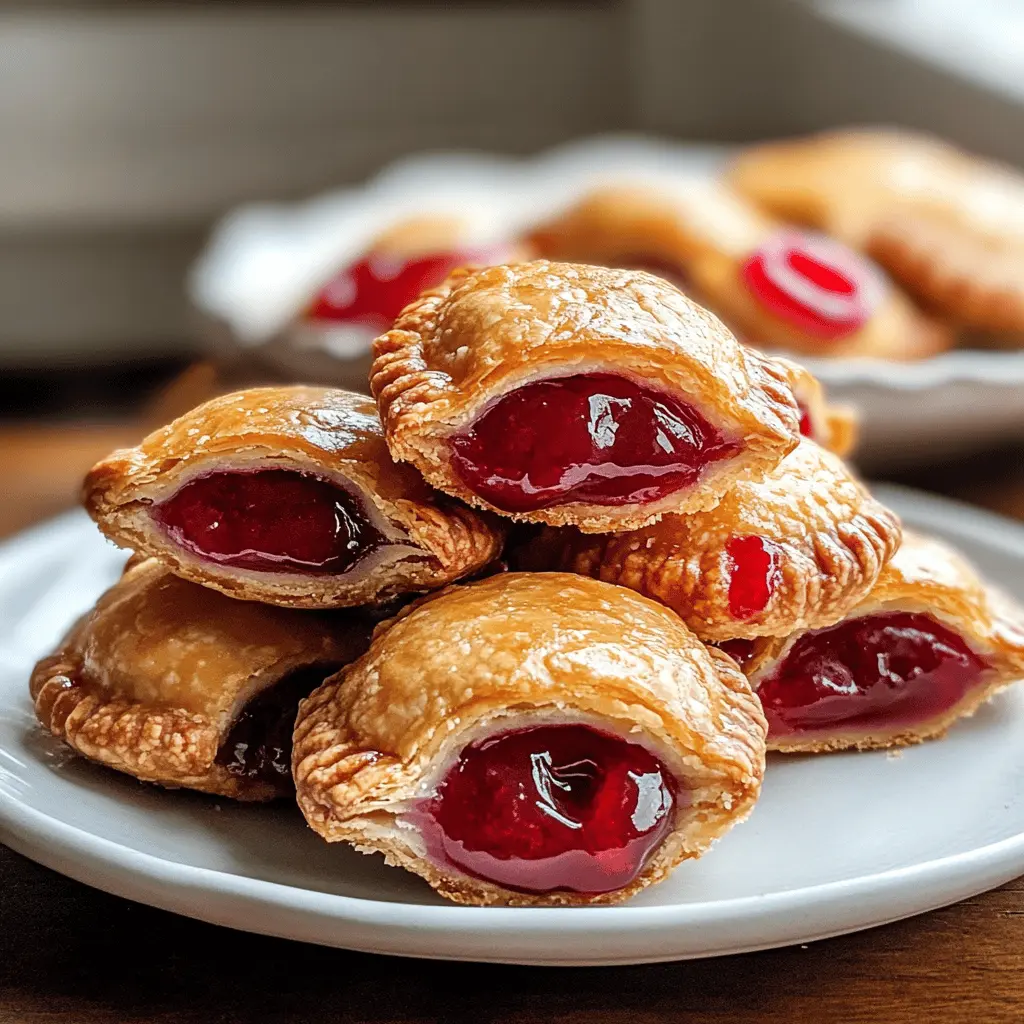
These Easy Cherry Pie Bites are like little treasures of deliciousness! With a flaky crust and sweet cherry filling, they’re perfect for satisfying your sweet tooth.
Making these treats is as fun as eating them! I love that they’re bite-sized, so it’s totally okay to go back for more… or just have a few extra! 🍒
Key Ingredients & Substitutions
Refrigerated Pie Crusts: These are super convenient and save a lot of time! If you’re feeling adventurous, you can make your own pie crust from scratch using flour, butter, and water. Alternatively, you can use puff pastry for a flakier texture.
Cherry Pie Filling: If you don’t have cherry pie filling, you can easily make your own with fresh or frozen cherries, sugar, and a bit of cornstarch for thickening. It’s a great way to customize the flavor and sweetness to your liking.
Egg Wash: This gives your bites a beautiful, shiny golden color. If you prefer a vegan option, you can replace the egg with a mixture of almond milk and a touch of maple syrup or just use milk or plant-based milk on its own.
Powdered Sugar Glaze: While optional, this glaze adds a nice touch! You can leave it off for a lighter dessert or sprinkle the bites with regular granulated sugar instead.
How Do You Seal Cherry Pie Bites Properly?
Sealing the edges is crucial so the filling doesn’t leak out during baking. Here’s how to do it:
- Place the filling right in the center—don’t overfill, or they might burst!
- After folding the dough over the filling, you should pinch the edges together firmly. You can also use a fork to crimp the edges, which creates a nice design and helps seal it tighter.
- Ensure there are no air pockets inside, as these can cause the bites to open while baking.
With these tips, you’ll have perfectly sealed cherry pie bites every time!
How to Make Easy Cherry Pie Bites
Ingredients You’ll Need:
- 1 package (14 oz) refrigerated pie crusts (usually 2 crusts per package)
- 1 can (21 oz) cherry pie filling
- 1 egg, beaten (for egg wash)
- 1 tablespoon water (for egg wash)
- Powdered sugar glaze (optional):
- 1 cup powdered sugar
- 2 tablespoons milk
- 1/2 teaspoon vanilla extract
How Much Time Will You Need?
This delightful treat will take about 15 minutes of preparation time and then 15-18 minutes to bake. All in all, you’re looking at around 30-35 minutes before you can enjoy these sweet bites!
Step-by-Step Instructions:
1. Preheat the Oven:
Start by preheating your oven to 375°F (190°C). While it’s heating up, grab a baking sheet and line it with parchment paper or a silicone baking mat to prevent sticking. You’ll want your kitchen ready for these yummy bites!
2. Prepare the Pie Crusts:
Open the package of refrigerated pie crusts and unroll them on a lightly floured surface. This keeps them from sticking and makes it easier to work with. You’ll need to cut out circles for your bites!
3. Cutting Out Circles:
Use a round cookie cutter, about 2 to 2.5 inches in diameter, to cut out circles from the dough. If you have extra dough from the edges, don’t throw it away! Just re-roll it and keep cutting out more circles.
4. Adding Cherry Filling:
Take about 1 teaspoon of cherry pie filling and place it right in the center of each dough circle. It’s just enough to get that tasty cherry flavor without spilling out!
5. Sealing the Bites:
Now, gently fold the dough over the filling, making a small pocket. Pinch the edges tightly to seal it up, so no filling leaks out while baking. You can make them into half-moon shapes or even round like little balls!
6. Arranging on Baking Sheet:
Place your sealed cherry pie bites on the baking sheet you prepared earlier. Make sure there’s a little space between each one so they can puff up nicely in the oven!
7. Making an Egg Wash:
In a small bowl, whisk together the beaten egg and water to create an egg wash. This helps the bites turn golden brown and gives them a shiny finish. Lightly brush the tops of each bite with the egg wash.
8. Baking:
Pop the baking sheet into your preheated oven and let them bake for 15-18 minutes. Keep an eye on them; you want them to be golden brown and perfectly puffed!
9. Optional Glaze:
While your bites are baking, whisk together the powdered sugar, milk, and vanilla extract in a bowl until smooth to make a delicious glaze. This step is optional, but it adds a sweet finish!
10. Cooling Time:
Once the bites are done baking, take them out and let them cool on the pan for about 10 minutes. This helps them set and cool down just enough for tasting.
11. Glazing or Dusting:
If you’re using the glaze, drizzle it over the cooled bites or just sprinkle some powdered sugar on top for a sweet touch.
12. Serving:
Now, you’re ready to serve these cherry pie bites! Enjoy them warm or at room temperature. They’re perfect for any occasion or just a sweet snack at home!
These tasty treats are sure to be a hit! Happy baking! 🍒
Frequently Asked Questions (FAQ)
Can I Use Fresh Cherries Instead of Canned Cherry Filling?
Absolutely! If you want to use fresh cherries, pit and chop about 2 cups of them. Cook them in a saucepan with 1/4 cup sugar and 1 tablespoon of cornstarch over medium heat until bubbly and thickened. Allow it to cool before using as filling.
How Do I Store Leftover Cherry Pie Bites?
Store any leftovers in an airtight container in the refrigerator for up to 3 days. To keep them fresh, layer parchment paper between bites to prevent sticking. You can reheat them in the oven at 350°F (175°C) for about 5-10 minutes.
Can I Freeze These Cherry Pie Bites?
Yes! You can freeze unbaked cherry pie bites. Just prepare them up to the point of baking, place them on a baking sheet to freeze until firm, then transfer them to a freezer-safe bag. Bake them from frozen at the same temperature, adding a few extra minutes to the baking time.
What Can I Use Instead of Egg Wash?
If you’re looking for a vegan option or simply don’t have eggs on hand, you can brush the tops with almond milk mixed with a bit of maple syrup for a nice golden finish. Alternatively, just a splash of milk will work too!