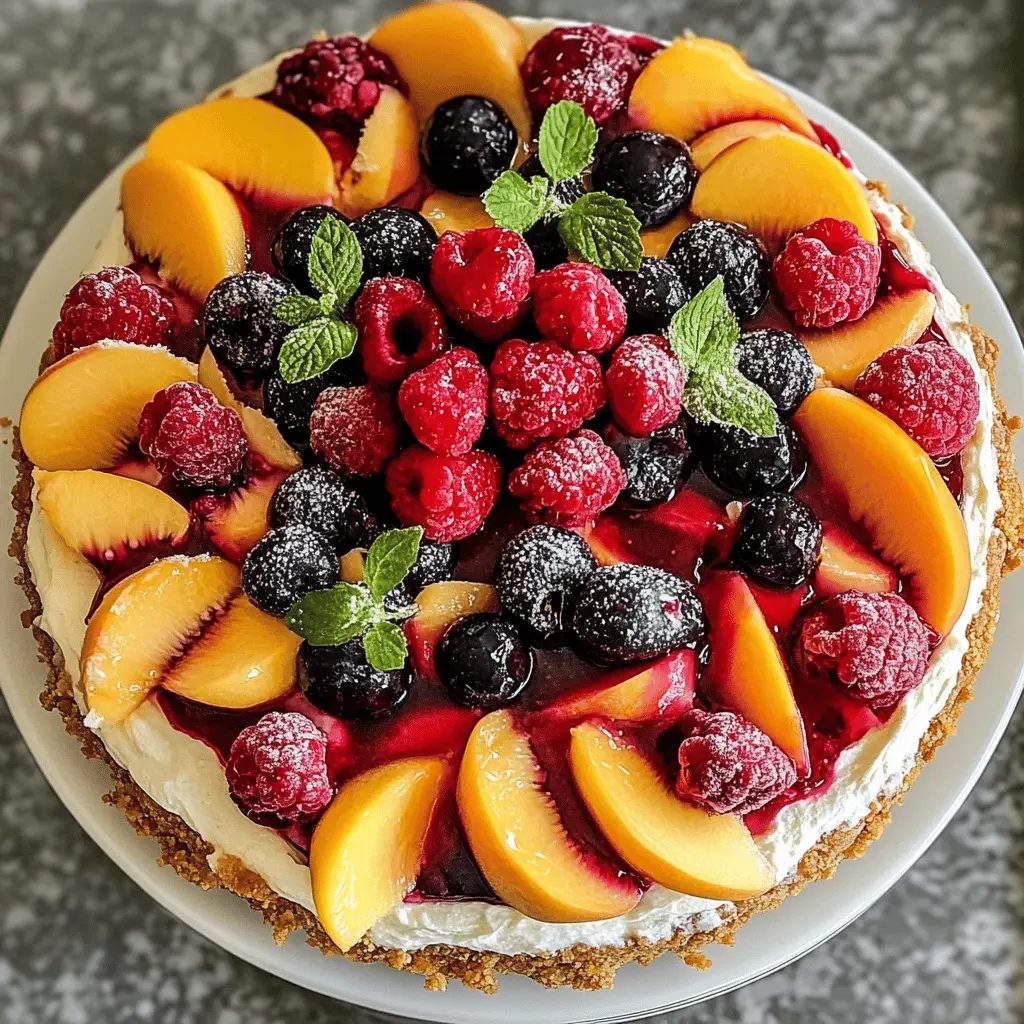
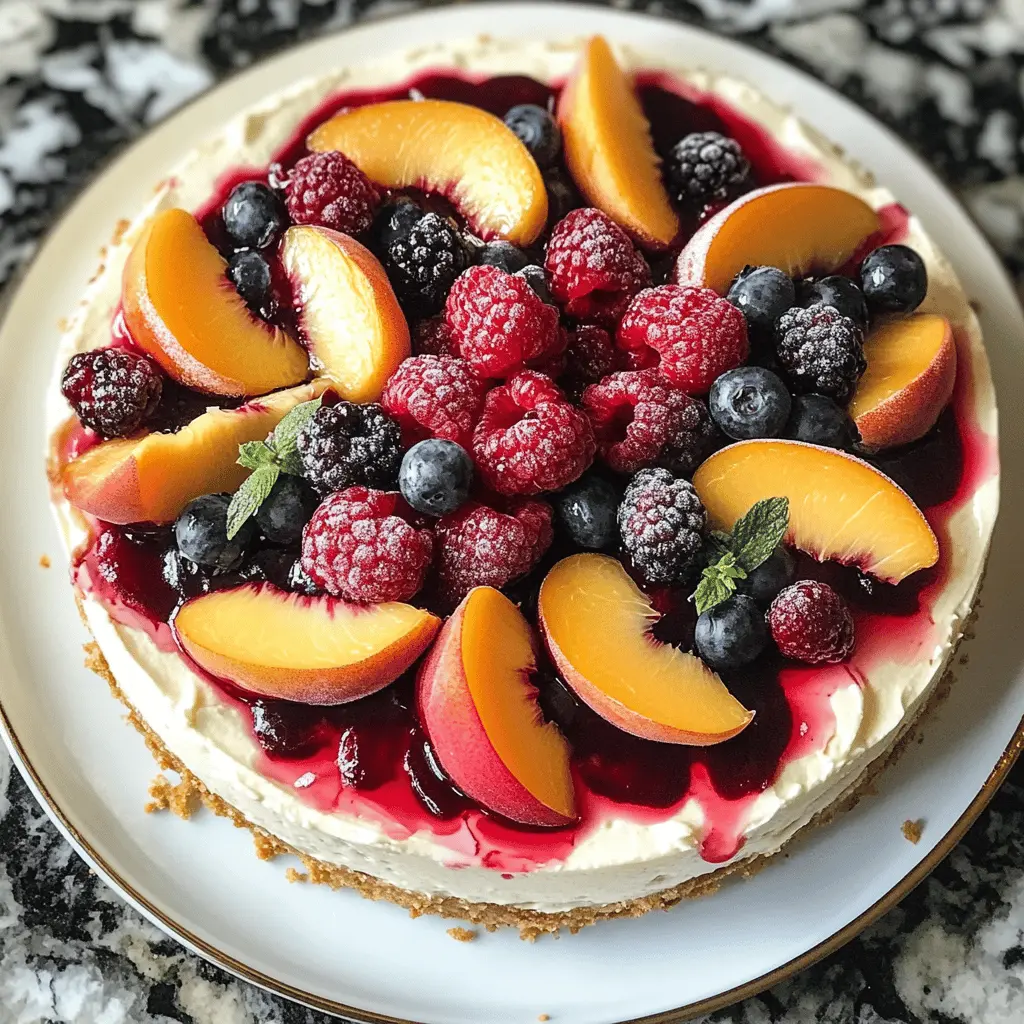
This Summer Berry and Peach Cheesecake is a fruity delight! With fresh berries and juicy peaches, it’s a treat you won’t want to miss. The creamy filling balances perfectly with the fruity toppings.
Every bite feels like a summer picnic on your plate! I love serving it chilled during hot days—it’s refreshing and looks so colorful. Who can resist that? 🍑🍓
Key Ingredients & Substitutions
Graham cracker crumbs: This forms the delightful base of your cheesecake. If you don’t have graham crackers, you can use digestive biscuits or even crushed cookies. Keep in mind, the flavor might change slightly.
Cream cheese: The star of the filling! Full-fat cream cheese gives the best texture. If you’re looking for a lighter option, Neufchâtel is a good substitute. It’s lower in fat but still creamy.
Heavy whipping cream: This helps create a fluffy filling. If you want a non-dairy option, try coconut cream, but keep in mind it may add a coconut flavor to your cheesecake.
Fruit topping: Raspberries, blackberries, and peaches add such a fresh touch. If they’re out of season, you could use frozen fruits, just make sure to thaw and drain any excess liquid first!
Whipped cream: This is perfect for decorating! You could use store-bought whipped topping for convenience or heavy cream whipped at home for a fresher taste. Sweetened coconut whipped cream is a fun vegan alternative.
How Do I Get the Cheesecake Filling to be Smooth and Creamy?
A smooth filling comes from proper mixing and folding. Here’s how to do it:
- Start with room temperature cream cheese to avoid lumps. Beat until creamy before adding other ingredients.
- Beat the powdered sugar in gradually to ensure it’s well combined, without clumps.
- When folding in whipped cream, do it gently. Use a spatula and make a lifting motion to keep air in the mixture.
This technique helps keep your cheesecake light and fluffy, giving it that perfect creamy texture!
How to Make Summer Berry and Peach Cheesecake
Ingredients You’ll Need:
For the Crust:
- 1 1/2 cups graham cracker crumbs
- 1/2 cup unsalted butter, melted
- 1/4 cup sugar
For the Cheesecake Filling:
- 16 oz cream cheese, softened
- 1 cup powdered sugar
- 1 cup heavy whipping cream
- 1 tsp vanilla extract
For the Fruit Topping:
- 1 cup fresh raspberries
- 1 cup fresh blackberries
- 1 cup fresh peach slices
- 1/4 cup fruit syrup or berry sauce (store-bought or homemade)
For Decoration:
- Whipped cream (for piping)
- Toasted almond slivers (optional)
How Much Time Will You Need?
This delightful cheesecake will take about 30 minutes of prep time and at least 4 hours to set in the refrigerator. So, plan to make it at least half a day ahead or even the night before your celebration!
Step-by-Step Instructions:
1. Preparing the Crust:
In a medium bowl, mix together the graham cracker crumbs, melted butter, and sugar until everything is well combined. Press this mixture firmly into the bottom of a 9-inch springform pan, making sure it’s even. Set it aside so it can be ready for the filling!
2. Making the Cheesecake Filling:
In a large mixing bowl, beat the softened cream cheese together with the powdered sugar and vanilla extract until it’s creamy and smooth. In another bowl, whip the heavy cream until you get soft peaks. Now, gently fold this whipped cream into the cream cheese mixture until everything is combined nicely. This will make your filling light and fluffy!
3. Combining the Fruits:
Take half of the fresh raspberries and blackberries and gently fold them into the cheesecake filling. This adds delicious fruity flavor right into the filling.
4. Assembling the Cheesecake:
Pour your lovely cheesecake mixture over the prepared crust in the springform pan. Spread it evenly and smooth the top with a spatula. Now, it’s time to let it chill in the refrigerator for at least 4 hours, or until it’s set nicely.
5. Adding the Topping:
After your cheesecake has set, it’s topping time! Decorate the top with the remaining raspberries, blackberries, and peach slices. For a sweet finish, drizzle it with your favorite fruit syrup or berry sauce.
6. Decorating:
Now for the fun part! Use whipped cream to pipe around the edges of the cheesecake. If you like, sprinkle some toasted almond slivers on top for a little crunch and extra flavor.
7. Serving:
Carefully remove your beautiful cheesecake from the springform pan and slice it into pieces. Now, gather your friends or family and enjoy this refreshing summer berry and peach cheesecake—it’s sure to be a hit!
Can I Use Different Types of Crust for This Cheesecake?
Absolutely! You can substitute graham cracker crumbs with Oreo cookie crumbs, digestive biscuits, or even crushed nuts for a gluten-free option. Just ensure that if you’re using nuts, you add a bit of butter to help them bind together.
How to Make This Cheesecake Gluten-Free?
To make the cheesecake gluten-free, use gluten-free graham cracker crumbs or a gluten-free cookie alternative for the crust. Additionally, make sure your heavy cream and other ingredients do not contain gluten. Always check the labels!
Can I Use Frozen Fruits Instead of Fresh?
Yes, you can! Just make sure to thaw and drain the frozen fruits thoroughly before adding them to the cheesecake. This prevents excess moisture, which can affect the texture of your filling. Frozen fruits may also work well in sauces if blended to a smooth consistency.
How Long Can I Store Leftover Cheesecake?
Leftover cheesecake can be stored in an airtight container in the fridge for up to 5 days. If you want to keep it longer, you can freeze individual slices wrapped tightly in plastic wrap and placed in a freezer-safe container for up to 2 months. Thaw in the fridge before serving!