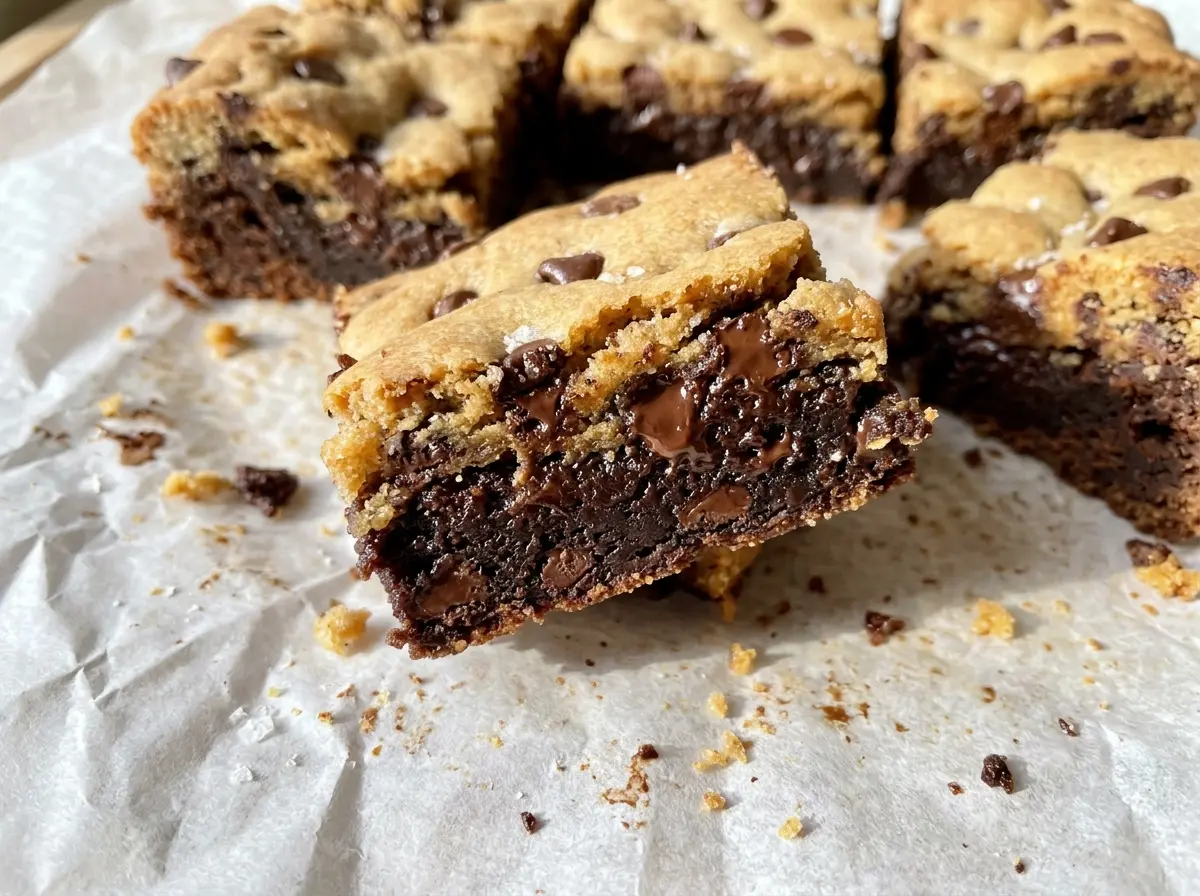
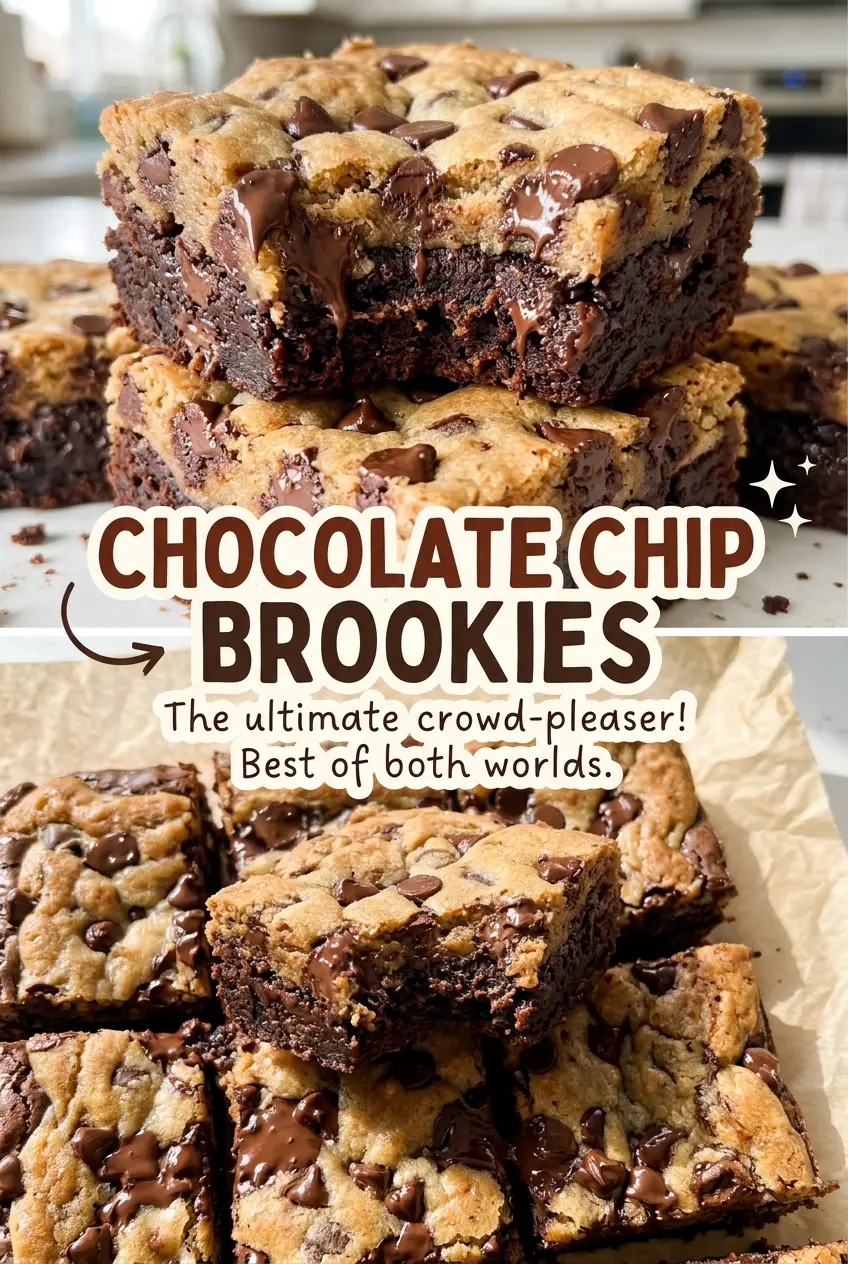
When the pan comes out, the cookie mounds are golden while the brownie underneath still looks soft. That contrast is exactly what I want from Chocolate Chip Brookies. I used to think the cookie dough should cover every inch, but leaving a few small windows of brownie gives you two clear textures instead of one thick cookie cap. The first slice shows a fudgy base with a tender chocolate chip cookie top.
These two batters need different handling, even though they bake together. The brownie butter is melted, while the cookie butter stays softened so that dough holds its shape when you drop it over the brownie. I keep the brownie batter simple and fold in the dry ingredients only until the streaks disappear; a heavy hand can make that layer tough. Once the cookie portions turn golden and the brownie gives a few moist crumbs on a toothpick, the pan is ready to cool into neat, generous squares.
Kitchen Note
Give the pan the full cooling time before you lift it out. The brownie layer is soft while warm, and cutting too soon can smear the layers instead of giving you clean squares.
Save these Chocolate Chip Brookies for a bake when you want fudgy brownies and golden chocolate chip cookies in the same square.
Why the Cookie Dough Should Sit in Mounds, Not Form a Solid Lid
Brownie batter and cookie dough don’t bake at the same pace. The cookie dough has flour, baking soda, and chocolate chips, so its portions need time to turn golden and set. Underneath, the brownie layer stays moist. If you spread the cookie dough into an unbroken sheet, it covers the brownie and makes it harder to judge whether both layers have baked properly.
Leaving a few small gaps gives the brownie batter room to show through, and it also gives you a useful visual cue: the cookie portions brown on top while the brownie portion tells you when the center is ready. Test a brownie area with a toothpick rather than poking through a chocolate chip. A few moist crumbs are what you’re looking for; a completely clean toothpick can mean the brownie has gone past its soft center.
The toppings don’t need to be identical in size, but keeping them as separate spoonfuls helps each portion bake evenly. Gently flattening each mound gives the cookie layer a little more contact with the brownie without pressing it into the batter. You’ll get a mix of brownie-forward and cookie-forward bites across the pan.
What the Two Batters Need from Their Ingredients
- Unsalted butter — The brownie layer uses melted butter for a dense, rich base, while softened butter helps the cookie dough hold its shape. Regular grocery-store butter works well here; keep the two butter textures distinct rather than melting both portions.
- Granulated and brown sugars — Granulated sugar sweetens both batters, while packed light brown sugar brings moisture and a gentle molasses note to the cookie layer. If you only have dark brown sugar, it can stand in for light brown sugar and will make the cookie portion taste a little deeper.
- Unsweetened cocoa powder — This gives the brownie layer its chocolate flavor without adding extra sweetness. A fresh, unsweetened cocoa powder is useful, but an inexpensive grocery-store option works; avoid sweetened cocoa mix, which changes both the sweetness and the dry-ingredient balance.
- All-purpose flour — Flour gives the brownie layer enough structure to slice and gives the cookie topping its shape. For a gluten-free version, use a cup-for-cup gluten-free baking flour blend for both flour portions; almond flour isn’t a direct replacement in these batters.
- Eggs — The eggs bind the brownie batter and help the cookie dough hold together. Use large eggs, as listed, so the moisture balance stays consistent in both layers.
- Semisweet chocolate chips — Semisweet chips add pockets of chocolate without making the cookie layer overly sweet. If you’re out, chopped semisweet baking chocolate works in the same volume, though it melts into broader pockets than chips.
Build Each Layer Separately, Then Bake to Two Different Cues
Whisk a Smooth Brownie Base
Heat the oven to 350°F, lightly coat a 9×13-inch baking pan with nonstick cooking spray, and line it with parchment, leaving an overhang on two sides. Whisk the melted butter and sugar together in a large bowl, then whisk in the eggs one at a time and the vanilla until smooth. Fold in the flour, cocoa powder, and salt just until no dry streaks remain. Stop there; working the flour more than needed can make the brownie layer firm instead of tender.
Mix the Cookie Dough Until Creamy
In a medium bowl, beat the softened butter with the brown sugar and granulated sugar for 1 to 2 minutes, until creamy. Beat in the egg and vanilla until combined. Stir in the flour, baking soda, and salt, then fold in the chocolate chips. The dough should be thick enough to sit in spoonfuls; if the butter was melted rather than softened, it may spread more readily over the brownie batter.
Layer the Batters Without Pressing Them Together
Spread the brownie batter evenly in the prepared pan. Drop spoonfuls of cookie dough over the surface, leaving a few small gaps between them, and gently flatten each spoonful. Don’t stir or swirl the two batters together; keeping them distinct is what gives each square its brownie-and-cookie layers. The cookie portions can vary a little in size, so aim for an even distribution across the pan.
Watch for Golden Cookie Tops and Moist Brownie Crumbs
Bake for 38 to 45 minutes. The cookie portions should be golden, and a toothpick inserted into a brownie portion should come out with a few moist crumbs. If the toothpick has wet batter on it, give the pan more time and check again; if it comes out completely clean, the brownie layer may be less fudgy. Set the pan aside to cool completely, about 2 hours, then use the parchment overhang to lift it out and cut it into squares.
Three Easy Ways to Change the Brookies
Make the Cookie Layer Gluten-Free
Replace both portions of all-purpose flour with the same amounts of a cup-for-cup gluten-free baking flour blend. Choose a blend formulated for baking rather than almond flour; the cookie layer may be a little more tender and less chewy.
Use Dark Brown Sugar for a Deeper Cookie
Swap the light brown sugar in the cookie layer for packed dark brown sugar in the same amount. Its stronger molasses flavor makes the cookie portion taste richer and slightly less bright against the cocoa brownie.
Give the Top a Bittersweet Edge
Use bittersweet chocolate chips instead of semisweet in the cookie dough. The chocolate flavor will taste more intense and the top a little less sweet, which suits anyone who likes a darker chocolate bite.
Storage and Reheating
- Refrigerator: Store the cut squares in an airtight container for up to 5 days. Chilling firms the brownie and makes the cookie layer less soft.
- Freezer: Freeze the squares in a single layer until firm, then transfer them to a sealed freezer-safe container for up to 2 months. Thaw at room temperature before serving.
- Reheating: Warm an individual square in the microwave for about 8 to 10 seconds. Longer heating can make the cookie portion tough and the chocolate too hot.
Questions That Come Up When Baking Brookies
Chocolate Chip Brookies
Ingredients
Equipment
Method
- Heat the oven to 350°F.
- Lightly coat a 9x13-inch baking pan with nonstick cooking spray.
- Line the pan with parchment paper, leaving an overhang on two sides.
- Whisk the melted butter and sugar together in a large bowl.
- Whisk in the eggs one at a time, then whisk in the vanilla until smooth.
- Fold in the flour, cocoa powder, and salt just until no dry streaks remain.
- Beat the softened butter, brown sugar, and granulated sugar in a medium bowl until creamy, about 1 to 2 minutes.
- Beat in the egg and vanilla until combined.
- Stir in the flour, baking soda, and salt.
- Fold in the chocolate chips.
- Spread the brownie batter evenly in the prepared pan.
- Drop spoonfuls of cookie dough over the top, spacing them to leave a few small gaps.
- Gently flatten each spoonful.
- Bake for 38 to 45 minutes, until the cookie portions are golden and a toothpick inserted into a brownie portion comes out with a few moist crumbs.
- Cool completely in the pan, about 2 hours.
- Lift out using the parchment and cut into squares.