Garlic butter bread rolls come out soft, pillowy, and rich enough to disappear from the pan before they ever make it to the table. The tops bake up with a light golden crust, then the hot garlic butter sinks into every ridge and seam, so each roll tastes seasoned all the way through instead of just glossy on the outside.
What makes this version work is the balance of a lightly enriched dough and a generous finish. The milk, butter, and egg keep the crumb tender, while the kneading time builds enough structure for the rolls to rise tall instead of spreading flat. Brushing the garlic butter on while the rolls are still hot matters too, because that’s what gives you flavor in the bread, not just on top of it.
Below, I’ve included the one timing detail that keeps the texture soft, plus the simplest way to get the garlic butter to soak in without making the tops greasy. If you’ve ever wanted rolls that pull apart in fluffy layers with a little salty crunch at the finish, this is the one to keep around.
The rolls turned out unbelievably fluffy, and brushing the garlic butter on right after baking made the tops soak it up without getting soggy. My kids ate three each before dinner was even served.
Soft garlic butter bread rolls with a golden top are the kind of side dish worth pinning for pasta nights and holiday dinners.
The Trick That Keeps Garlic Butter Rolls Soft Instead of Dry
The most common mistake with bread rolls is baking them until they look deeply browned all over. That gives you a tough top and a drier crumb than you wanted. Pull these when they’re golden and the center rolls are just set; they’ll finish cooking from the heat of the pan and stay tender.
The other place people go wrong is adding too much flour during kneading. The dough should feel soft and slightly tacky, not stiff like modeling clay. If it turns dry early, the rolls bake up tighter and don’t tear apart with that fluffy pull you want.
- Instant yeast — This moves quickly and skips the bloom step regular active dry yeast often needs. If you only have active dry yeast, give it a few extra minutes in the warm milk until it looks foamy before adding the rest of the ingredients.
- Warm milk — The milk should feel warm, not hot. Around 110°F is the sweet spot; too much heat can slow or kill the yeast, and too little won’t wake it up properly.
- Butter in two stages — The butter in the dough makes the crumb rich and soft, while the butter on top carries the garlic and parsley into the crust. Melted butter works best here because it spreads fast and soaks in instead of sitting in clumps.
- Flaky sea salt — This isn’t decorative. The little crunch on top cuts through the richness and makes the garlic butter taste brighter.
What Each Ingredient Is Actually Doing in These Rolls

- Warm milk — It feeds the yeast gently and gives the dough a softer, richer crumb than water would. If you’re out of milk, plain water works, but the rolls won’t taste as plush.
- Instant yeast — This is what gives you a reliable rise in a short window. It’s forgiving as long as the milk isn’t too hot and the dough gets enough time to double.
- Sugar — The sugar isn’t making the rolls sweet; it gives the yeast a quick head start and helps the tops color in the oven. Reducing it too much will slow the rise and leave the rolls paler.
- Egg — The egg adds structure and tenderness at the same time. It helps the dough rise into soft pillows instead of bready little pucks.
- Butter — Use real butter here. Margarine won’t give the same flavor or finish, and the dough loses some of its richness without it.
- Parsley and garlic — Fresh garlic gives the topping its sharp, savory bite, and parsley keeps it from tasting heavy. Dried parsley won’t give you the same fresh finish, though it works in a pinch.
Building the Dough and Finishing the Tops at the Right Time
Waking Up the Yeast
Start with warm milk, yeast, and sugar, then let it sit until the surface looks foamy. That foam tells you the yeast is active and ready to work. If nothing happens after five minutes, the milk was probably too hot or the yeast is old, and the dough won’t rise well later.
Kneading Until the Dough Turns Smooth
Add the egg, melted butter, salt, and flour, then knead until the dough feels elastic and supple, about 6 to 8 minutes. It should clear the sides of the bowl and still feel soft to the touch. If it stays sticky, add flour a spoonful at a time; too much too fast is what makes rolls dense.
Letting the Rise Do Its Job
Let the dough rise until it doubles in size, then shape it into 12 even balls and nestle them into a greased 9×13-inch pan. During the second rise, they should look puffy and touch each other lightly. If they’re underproofed, the rolls spring up unevenly and split instead of baking into a soft pull-apart pan.
Baking Until Just Golden
Bake at 375°F until the tops are golden brown and the rolls look set in the center, about 18 to 20 minutes. Don’t wait for a deep brown color; that’s where the crust starts drying out. As soon as they come out, brush on the garlic butter while the surface is still hot enough to absorb it.
The Garlic Butter Finish
Stir the melted butter with the garlic and parsley, then brush it over every roll and finish with flaky sea salt. The hot bread pulls the butter into the cracks, which is what gives you that full garlic-bread flavor in every bite. If you add the butter too early, it can slide off instead of sinking in.
How to Adapt These Rolls Without Losing the Soft Pull-Apart Texture
Dairy-Free Rolls
Use unsweetened plant milk and a dairy-free butter substitute with a similar fat content. The rolls will still rise well, but the flavor will be a little less rich, so the garlic topping matters even more.
Gluten-Free Version
Use a 1:1 gluten-free flour blend that includes xanthan gum, and expect a softer, less stretchy dough. You’ll likely need to stop kneading earlier and rely on the pan shape to help the rolls hold together.
Extra-Garlic Herb Rolls
Add a pinch of garlic powder to the dough and swap part of the parsley for chives or rosemary in the topping. The flavor gets stronger and more savory, but keep the fresh garlic in the butter for the best finish.
Storage and Reheating
- Refrigerator: Store in an airtight container for up to 3 days. They’ll lose a little of that just-baked softness, but they come back well with gentle reheating.
- Freezer: Freeze baked rolls tightly wrapped for up to 2 months. Thaw at room temperature before reheating so the centers warm evenly instead of drying out.
- Reheating: Warm in a 300°F oven for 8 to 10 minutes, covered loosely with foil if the tops are already dark enough. The biggest mistake is microwaving too long, which makes the bread rubbery instead of soft.
Answers to the Questions Worth Asking
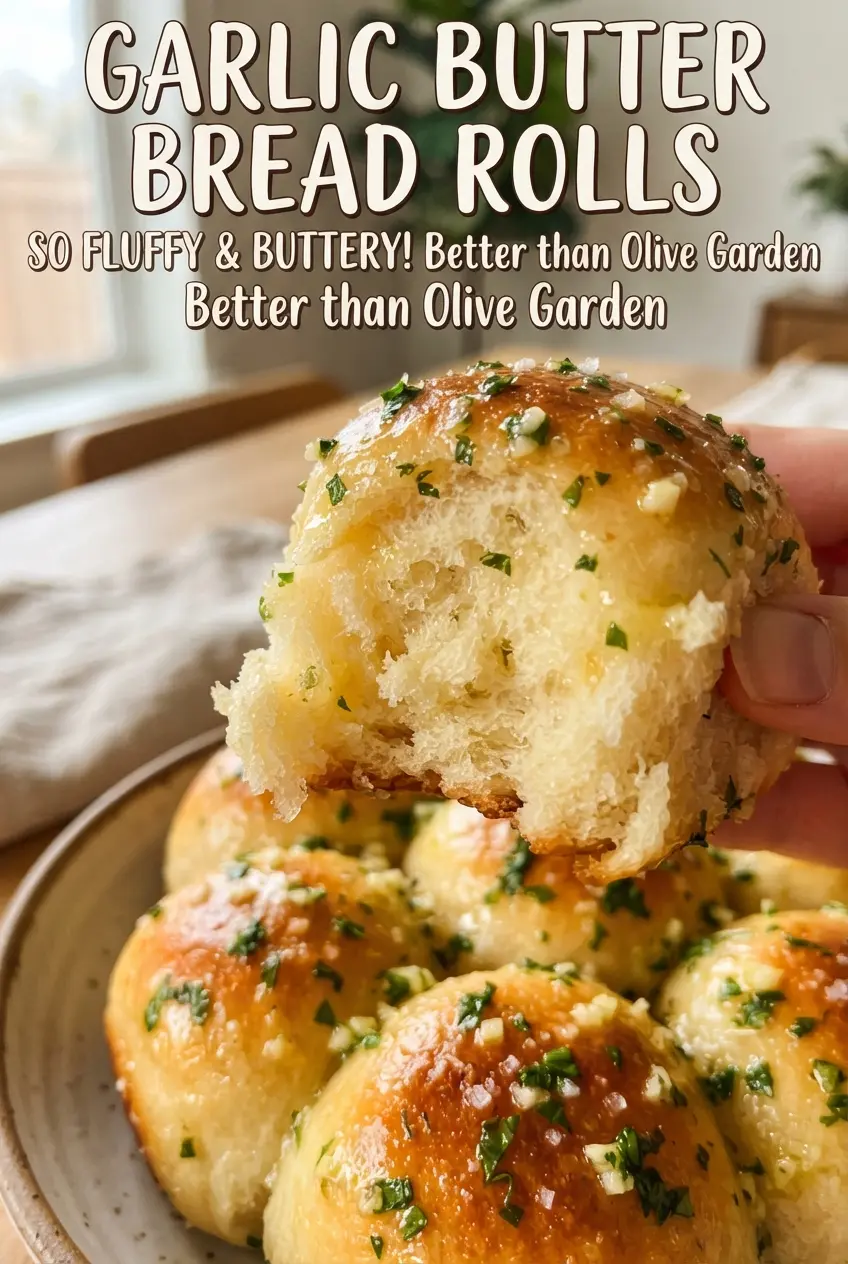
Garlic Butter Bread Rolls
Ingredients
Equipment
Method
- Whisk warm milk (110F), instant yeast, and sugar, then let sit 5 minutes until foamy.
- Mix in the egg, melted butter, salt, and flour until a shaggy dough forms.
- Knead the dough 6-8 minutes until smooth and elastic.
- Cover and let rise 1 hour until doubled.
- Divide the dough into 12 balls and place in a greased 9x13-inch pan.
- Cover and let rise 30 minutes until puffy.
- Preheat the oven to 375F and bake 18-20 minutes until golden brown.
- Stir the melted butter with the minced garlic and chopped parsley, then brush generously over the hot rolls.
- Sprinkle with flaky sea salt and serve warm.