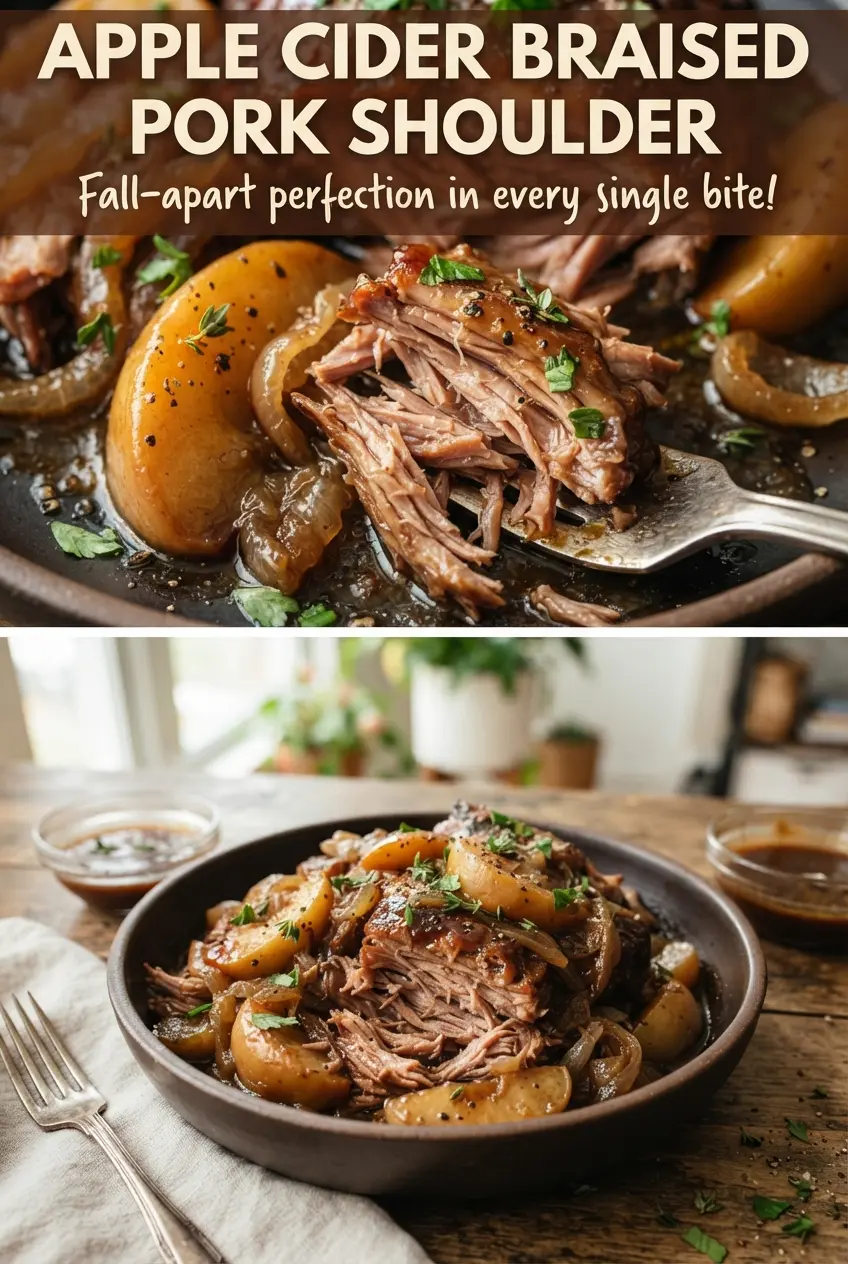
Apple cider braised pork shoulder turns a tough cut into spoon-tender meat with a glossy pan sauce that tastes like it cooked all day, because it did. The pork goes in with a hard sear first, so you get a deep savory crust before the cider, broth, and mustard soften everything into something rich and balanced. By the time the apples go in near the end, they’re soft but still holding their shape, which keeps the dish from turning muddy.
The details matter here. Browning the pork gives the braise depth. Scraping up the browned bits after adding the liquid keeps the sauce from tasting flat. And cutting the pork into two large pieces helps it cook evenly without drying out on the edges before the center turns tender. The apple cider brings gentle sweetness, but the Dijon and vinegar keep it from leaning cloying.
Below, I’ve included the exact moment to add the apples, the swap I’d use if your cider is very sweet, and what to do if the sauce needs a little more body at the end.
The pork shredded into big juicy pieces, and the sauce reduced into this glossy cider gravy that clung to every bite. I added a splash more broth at the end and it was perfect over mashed potatoes.
Save this apple cider braised pork shoulder for a cozy braise with tender pork, soft apples, and a rich cider pan sauce.
The Sear Is What Keeps This Braise from Tasting Flat
Most braised pork gets its tenderness right but loses depth because the meat never gets properly browned before the liquid goes in. That first sear is where the flavor starts. You want a dark, even crust on the outside of the pork shoulder, not pale patches and not a wet pan. If the meat is crowded or the heat is too low, it will steam instead of sear and the finished sauce will taste one-note.
The other place people lose flavor is in the pan itself. Those browned bits left behind after searing are the backbone of the sauce, and they need to be loosened with the cider and broth before anything else happens. That’s what gives the braising liquid its savory base and keeps the apples from carrying the whole dish on their own.
- Pork shoulder — This cut is built for long braising. It has enough fat and connective tissue to turn tender instead of stringy. A lean cut won’t give you the same result.
- Apple cider — Use real cider, not apple cider vinegar and not apple juice if you can avoid it. Cider gives you a round apple flavor without making the sauce sharp or syrupy. If your cider is very sweet, add the full amount of vinegar.
- Dijon mustard — It doesn’t make the sauce taste like mustard. It sharpens the cider and helps the braising liquid taste finished instead of sugary.
- Apples — Choose firm apples that hold their shape, like Honeycrisp, Braeburn, or Fuji. Softer apples can dissolve before the pork is done.
What Each Ingredient Is Actually Doing in This Recipe

- Primary ingredient (the star) — Quality matters most. Choose the best you can find.
- Cooking medium (oil, butter, or broth) — This carries flavors and prevents dryness.
- Seasonings (salt, pepper, spices, herbs) — Layer flavors so nothing overpowers. Build depth gradually.
- Aromatics (garlic, onion, herbs) — Cook with fat to bloom flavors. Become the foundation.
- Supporting ingredients — Complement the main ingredient without overpowering it.
- Sauce or liquid (if applicable) — Brings flavors together. Balance richness with acid.
- Acid (lemon, vinegar, wine, or other) — Brightens and prevents flat-tasting results.
- Final finish (garnish, glaze, or sauce) — Prevents one-dimensional taste and adds visual appeal.
Building the Braise So the Sauce Stays Balanced
Season and Sear the Pork First
Pat the pork dry before it ever hits the pot, then season it well with salt, pepper, and paprika. Lay it into hot oil and leave it alone until the first side releases naturally and shows a deep brown crust, then turn it and do the same on the second side. If the pan looks crowded, sear in batches; crowded pork throws off moisture and gives you a gray surface instead of a browned one.
Cook Down the Onions and Garlic
Once the pork is out, the sliced onion goes into the same pot and picks up the flavor left behind in the fat. Cook it until it starts to soften and turn translucent, then add the garlic just long enough to smell fragrant. If the garlic browns too much, the sauce can turn bitter, so keep it moving and don’t walk away.
Pour, Scrape, and Return the Pork
Stir in the cider, broth, vinegar, Dijon, and brown sugar while scraping every browned bit from the bottom of the pot. That’s where the flavor lives. Return the pork and tuck in the thyme and rosemary so the liquid comes partway up the meat, then cover and braise at low heat until the pork is almost falling apart. The oven should stay at a gentle bubble, not a hard simmer.
Add the Apples at the End
Apples go in for the last stretch so they soften without disappearing. When the pork is fork-tender, add the wedges and let them braise until they’re tender and fragrant but still intact. If you add them from the start, they’ll melt into the sauce and you’ll lose the contrast that makes this dish work.
Reduce the Sauce Before Serving
Shred the pork into large pieces, then pull it out while you reduce the braising liquid on the stove. A few minutes of simmering concentrates the cider and turns the liquid into a sauce that coats the meat instead of pooling under it. If the sauce tastes too sweet at this stage, a small splash of vinegar fixes it faster than extra salt.
How to Adapt This Braise Without Losing the Point of It
Dairy-Free and Naturally Gluten-Free
This recipe already fits both without any changes as long as your broth and Dijon are gluten-free. That’s one reason it works so well for a crowd: the richness comes from the pork and the reduction, not from cream, butter, or flour.
Using Apple Juice Instead of Cider
Apple juice will work in a pinch, but it tastes sweeter and less complex than cider. If that’s what you have, keep the vinegar and Dijon in place, and don’t skip the sauce reduction or it can finish a little flat. I’d also lean toward a tart apple if you’re making that swap.
Making It Ahead for Better Flavor
This braise actually improves after a night in the fridge. The pork absorbs more of the cider sauce, and the fat is easier to lift off the top before reheating. If you’re serving it later, braise it fully, cool it, then reheat gently and add the apples fresh or during the final rewarm so they don’t break down.
What to Do If the Sauce Runs Thin
Keep the pork out while you simmer the liquid uncovered until it lightly coats a spoon. Braising liquids need time to reduce; cornstarch isn’t necessary here and can blur the clean cider flavor. If the sauce still seems loose, it usually needs another 5 to 10 minutes more than another thickener.
Storage and Reheating
- Refrigerator: Store in an airtight container for up to 4 days. The sauce thickens as it chills, and the pork gets even more flavorful.
- Freezer: This freezes well for up to 3 months. Freeze the pork with plenty of sauce so it stays moist when thawed.
- Reheating: Reheat slowly on the stovetop over low heat with a splash of broth or cider if needed. High heat dries out braised pork and can make the sauce taste sharp instead of rounded.
Questions I Get Asked About This Recipe
Apple Cider Braised Pork Shoulder
Ingredients
Equipment
Method
- Preheat the oven to 325°F. Season the pork with salt, black pepper, and smoked paprika.
- Heat olive oil in a Dutch oven until hot, then sear pork for 4-5 minutes per side until well browned. Remove the pork to a plate.
- Add onion to the Dutch oven and cook for 5 minutes. Add garlic and cook for 1 minute, stirring until fragrant.
- Pour in apple cider, chicken broth, apple cider vinegar, Dijon mustard, and brown sugar, scraping up the browned bits. Bring the mixture to a gentle simmer.
- Nestle pork back into the liquid and add fresh thyme and fresh rosemary. Cover and braise in the oven for 2 1/2 hours, until the pork is starting to get very tender.
- Add apples to the Dutch oven and continue braising, covered, for 45 minutes more. Cook until the pork is fork-tender and the apples are soft.
- Shred the pork into large pieces. Simmer the liquid on the stove for 10 minutes to reduce, until glossy and slightly thickened.
- Serve the pork with the reduced sauce and apples. Spoon generously so each portion gets pork, apples, and onions.